Last week began with two more days of dessert production and plating practice, we made four different desserts and practiced a mock-service again. We even received some different orders, as we would in real restaurants, like, no nuts, gluten free, or just a milkshake please, or a chef’s dessert selection – off the menu. This was a bit of a curve ball for some, forcing us all to really think fast and know your menu. But as fun as dessert plating is, the real highlight for me last week as our celebration cakes.
The balance of the week was ALL ABOUT CAKE. A massive cake project, where, for many of us, it was our first experience with stacking cake tiers. It was an awesome week.
This is my cake that I made with my station partner. The rest of this post I’ll show you, through photos, how this cake came to be over the three days.

One more look at our finished cake. It didn’t stay like this for long, we had to break it apart and then cut it open. Such is the life of a cake – short-lived… *smile*
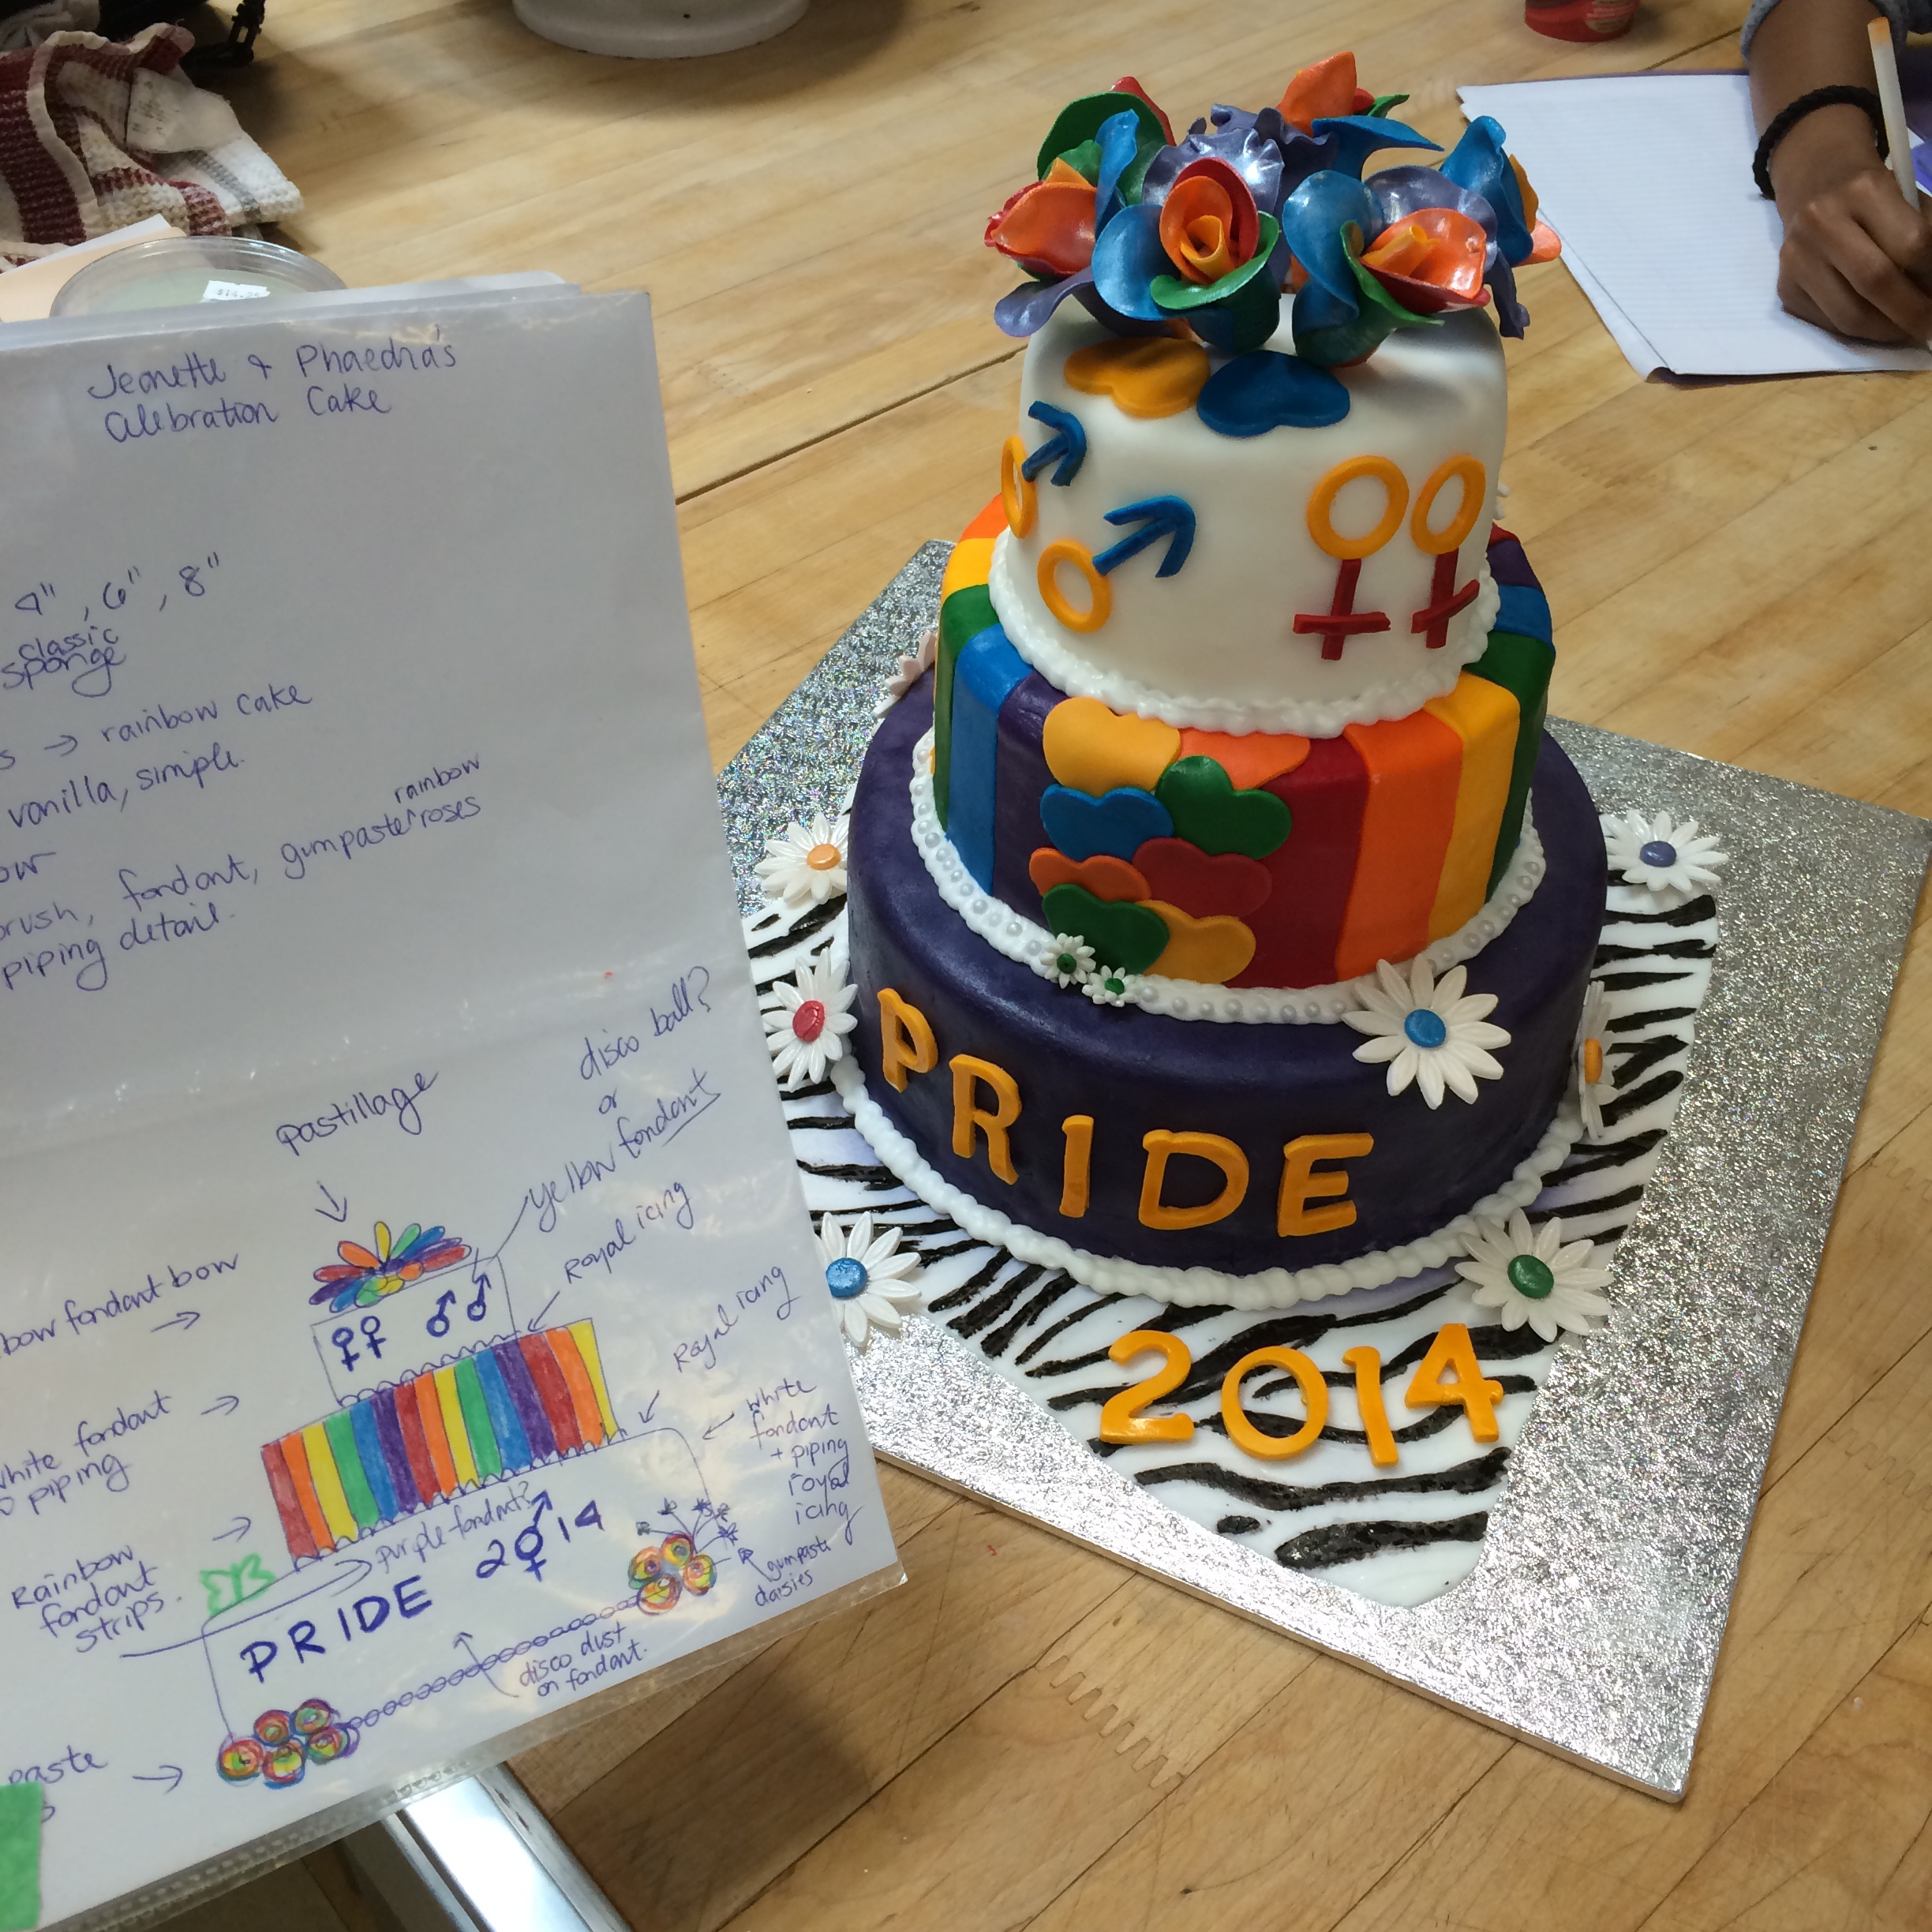
It was a fun cake to build and as you can see, we chose Pride 2014 as our theme since Vancouver Pride is coming up soon. I also love rainbows, and had seen the rainbow-layered cake on Pinterest before, and I always wanted to try making a cake like this.
Photos to follow at bottom of the post
[Warning: this post features A LOT of cake photos, view at your own risk]
I also did two more stages this week, one after school on Thursday at a Gluten-free bakery in North Vancouver. It was a great experience and I really enjoyed talking with the staff about their products and what it’s like to work in a gluten-free establishment. It was a shorter stage than the others, since it was after class, but I still had a good experience.
Seeing this variety of businesses, how they differ and how they are alike, have been super helpful for me and interesting.
My next stage was on Saturday, where I helped out at a high-end chocolate shop in Vancouver. It was a full day of prepping for an afternoon event they held that day. I saw how they fill delicious cream puffs with a variety of decadent flavours, like s’more, yuzu, chocolate banana, to name a few, and enjoyed working with the team there.
I also enjoyed seeing the looks on customers’ faces as they purchased frozen desserts and had a look of pure joy before they devoured every bite. That is what I love about this industry: we have the opportunity to bring joy, pleasure and new dessert experiences to people of all ages. I simultaneously love preparing the desserts and seeing them disappear in a fraction of the time it takes to make them.
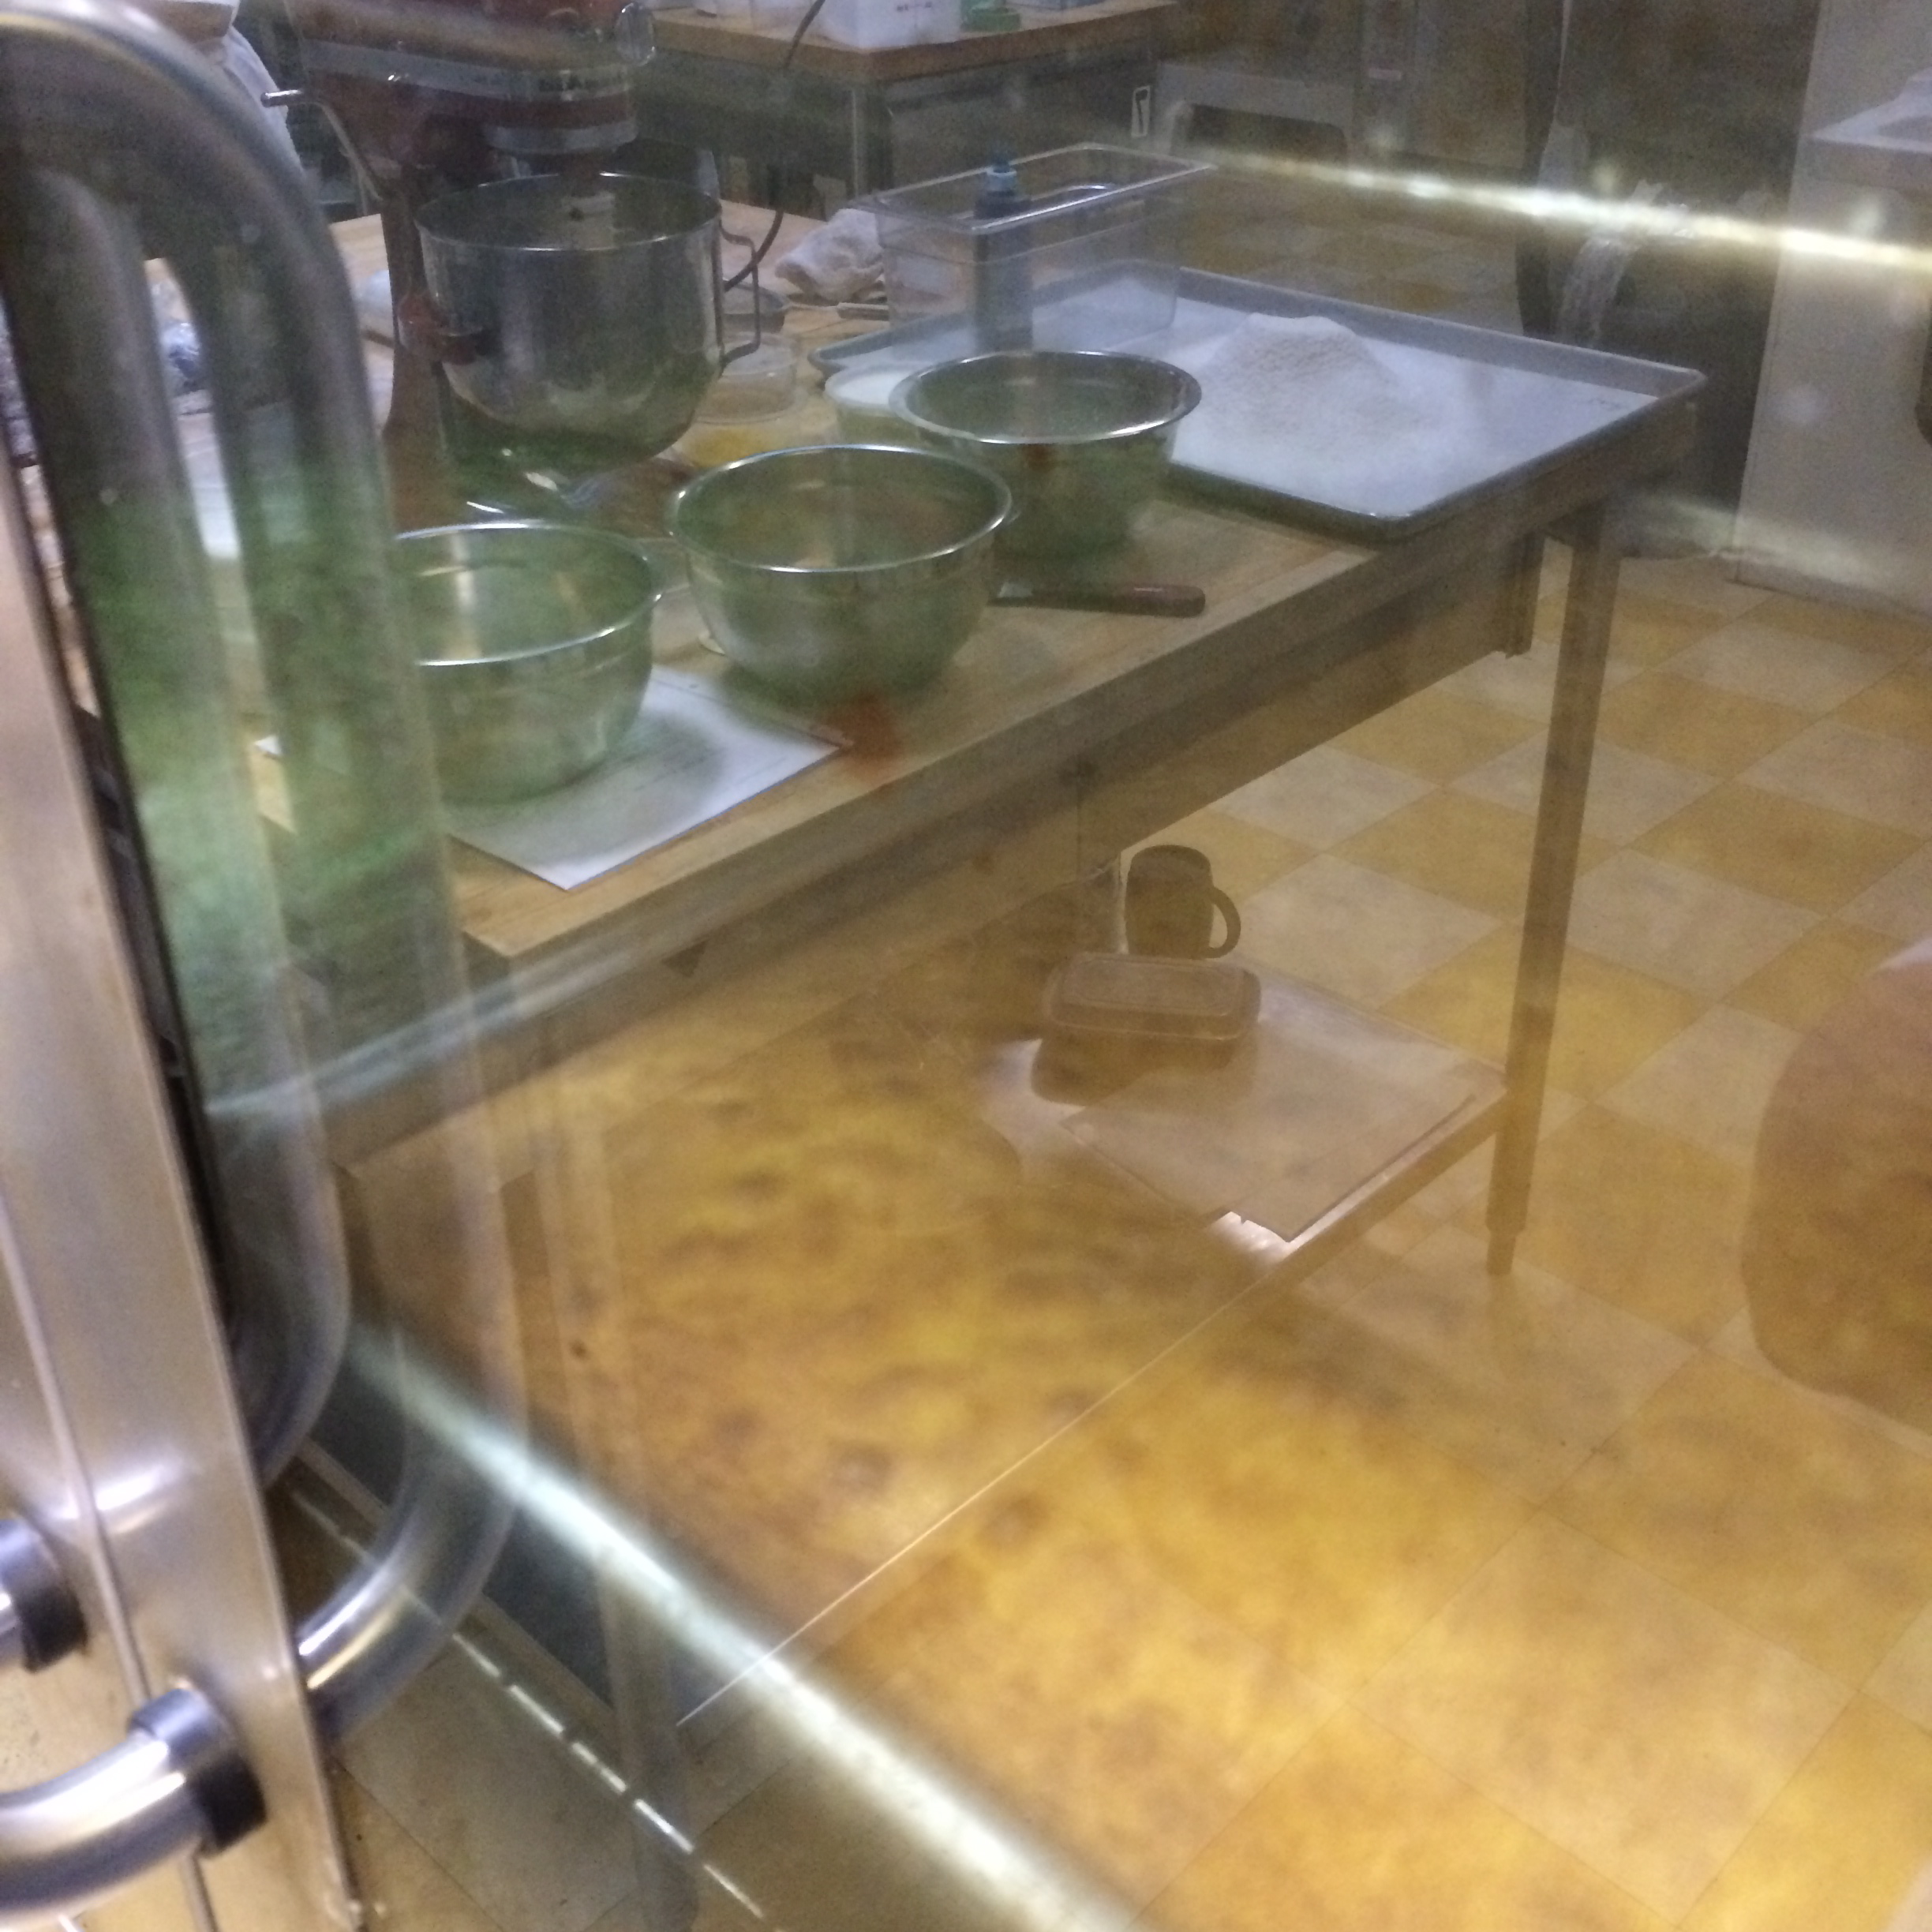
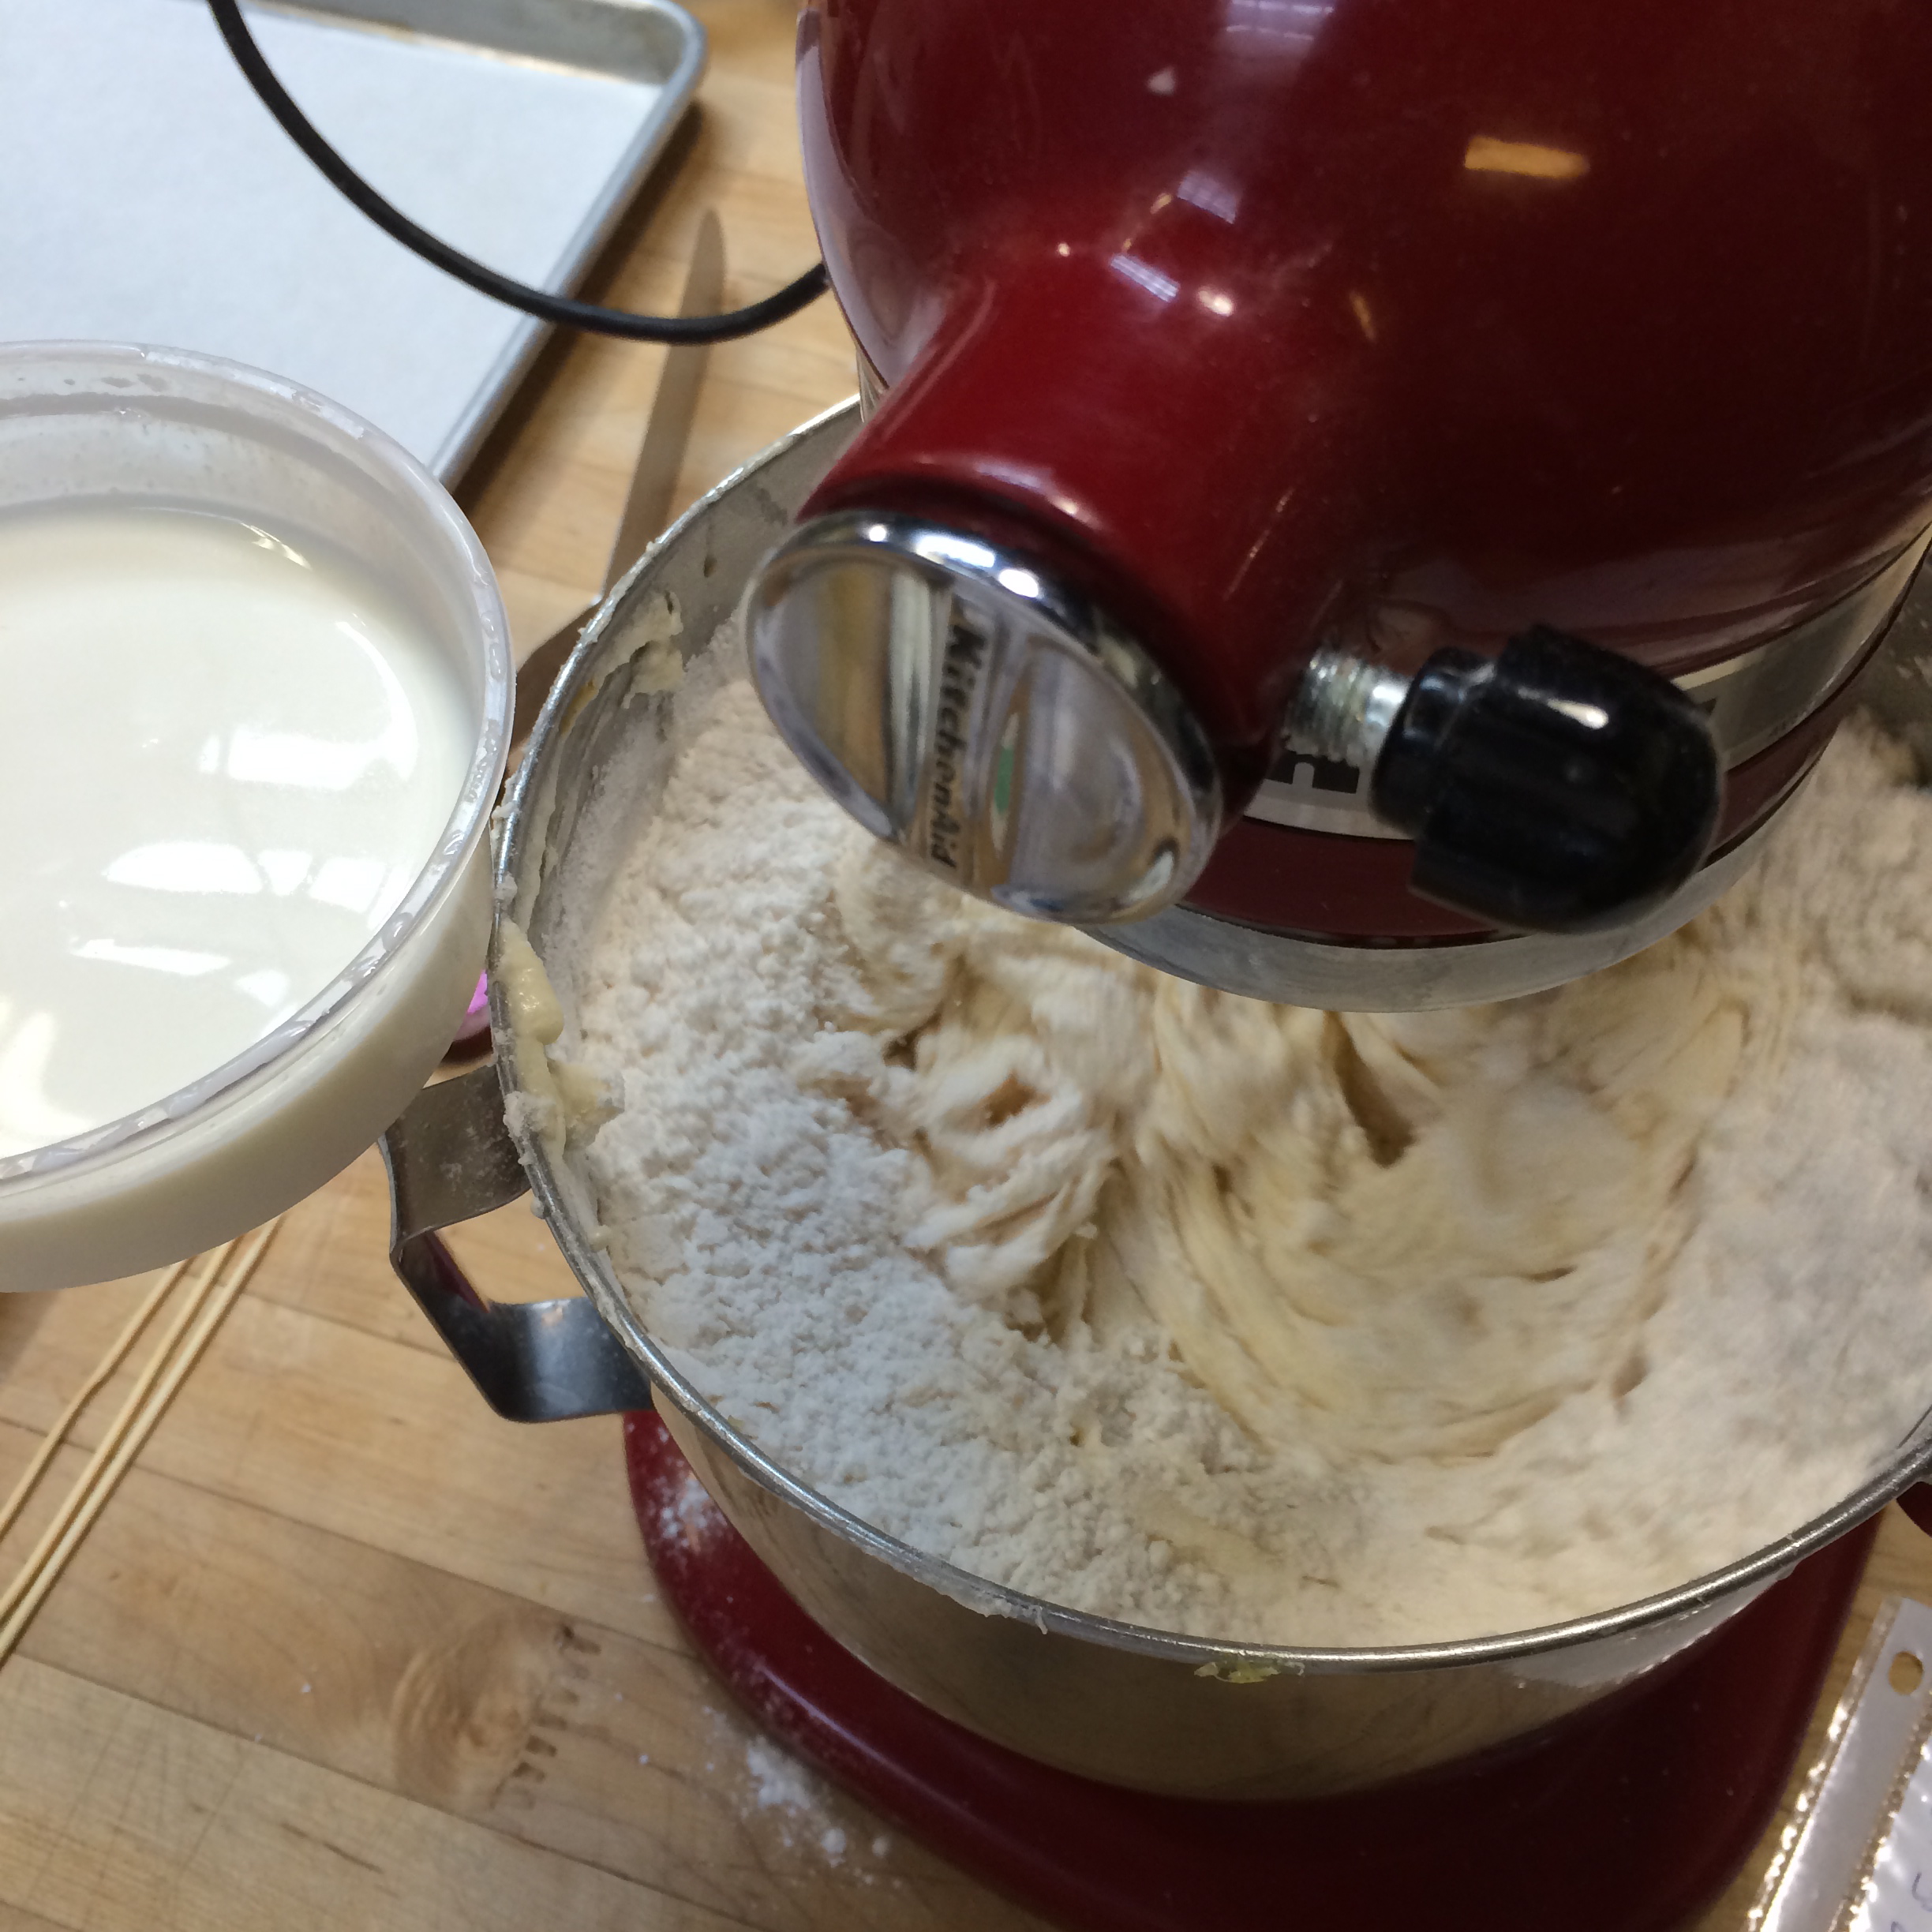
But now back to the celebration cake. A couple weeks ago we were told we would be partnered up and have to create a three-tier celebration cake over 3 days. So my partner and I decided we wanted to make a Pride 2014 cake. We made some sketches and agreed on the cake and fillings. We had to map out our timeline over the three days, task lists at all, and then execute. We discussed our plan with our Chef instructors and incorporated some feedback. The night before the cake day my partner had a family emergency and was unable to come to school. Sadly, life happens. It is a perfectly real situation and the cake must go on. So on Day one, I baked the whole cake and made all the filling. It was a lot of cake, but I had a system going and enjoyed the whole process, while managing to keep us on our timeline. We also had to make all of our fondant and gumpaste from scratch. Most people buy this stuff, ready made, but we had to make it. We chose to make marshmallow fondant, I find it is easier to work with.
Day two we had to layer all the tiers and ice them. We then covered each tier in fondant and made all the decoration details.
Day three was all about assembling the cake, and stacking each tier. We used small wooden dowels to help support each tier, so the cake remains sturdy. Then once everyone’s cakes were complete, we took a lot of photos of each team’s cake and then a big class photo of all seven celebration cakes (even our Chef made a cake too).
This week coming up we have a black box event and then our final practical exam is later in the week. Only two weeks to go now. Wish me luck 🙂
And now for the photos from last week, in a random order – I don’t have time to sort them for you now (maybe after graduation). Hopefully the captions help!
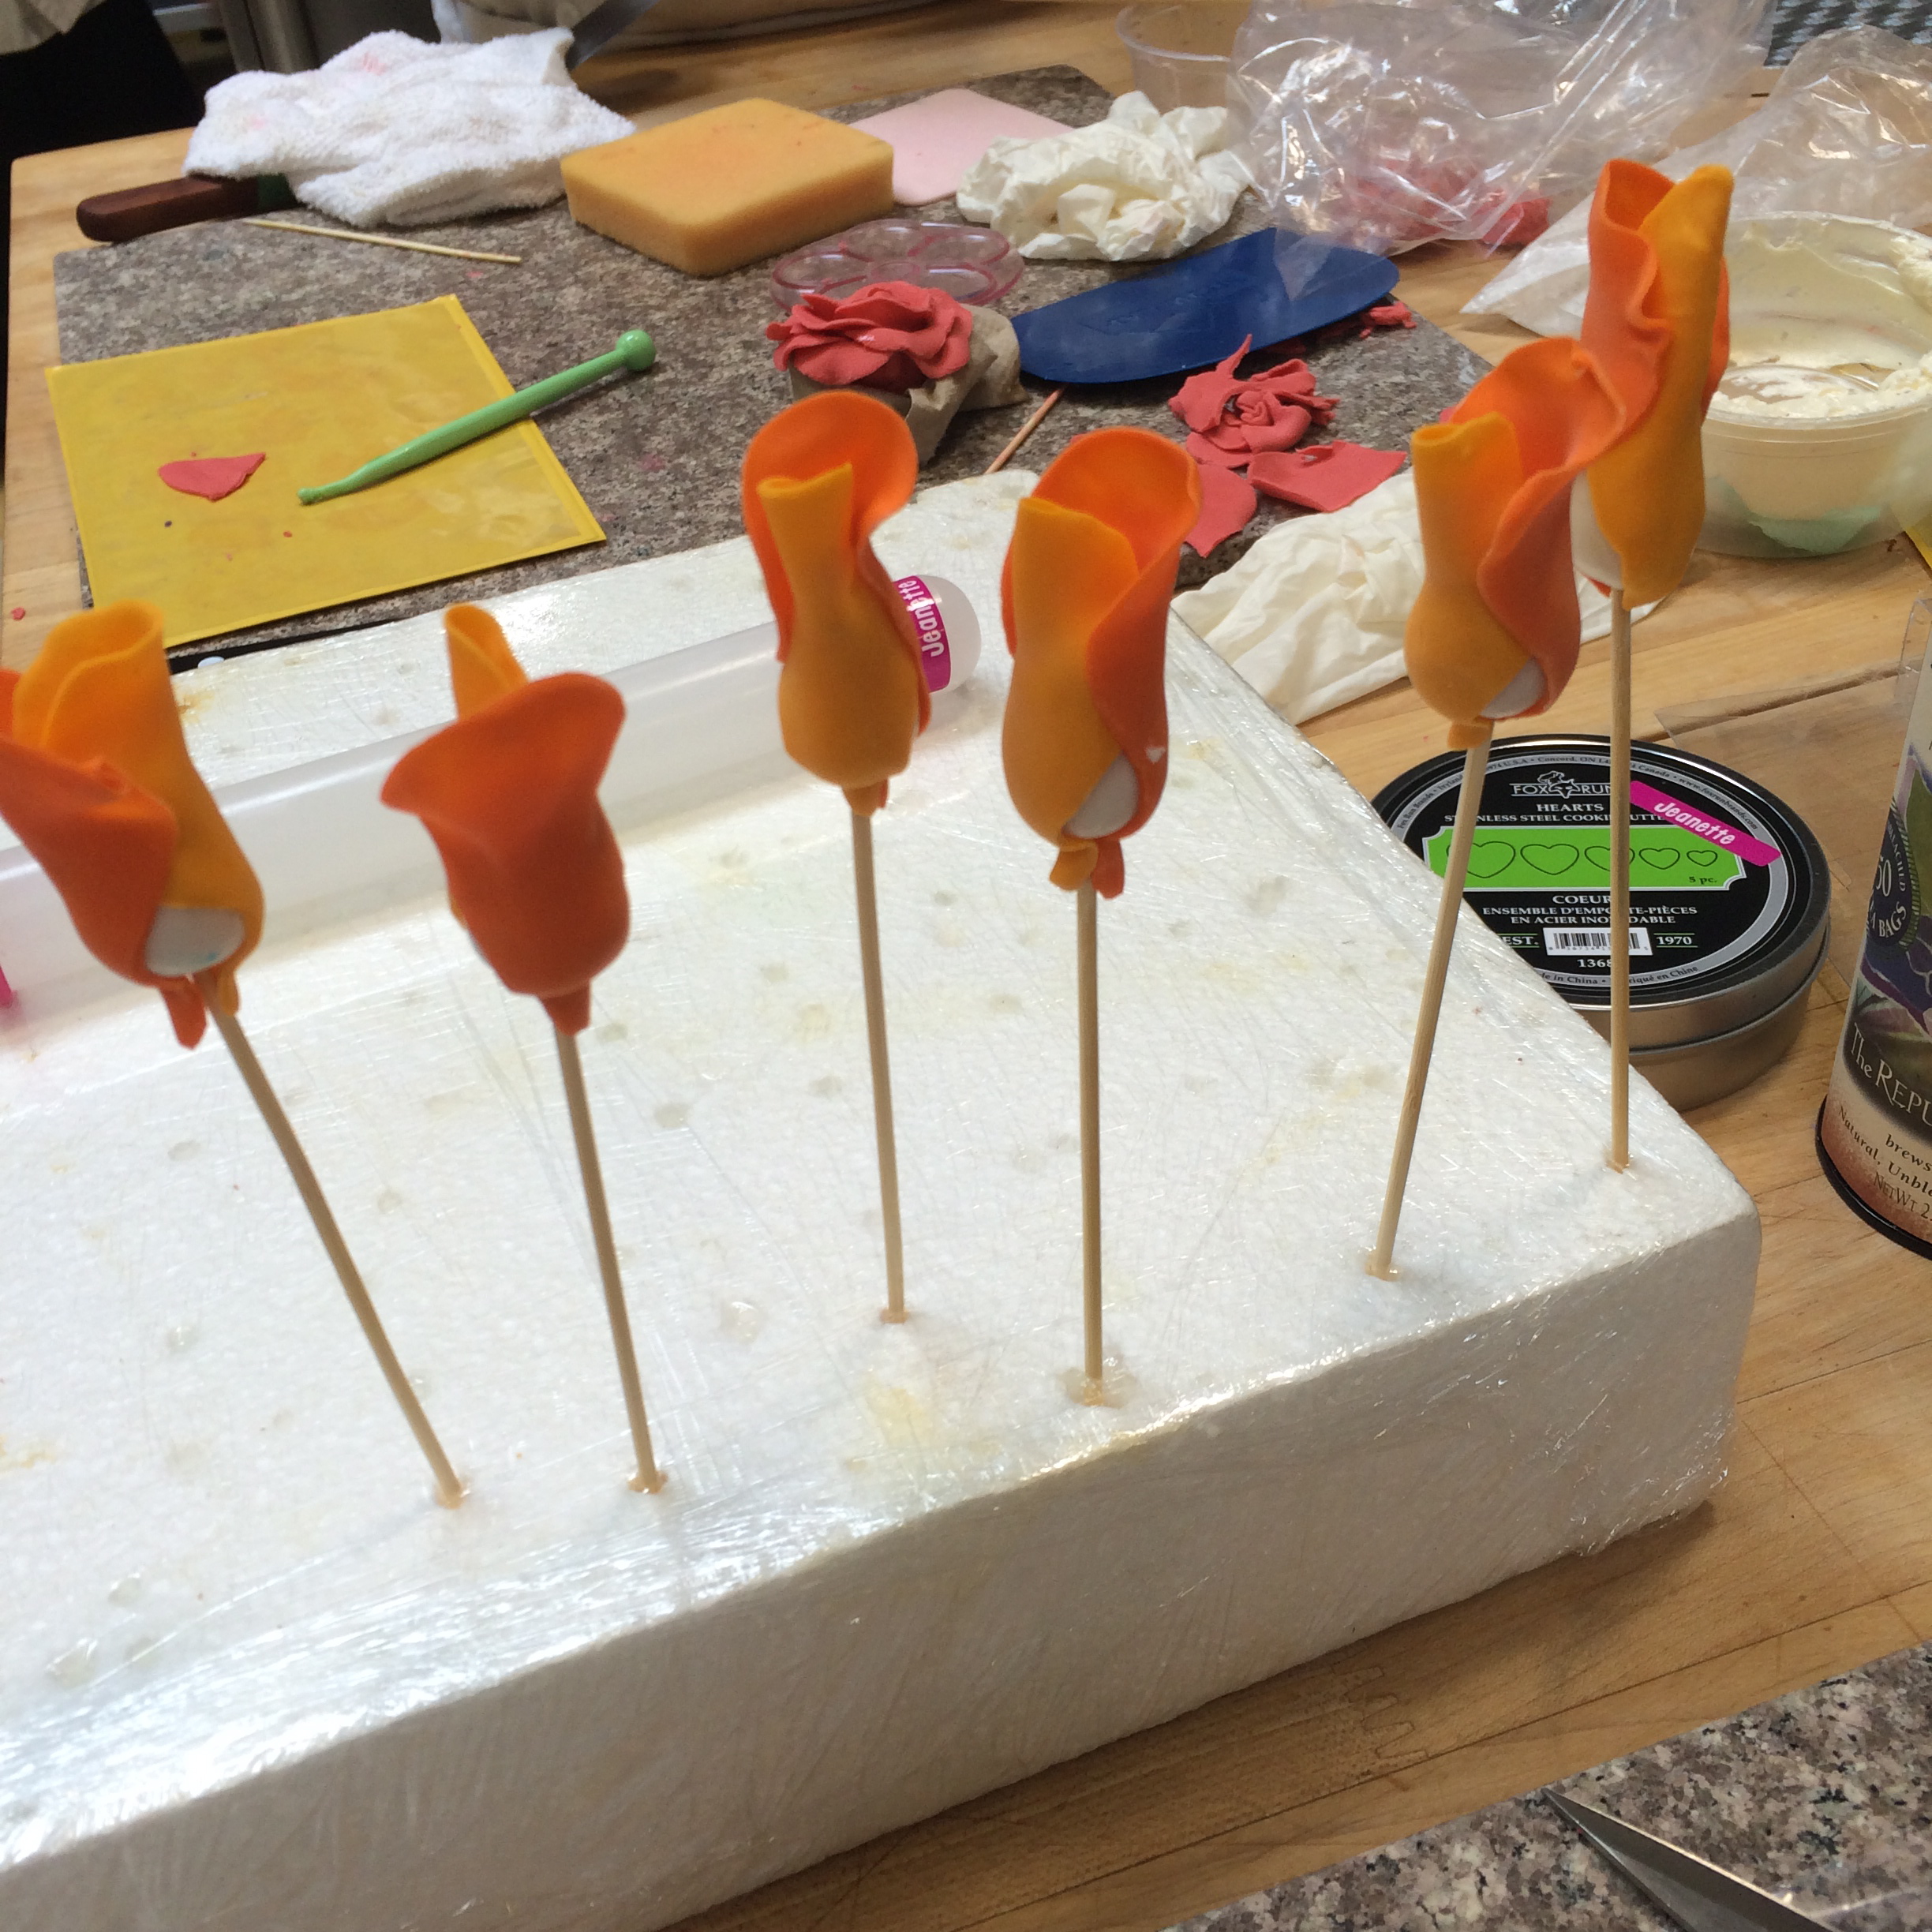
The beginning of my roses…
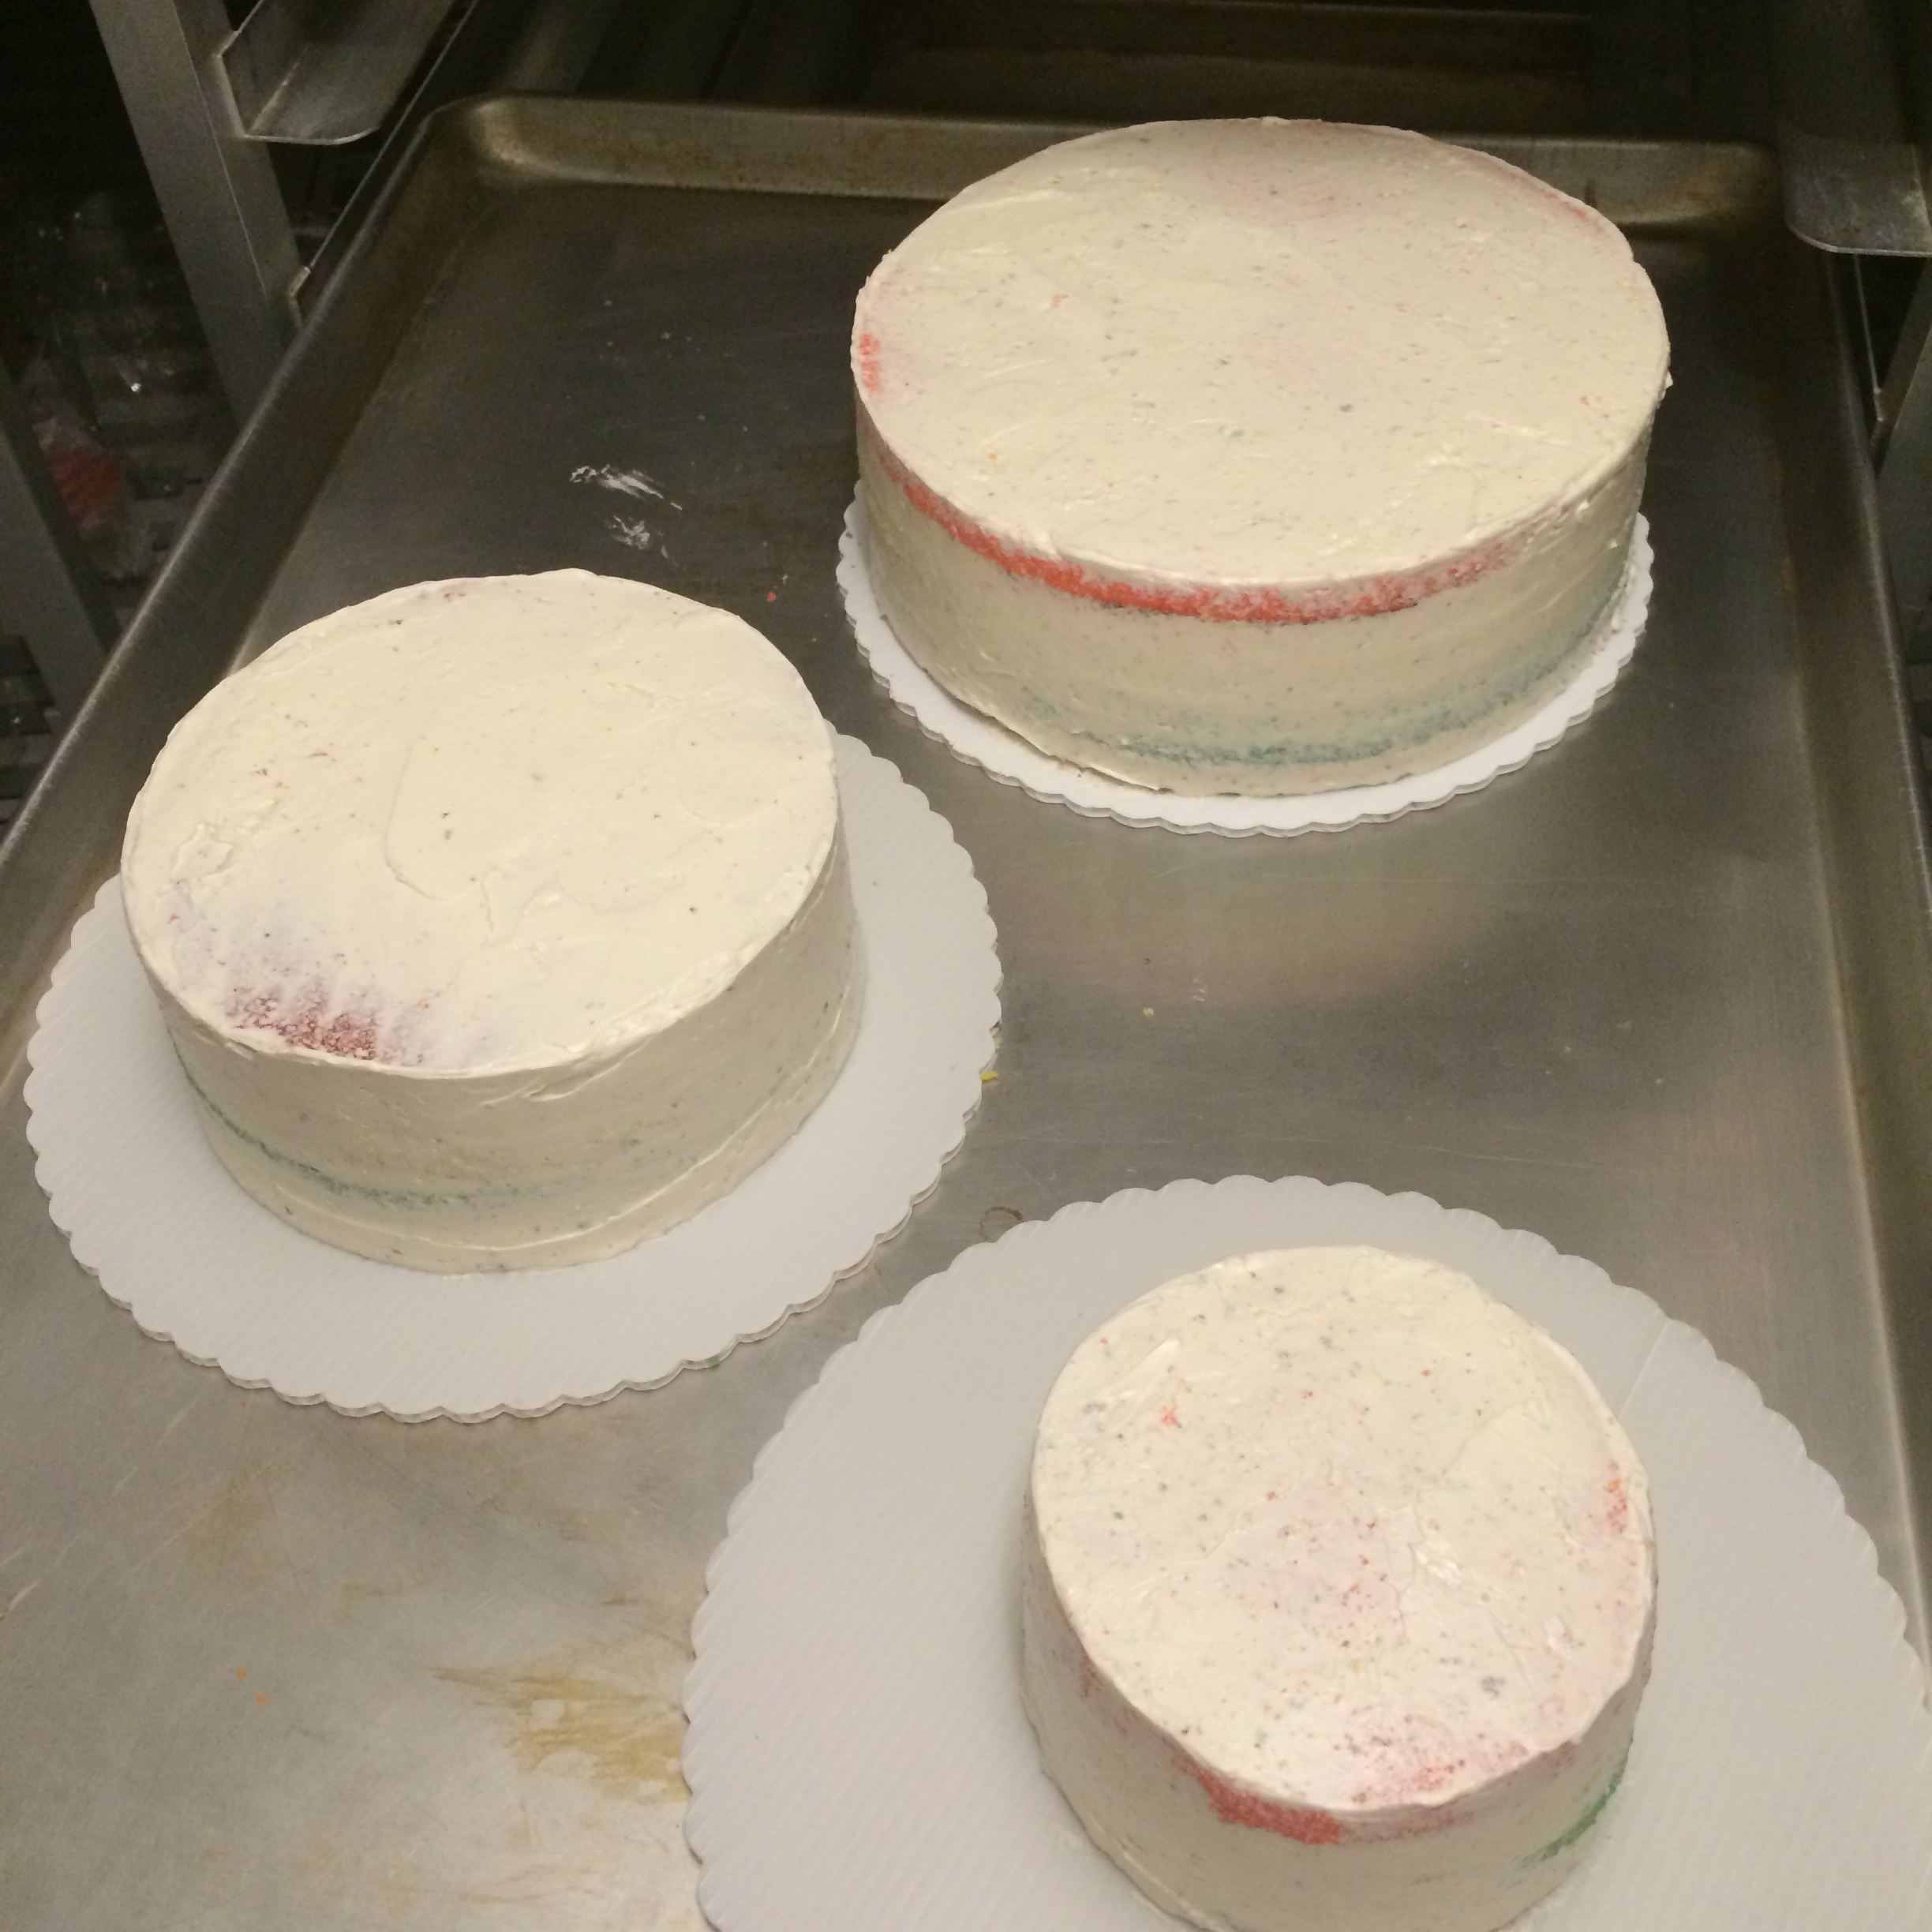
All three tiers preparing for fondant.
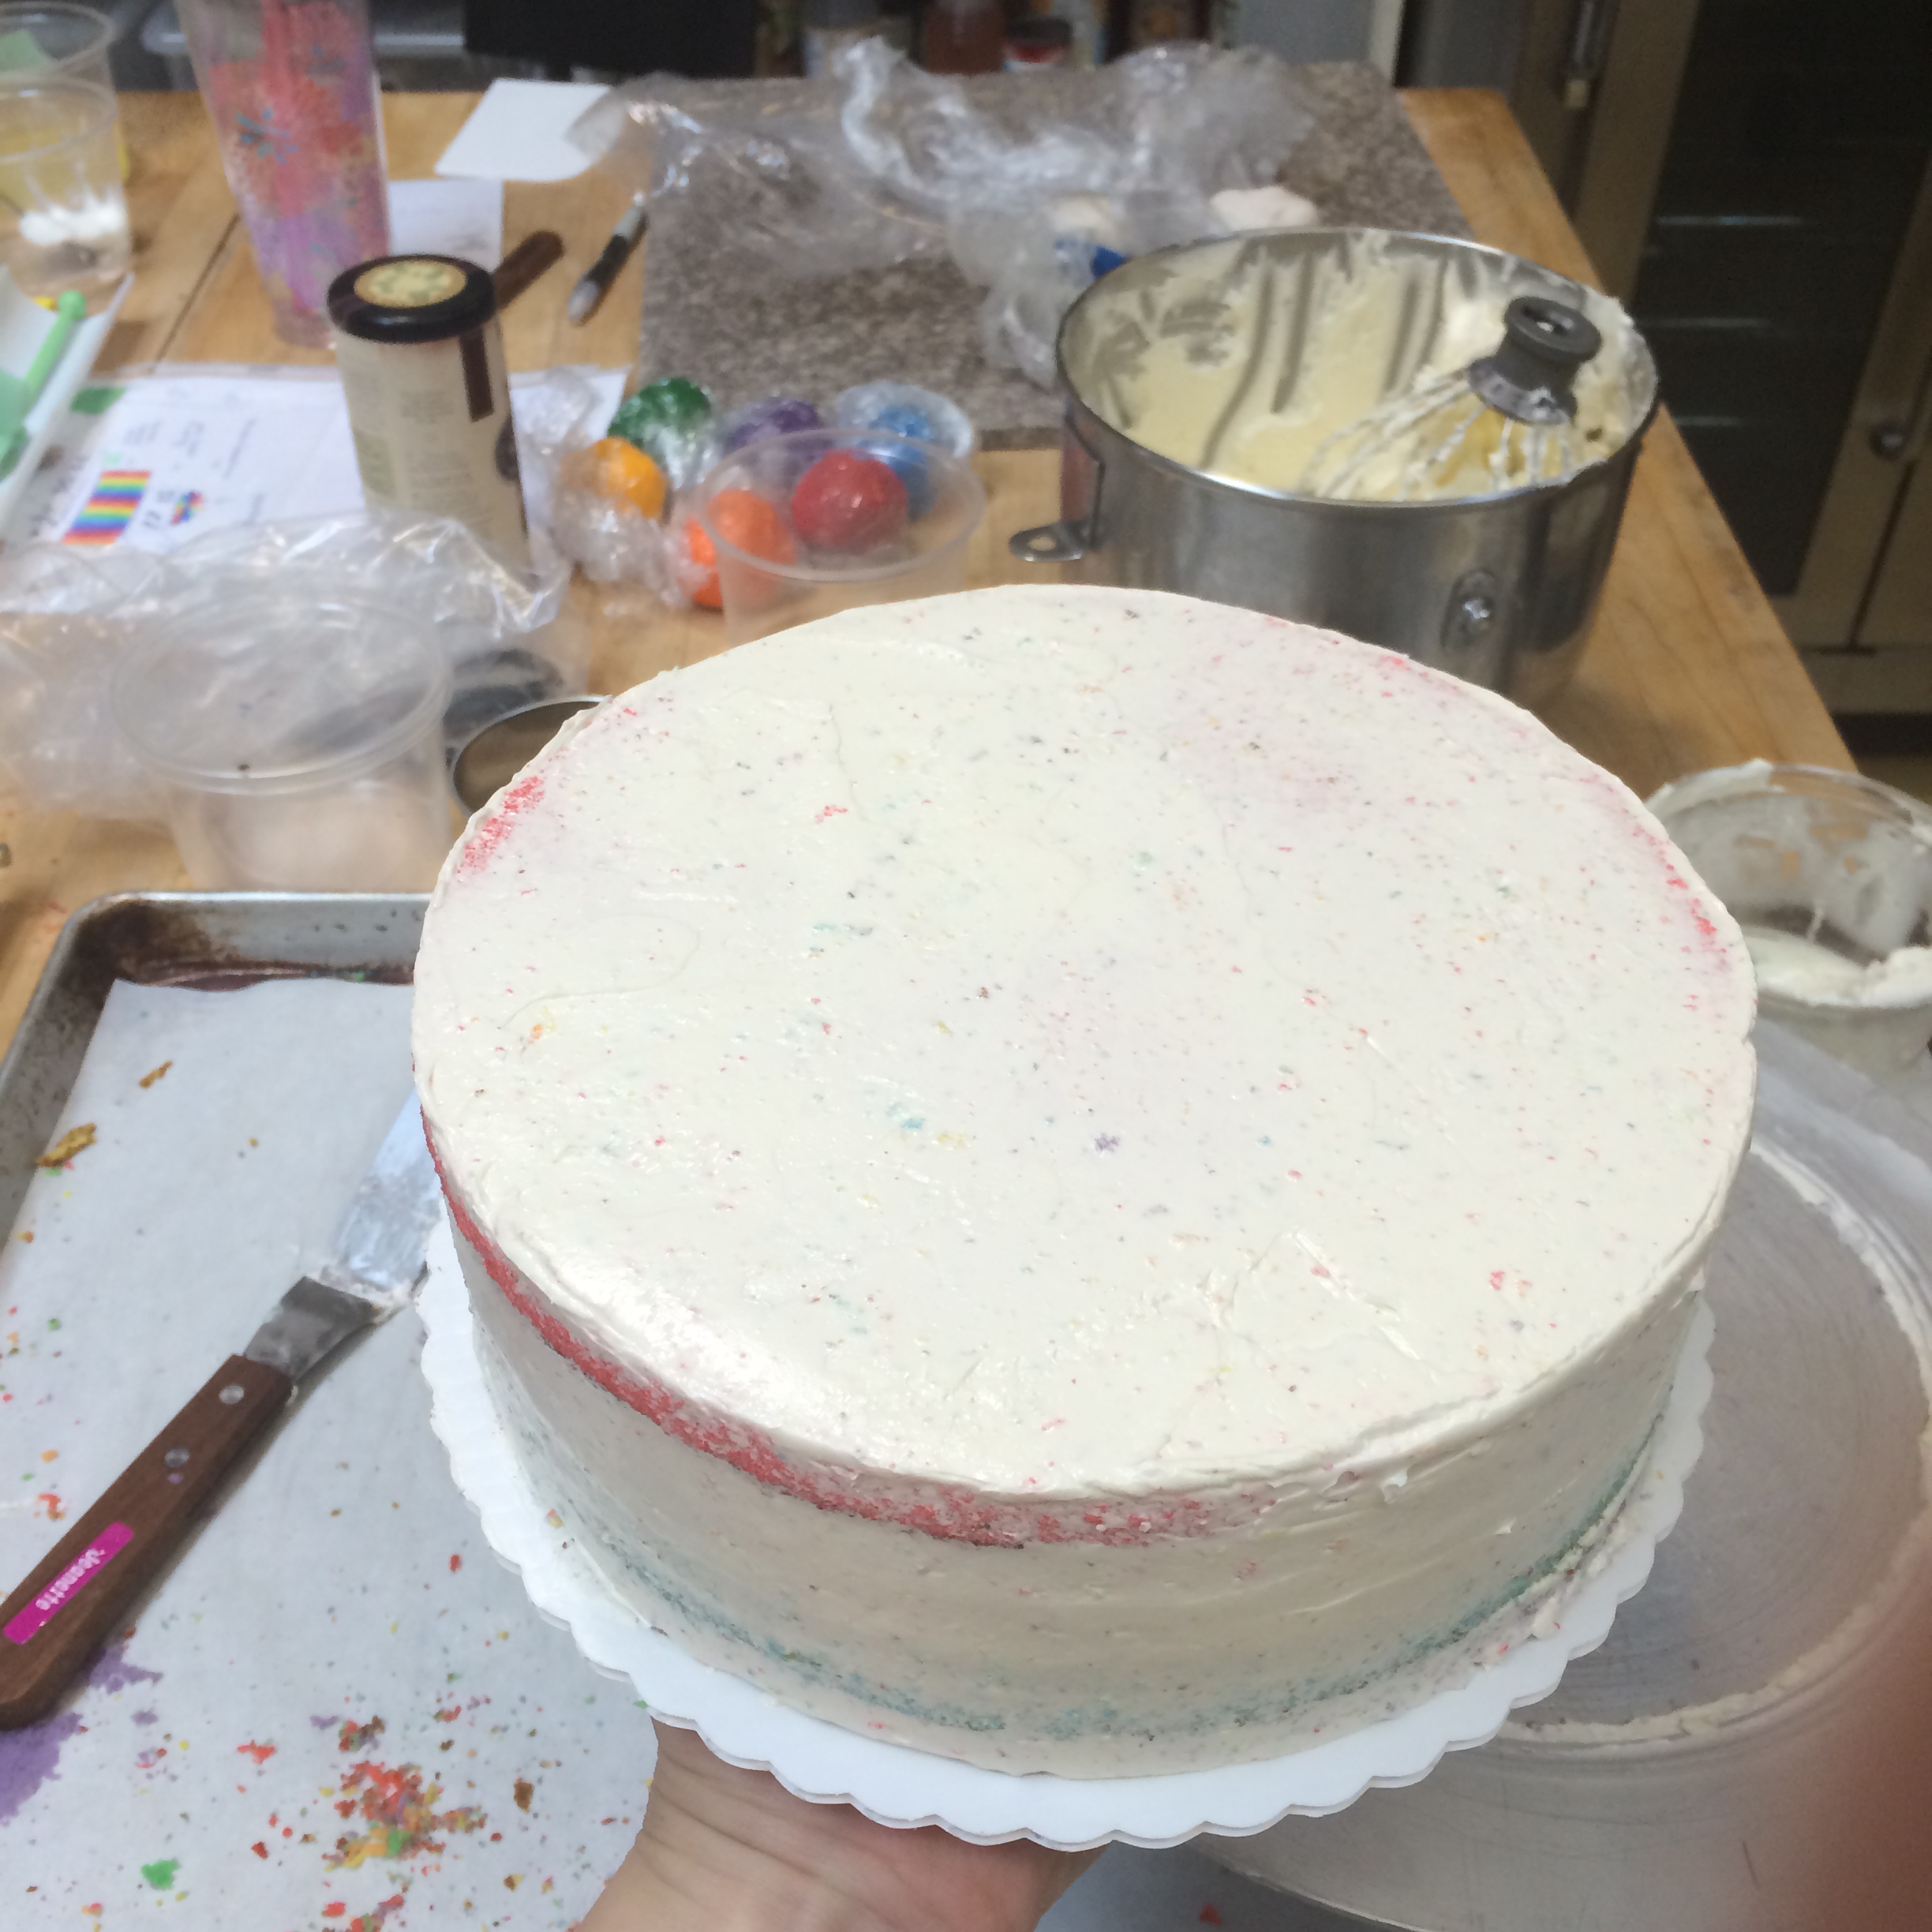
Crumb coating the cakes, to seal in all the crumbs before we add another layer of icing. I love this part.
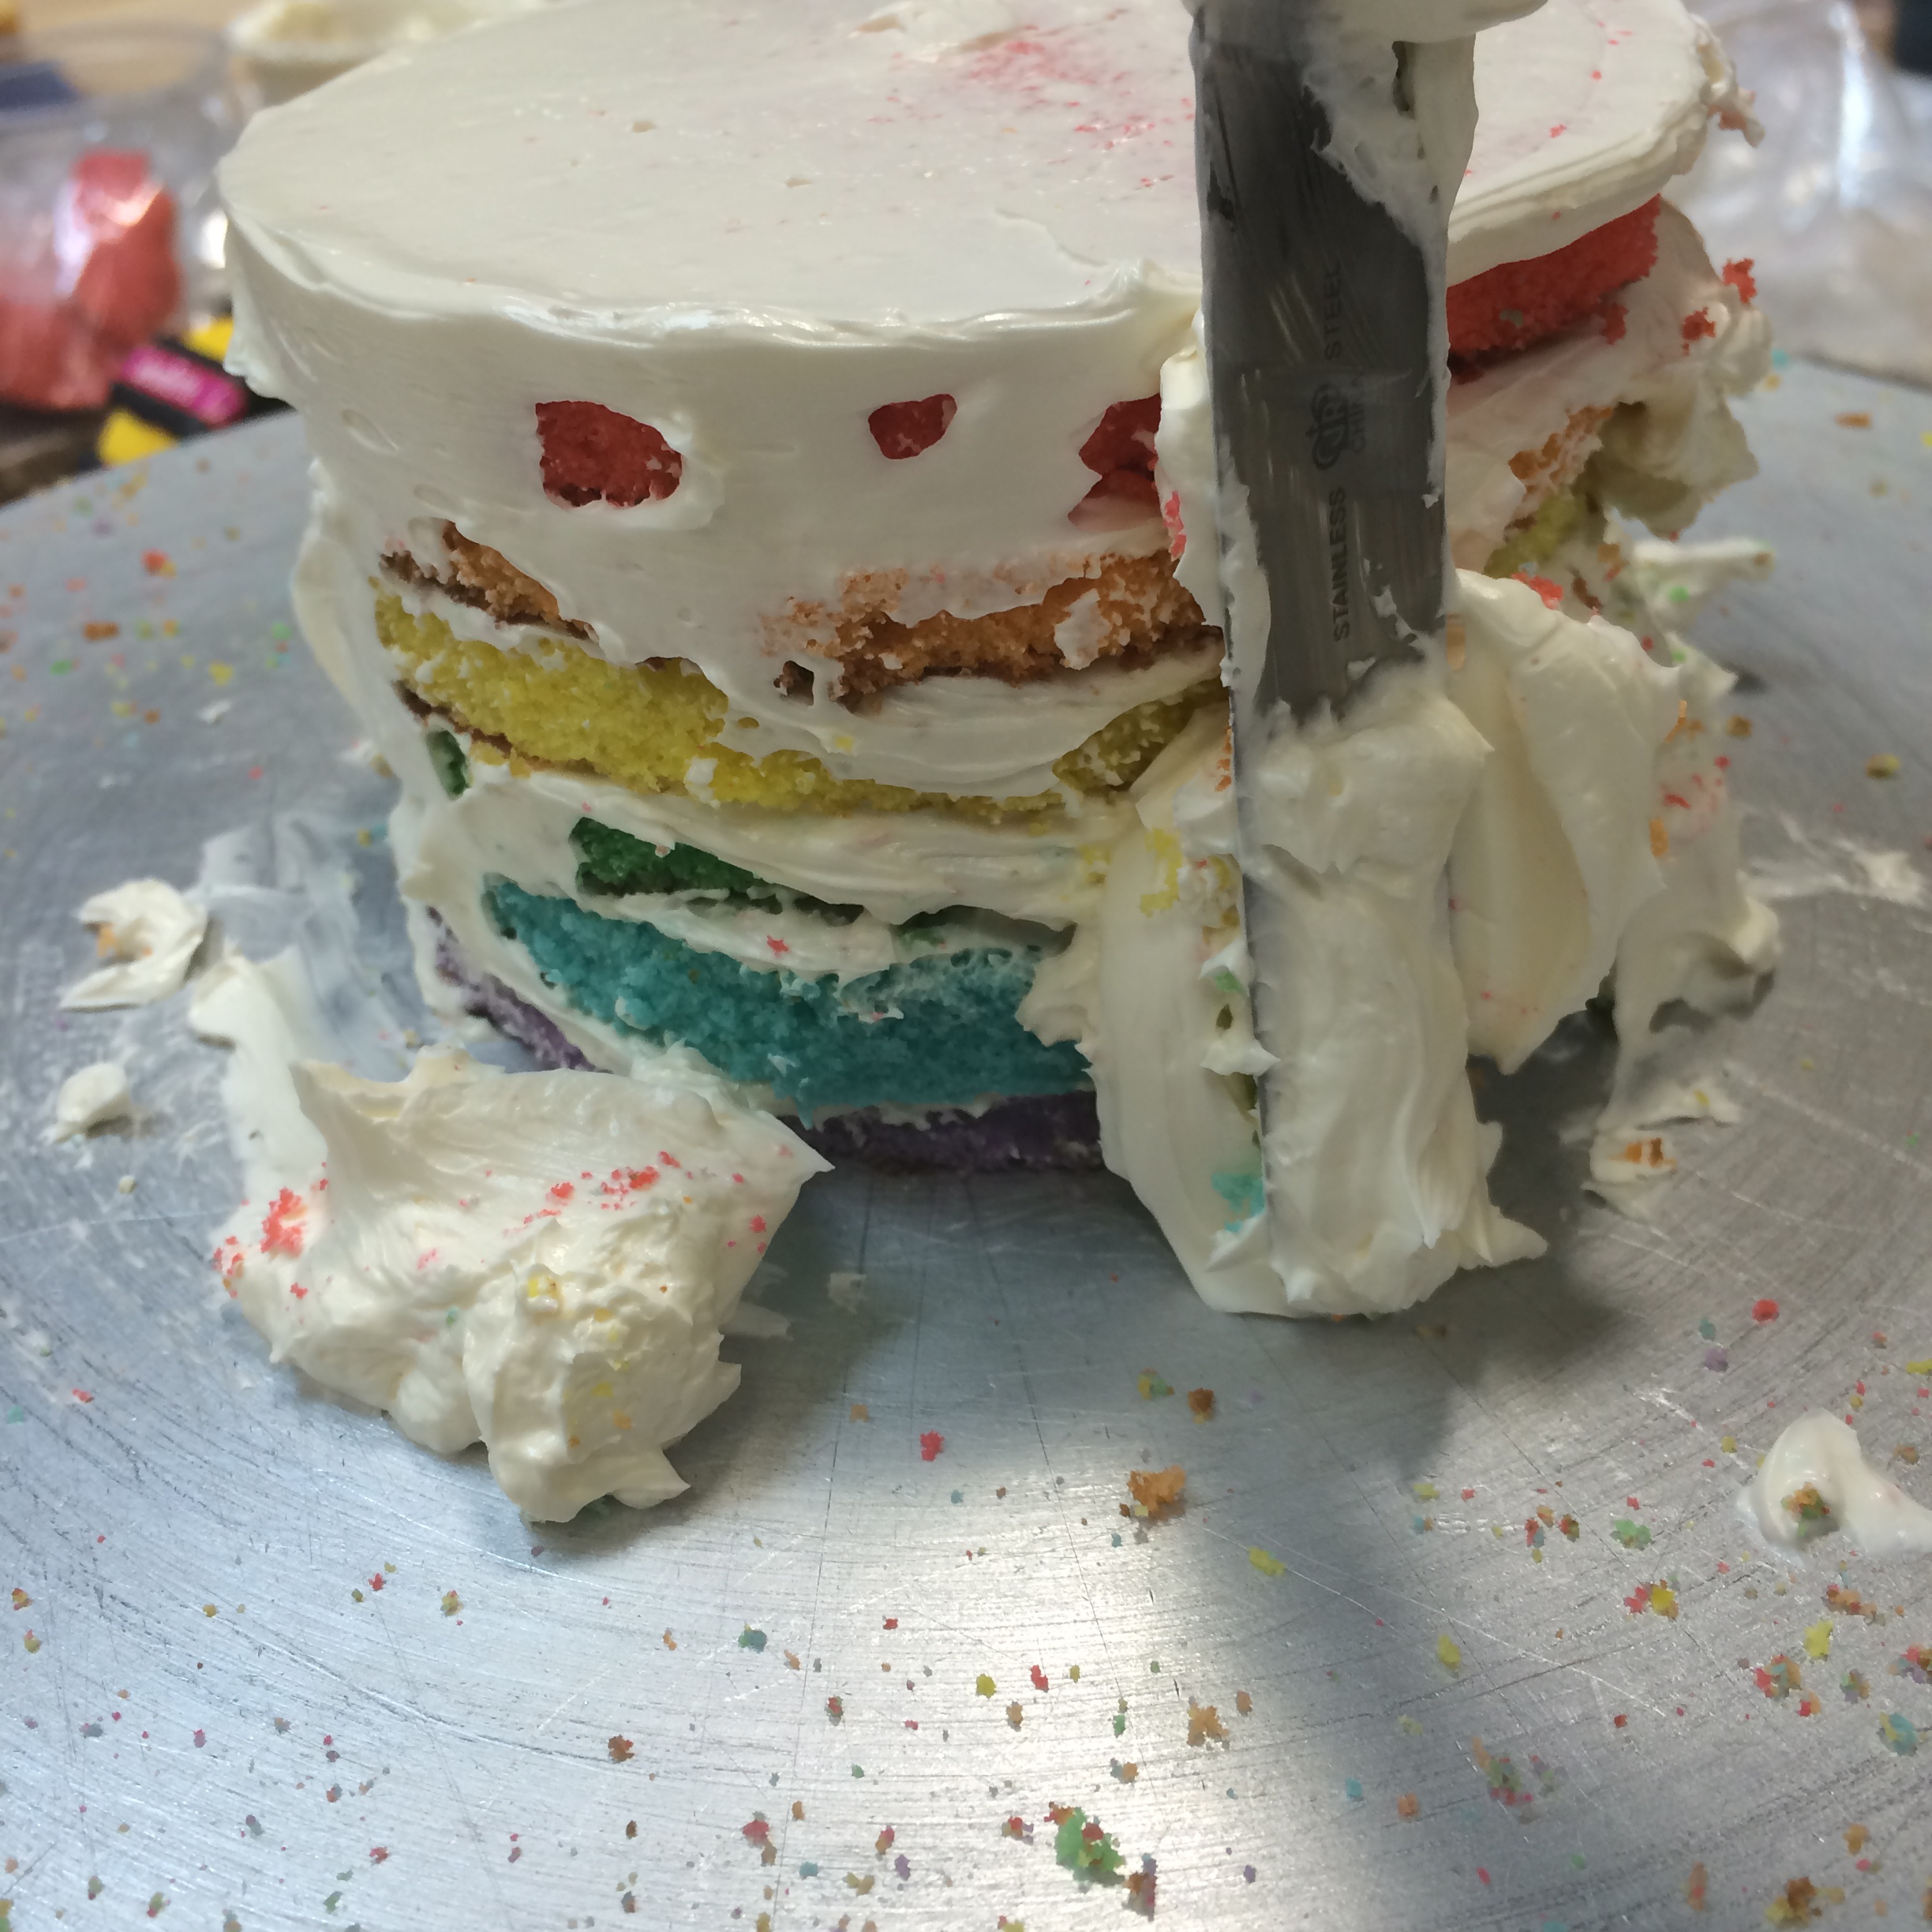
We didn’t have a 4″ round mold, so we had to carve the top tier manually. I just love the rainbow crumbs everywhere….
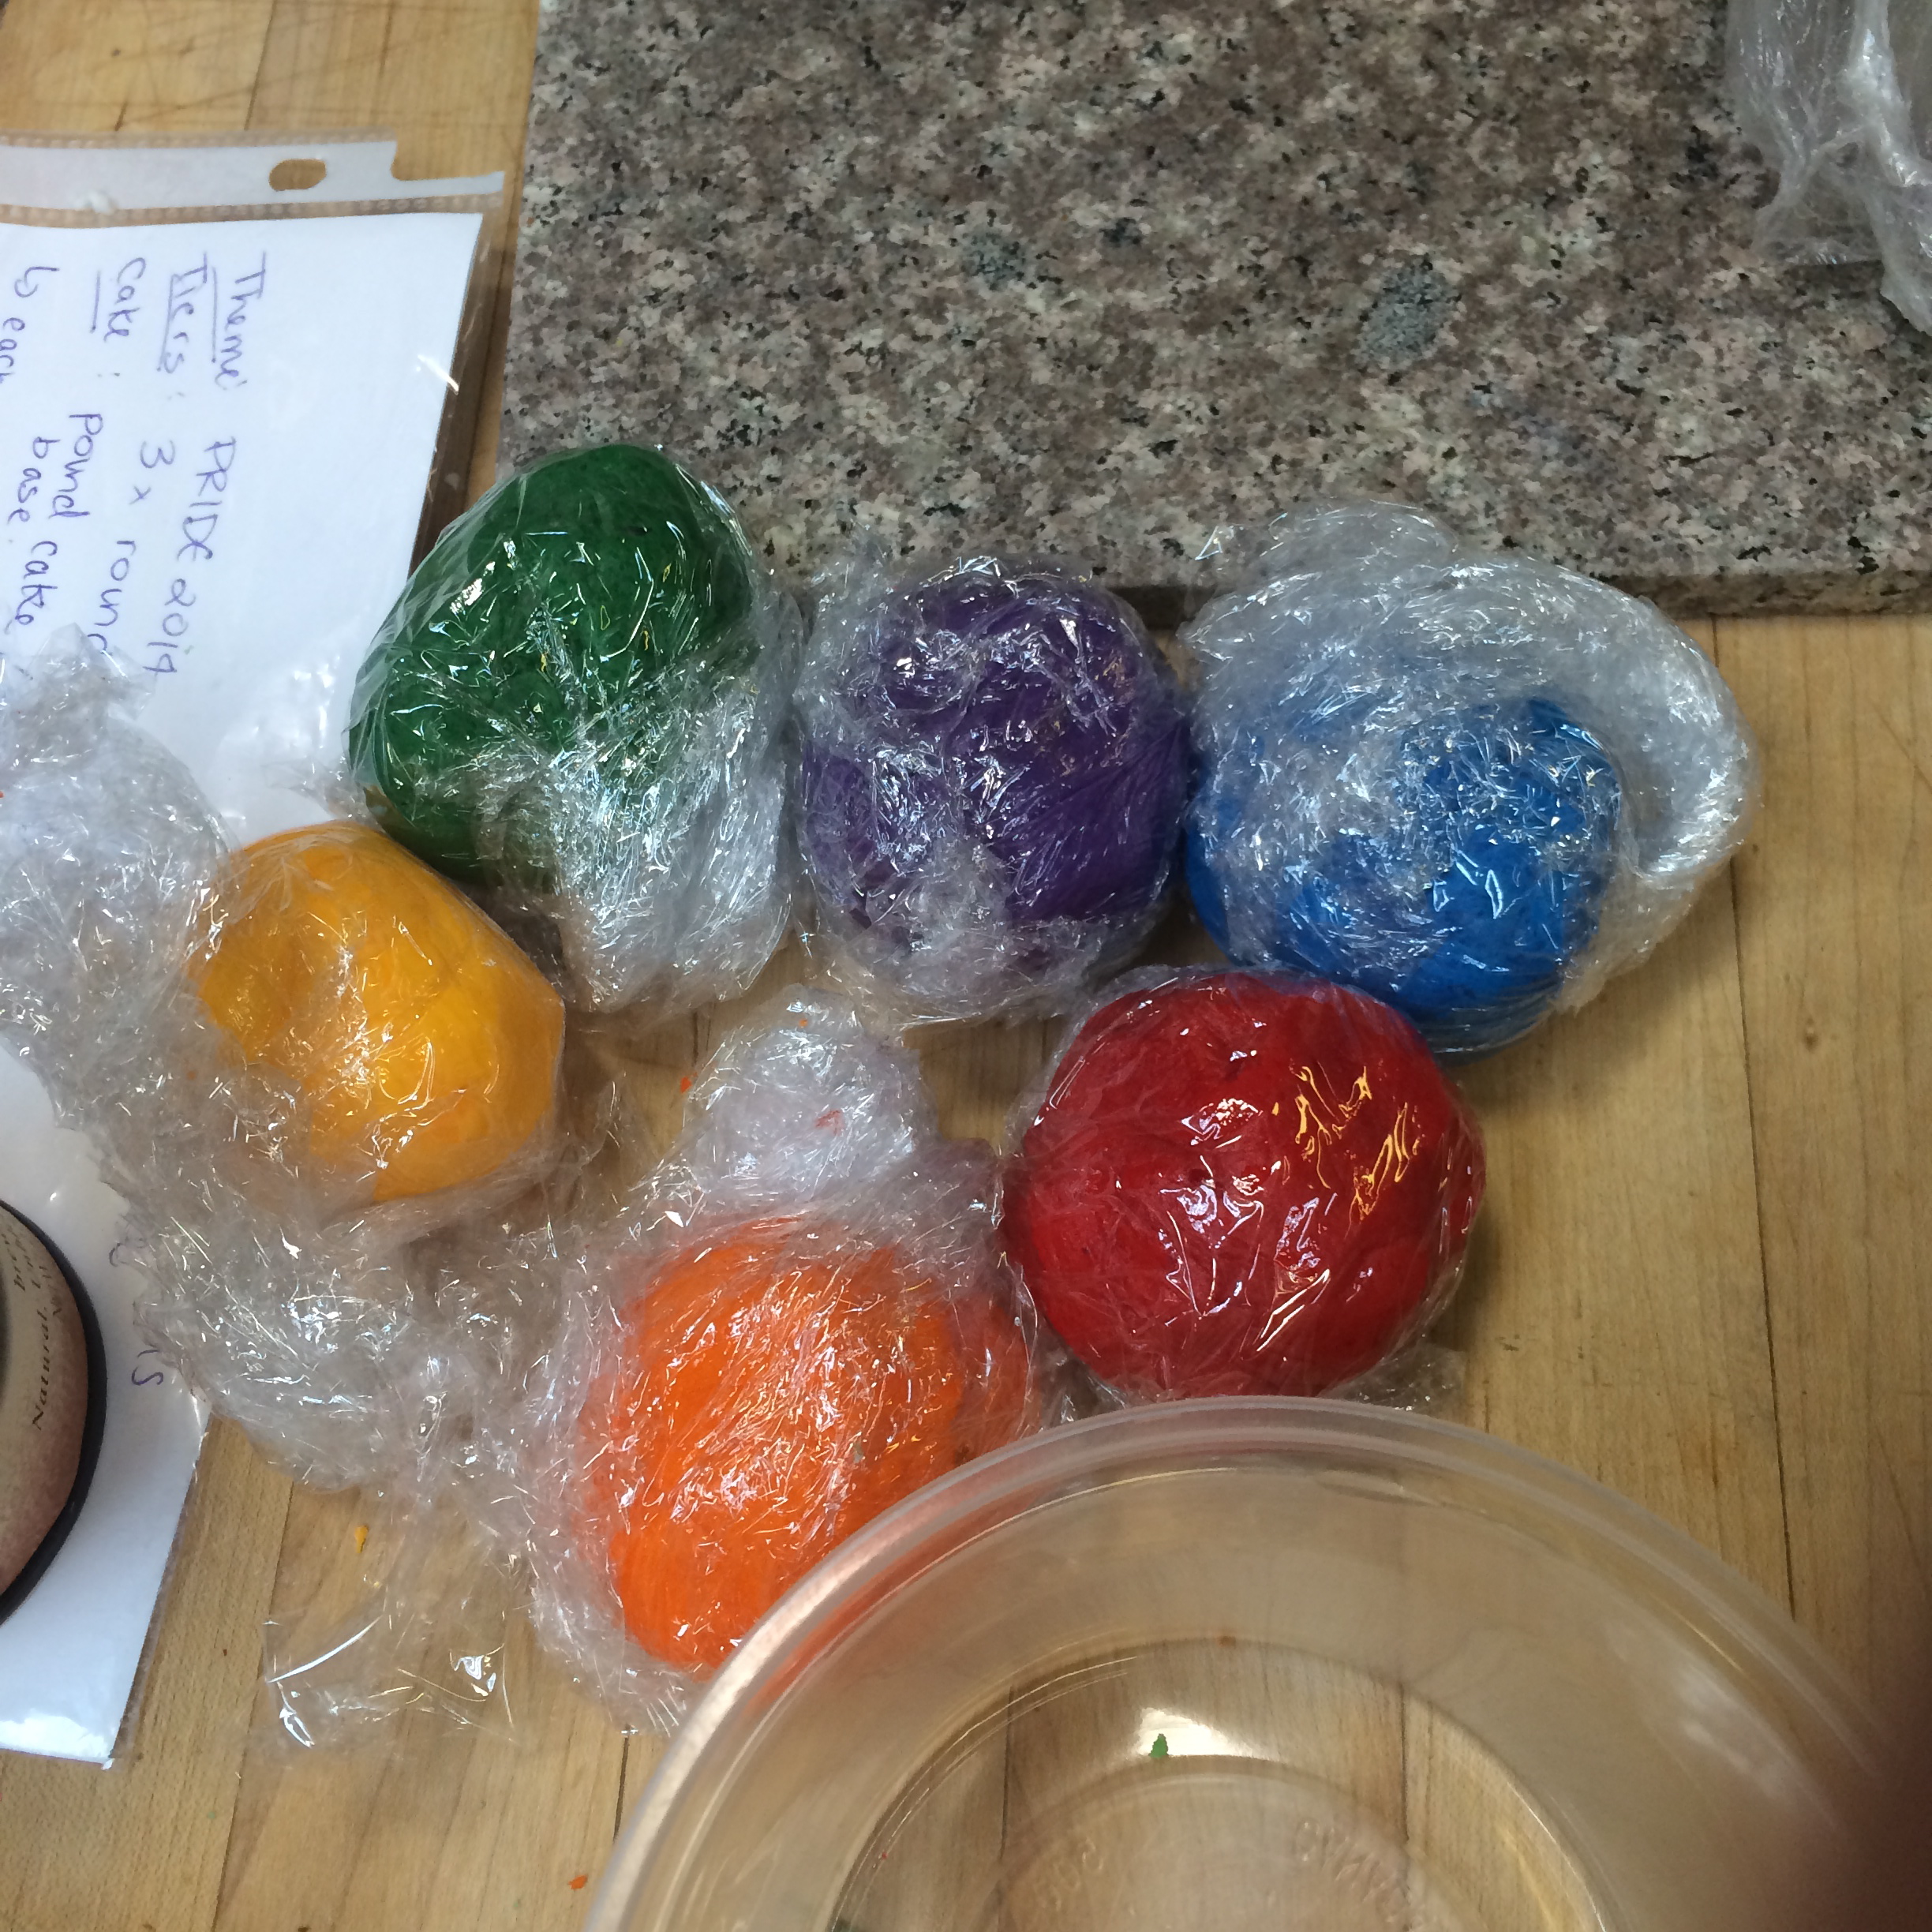
Rainbow gumpaste! My station partner kneaded in the colour to each of these balls of gumpaste – it was a lot of work.
I love making the sharp edges on a cake with icing.
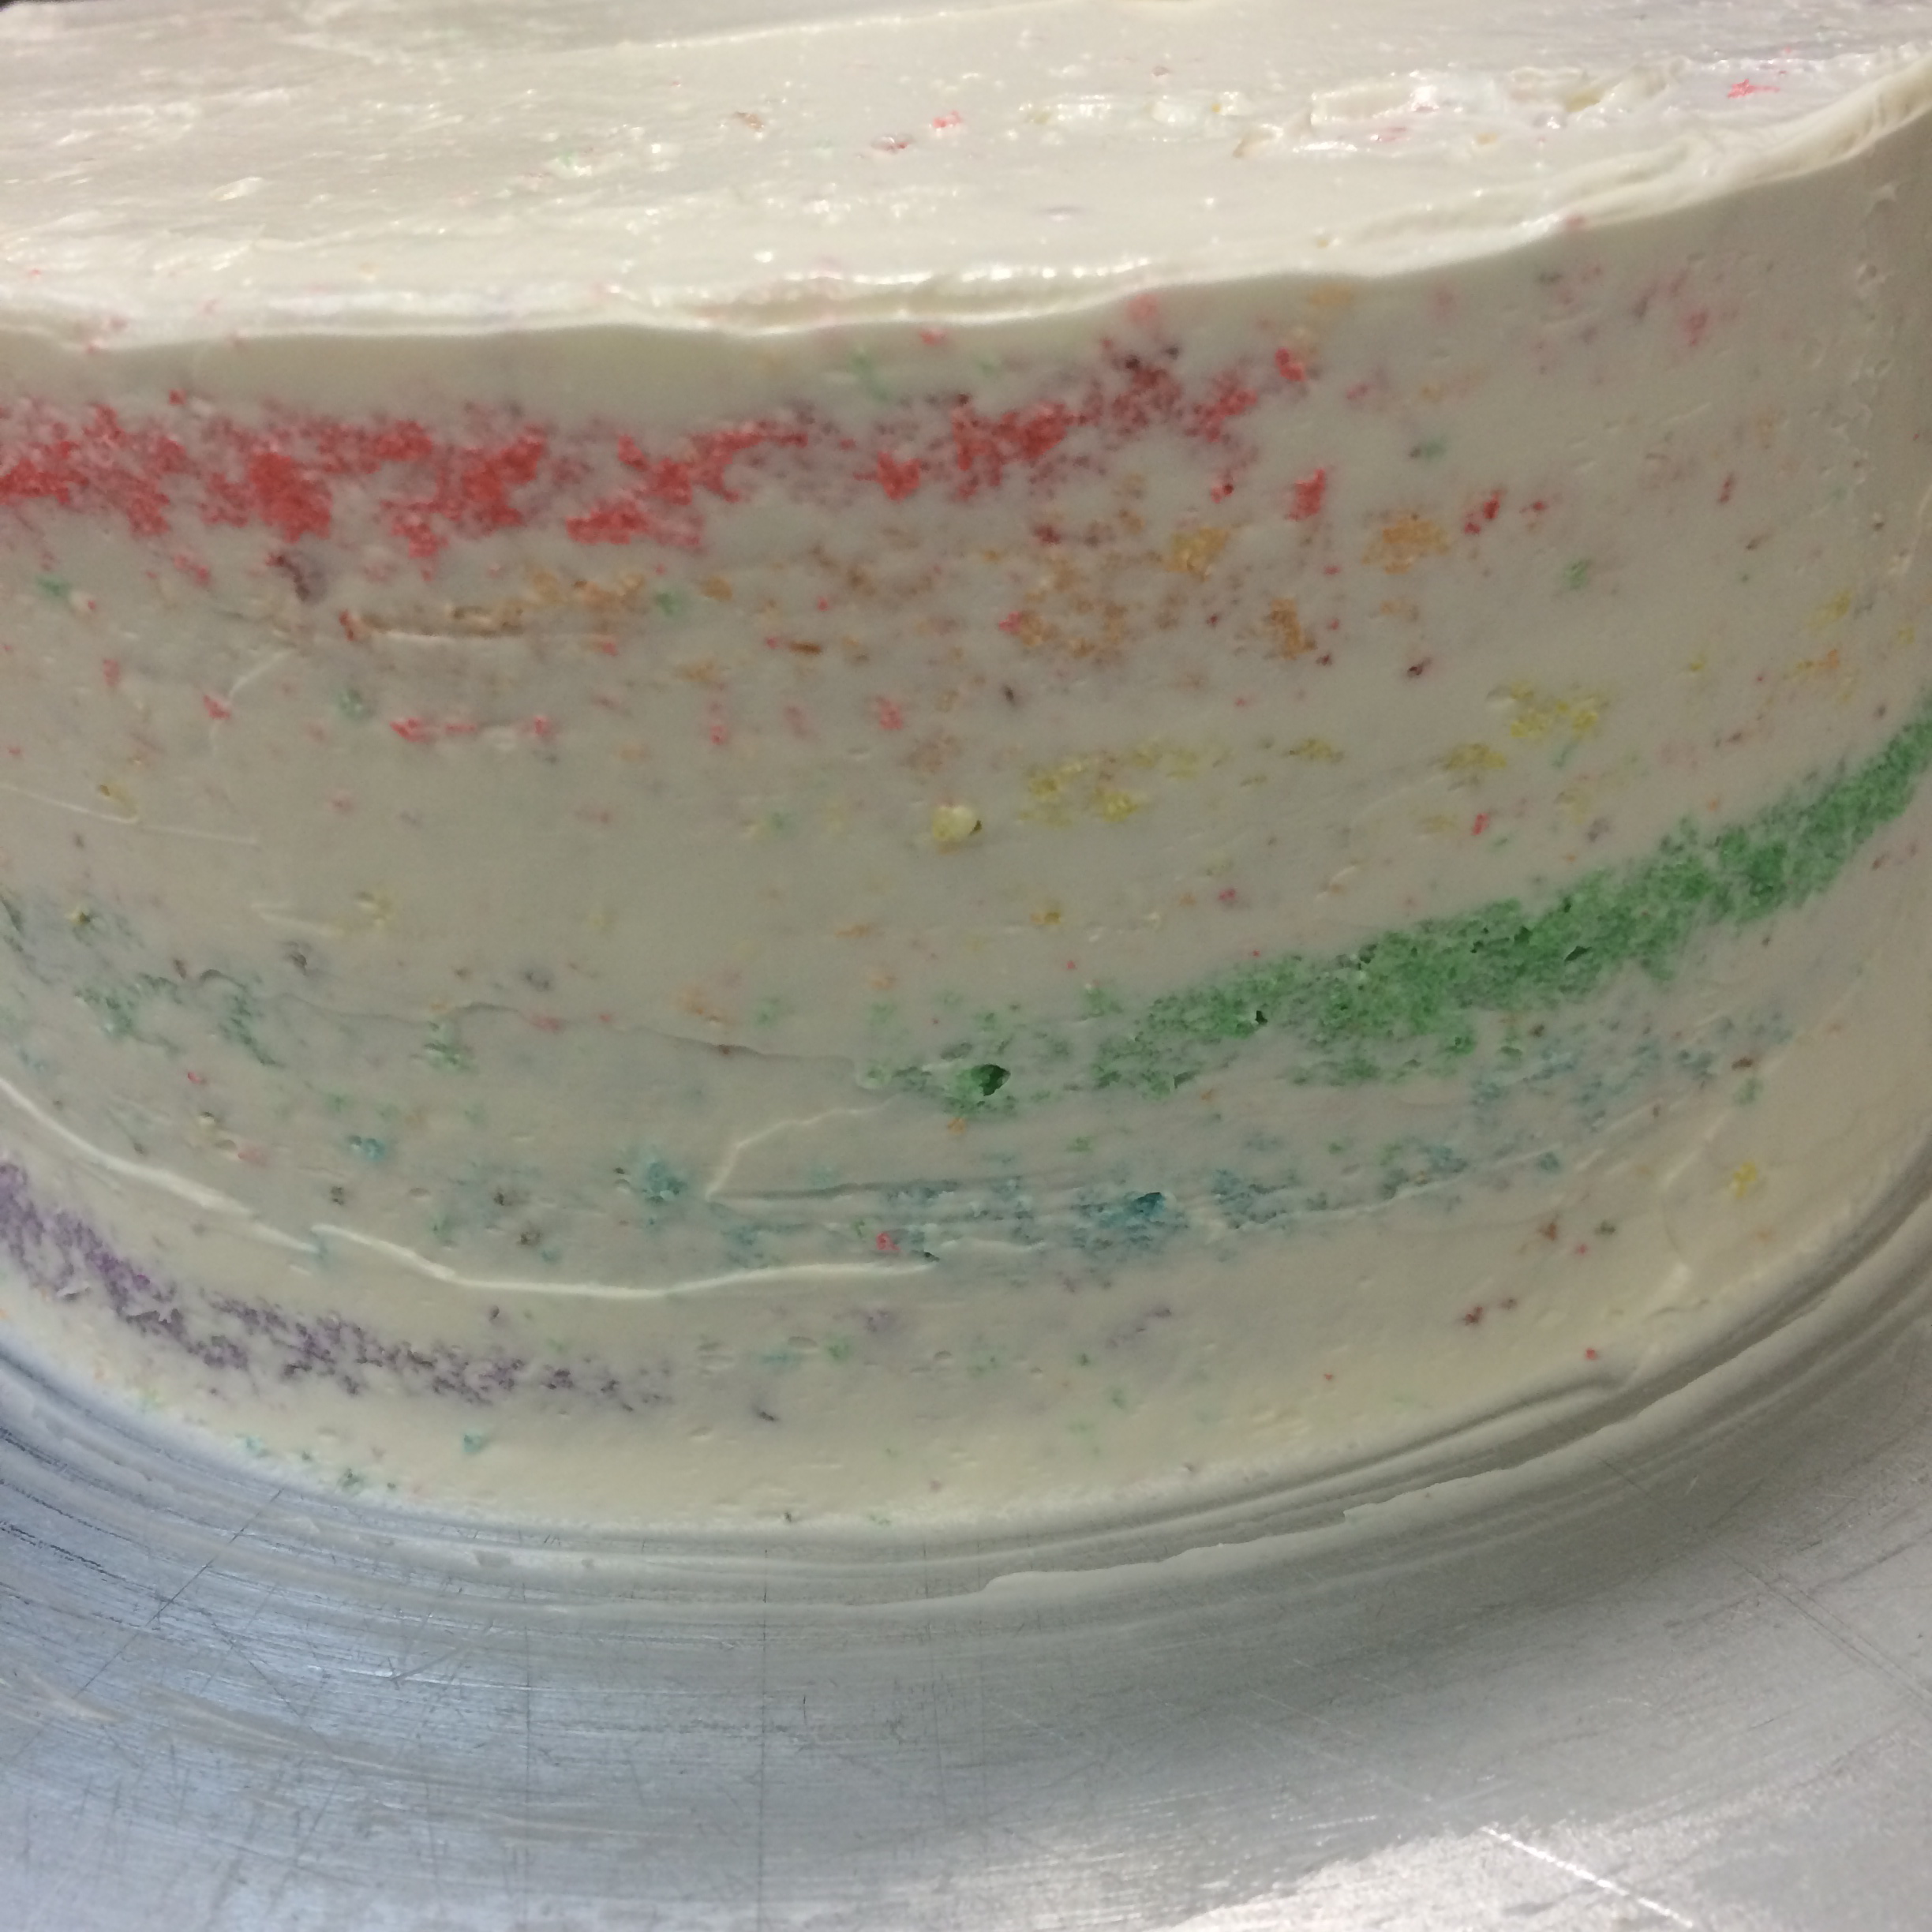
I think cakes look quite pretty just like this, sort of naked.
I finally made a pinterest-idea cake.
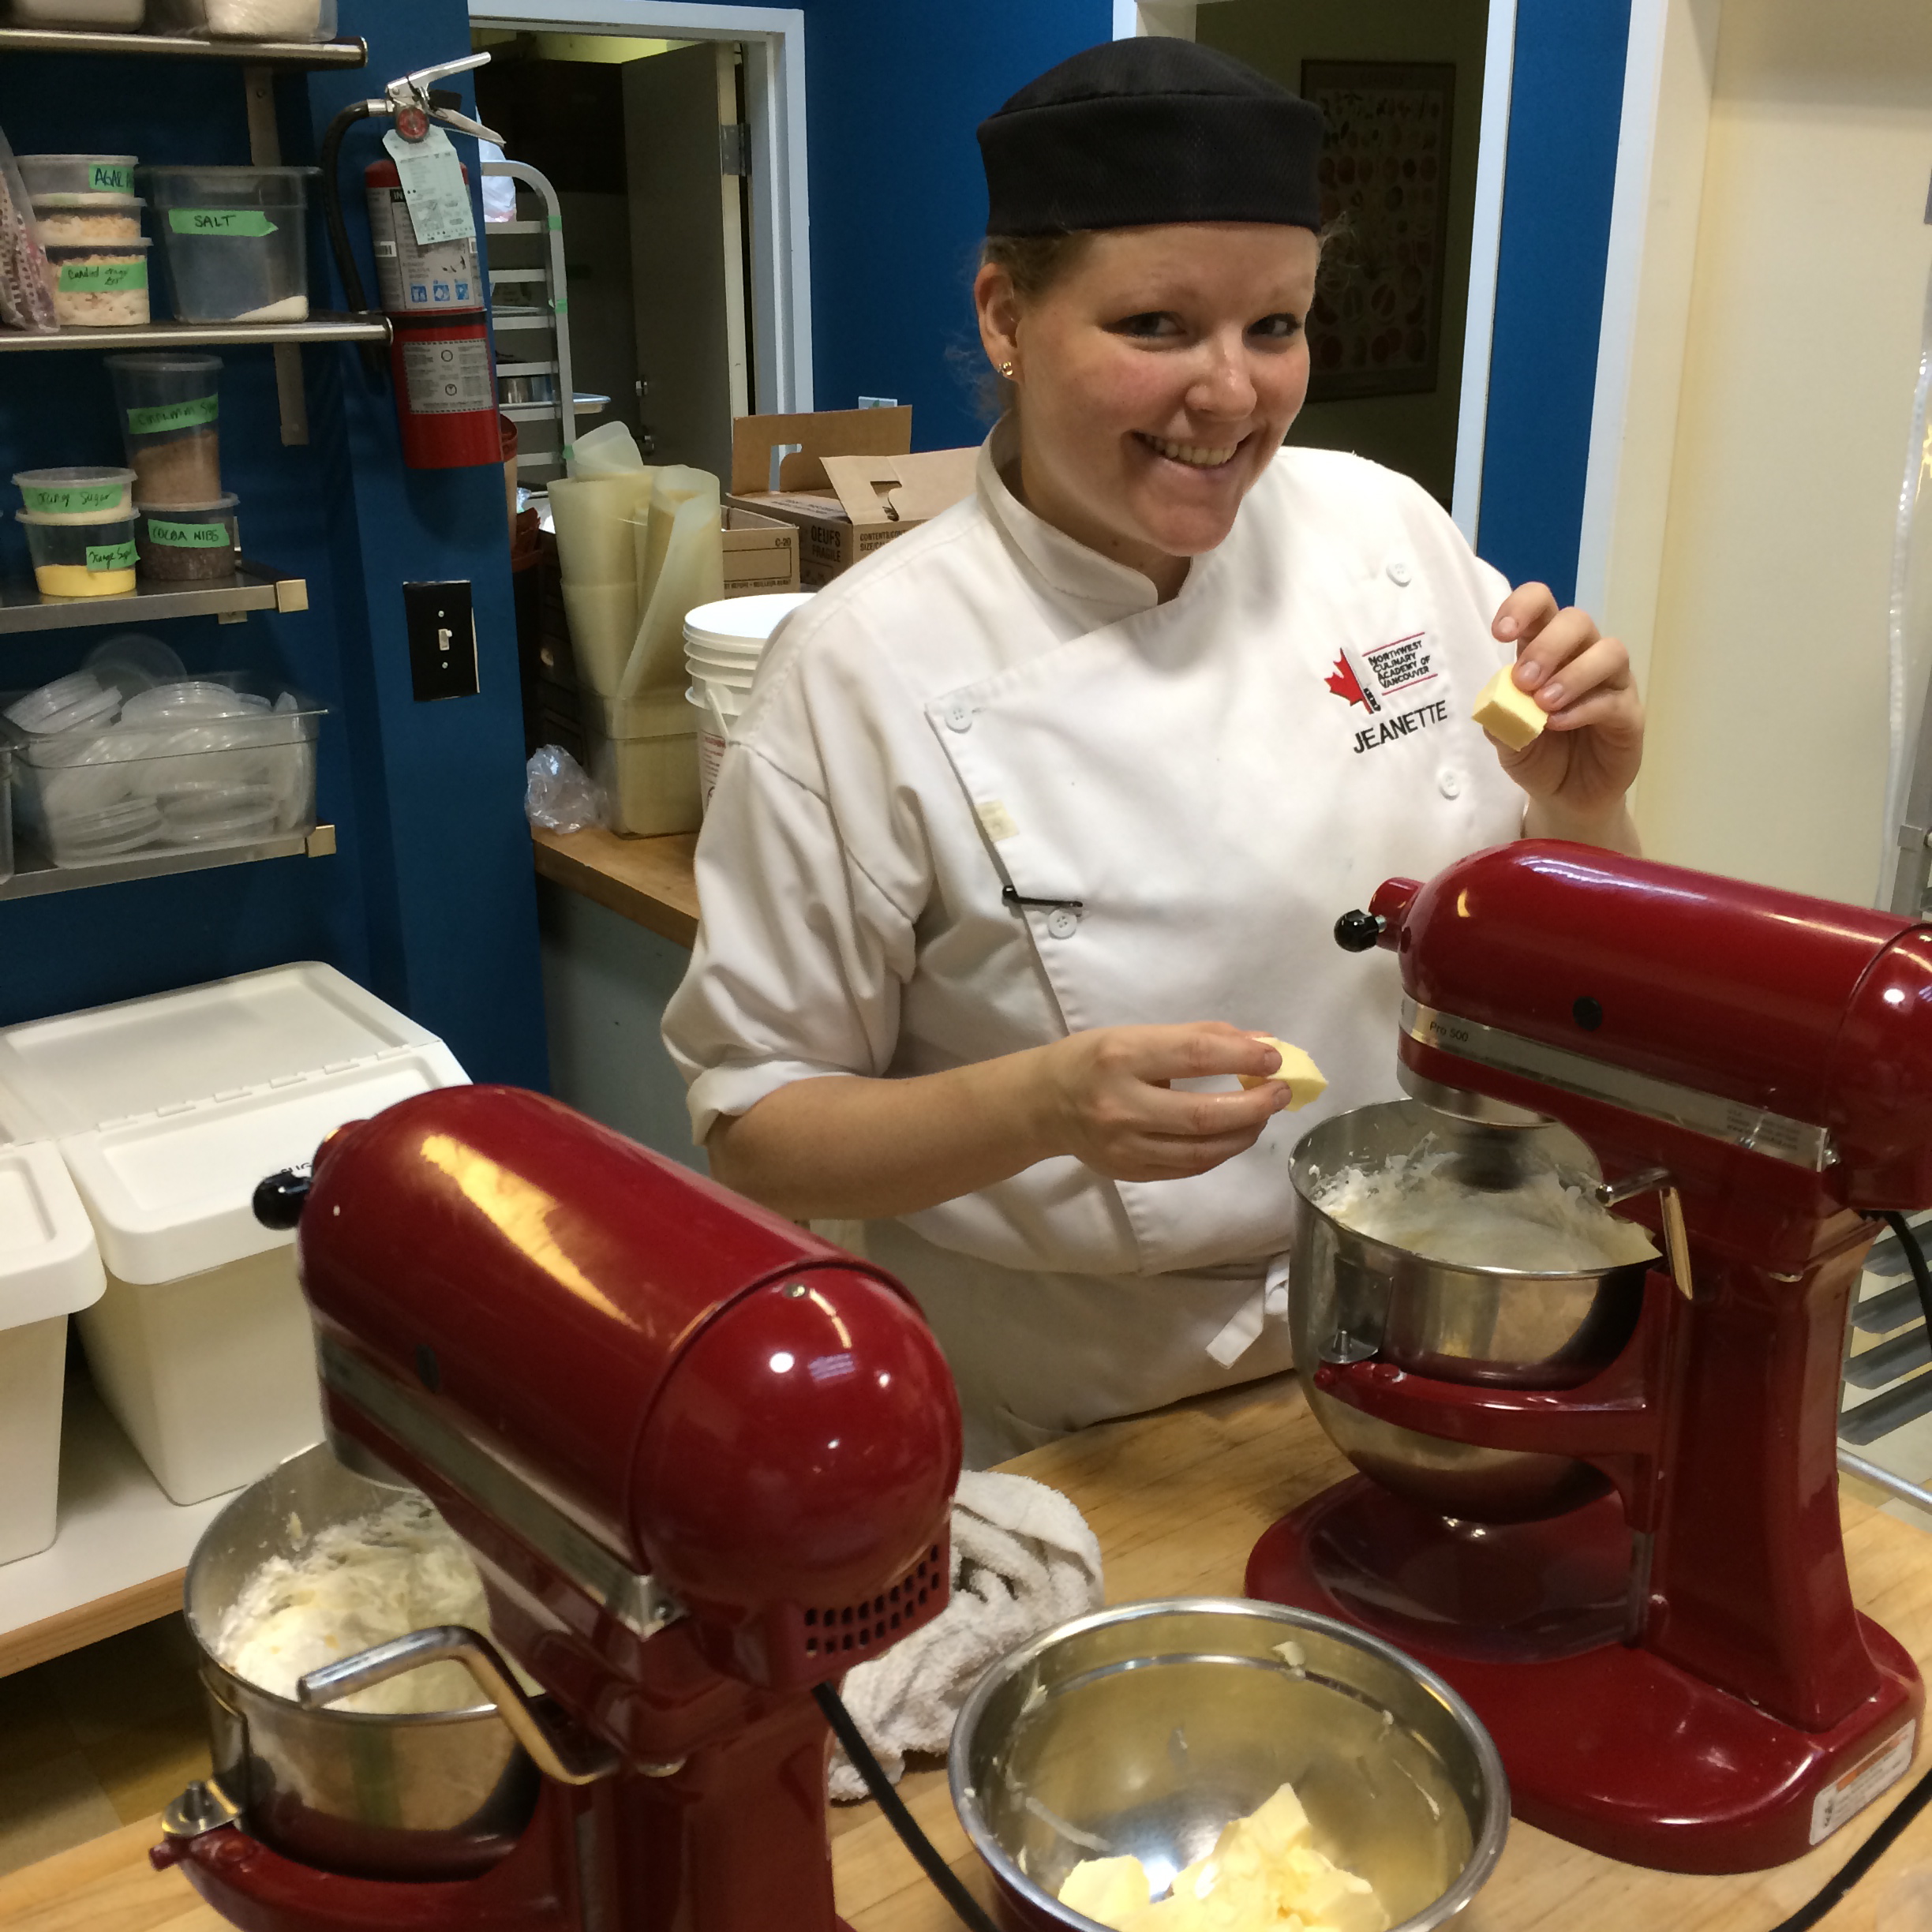
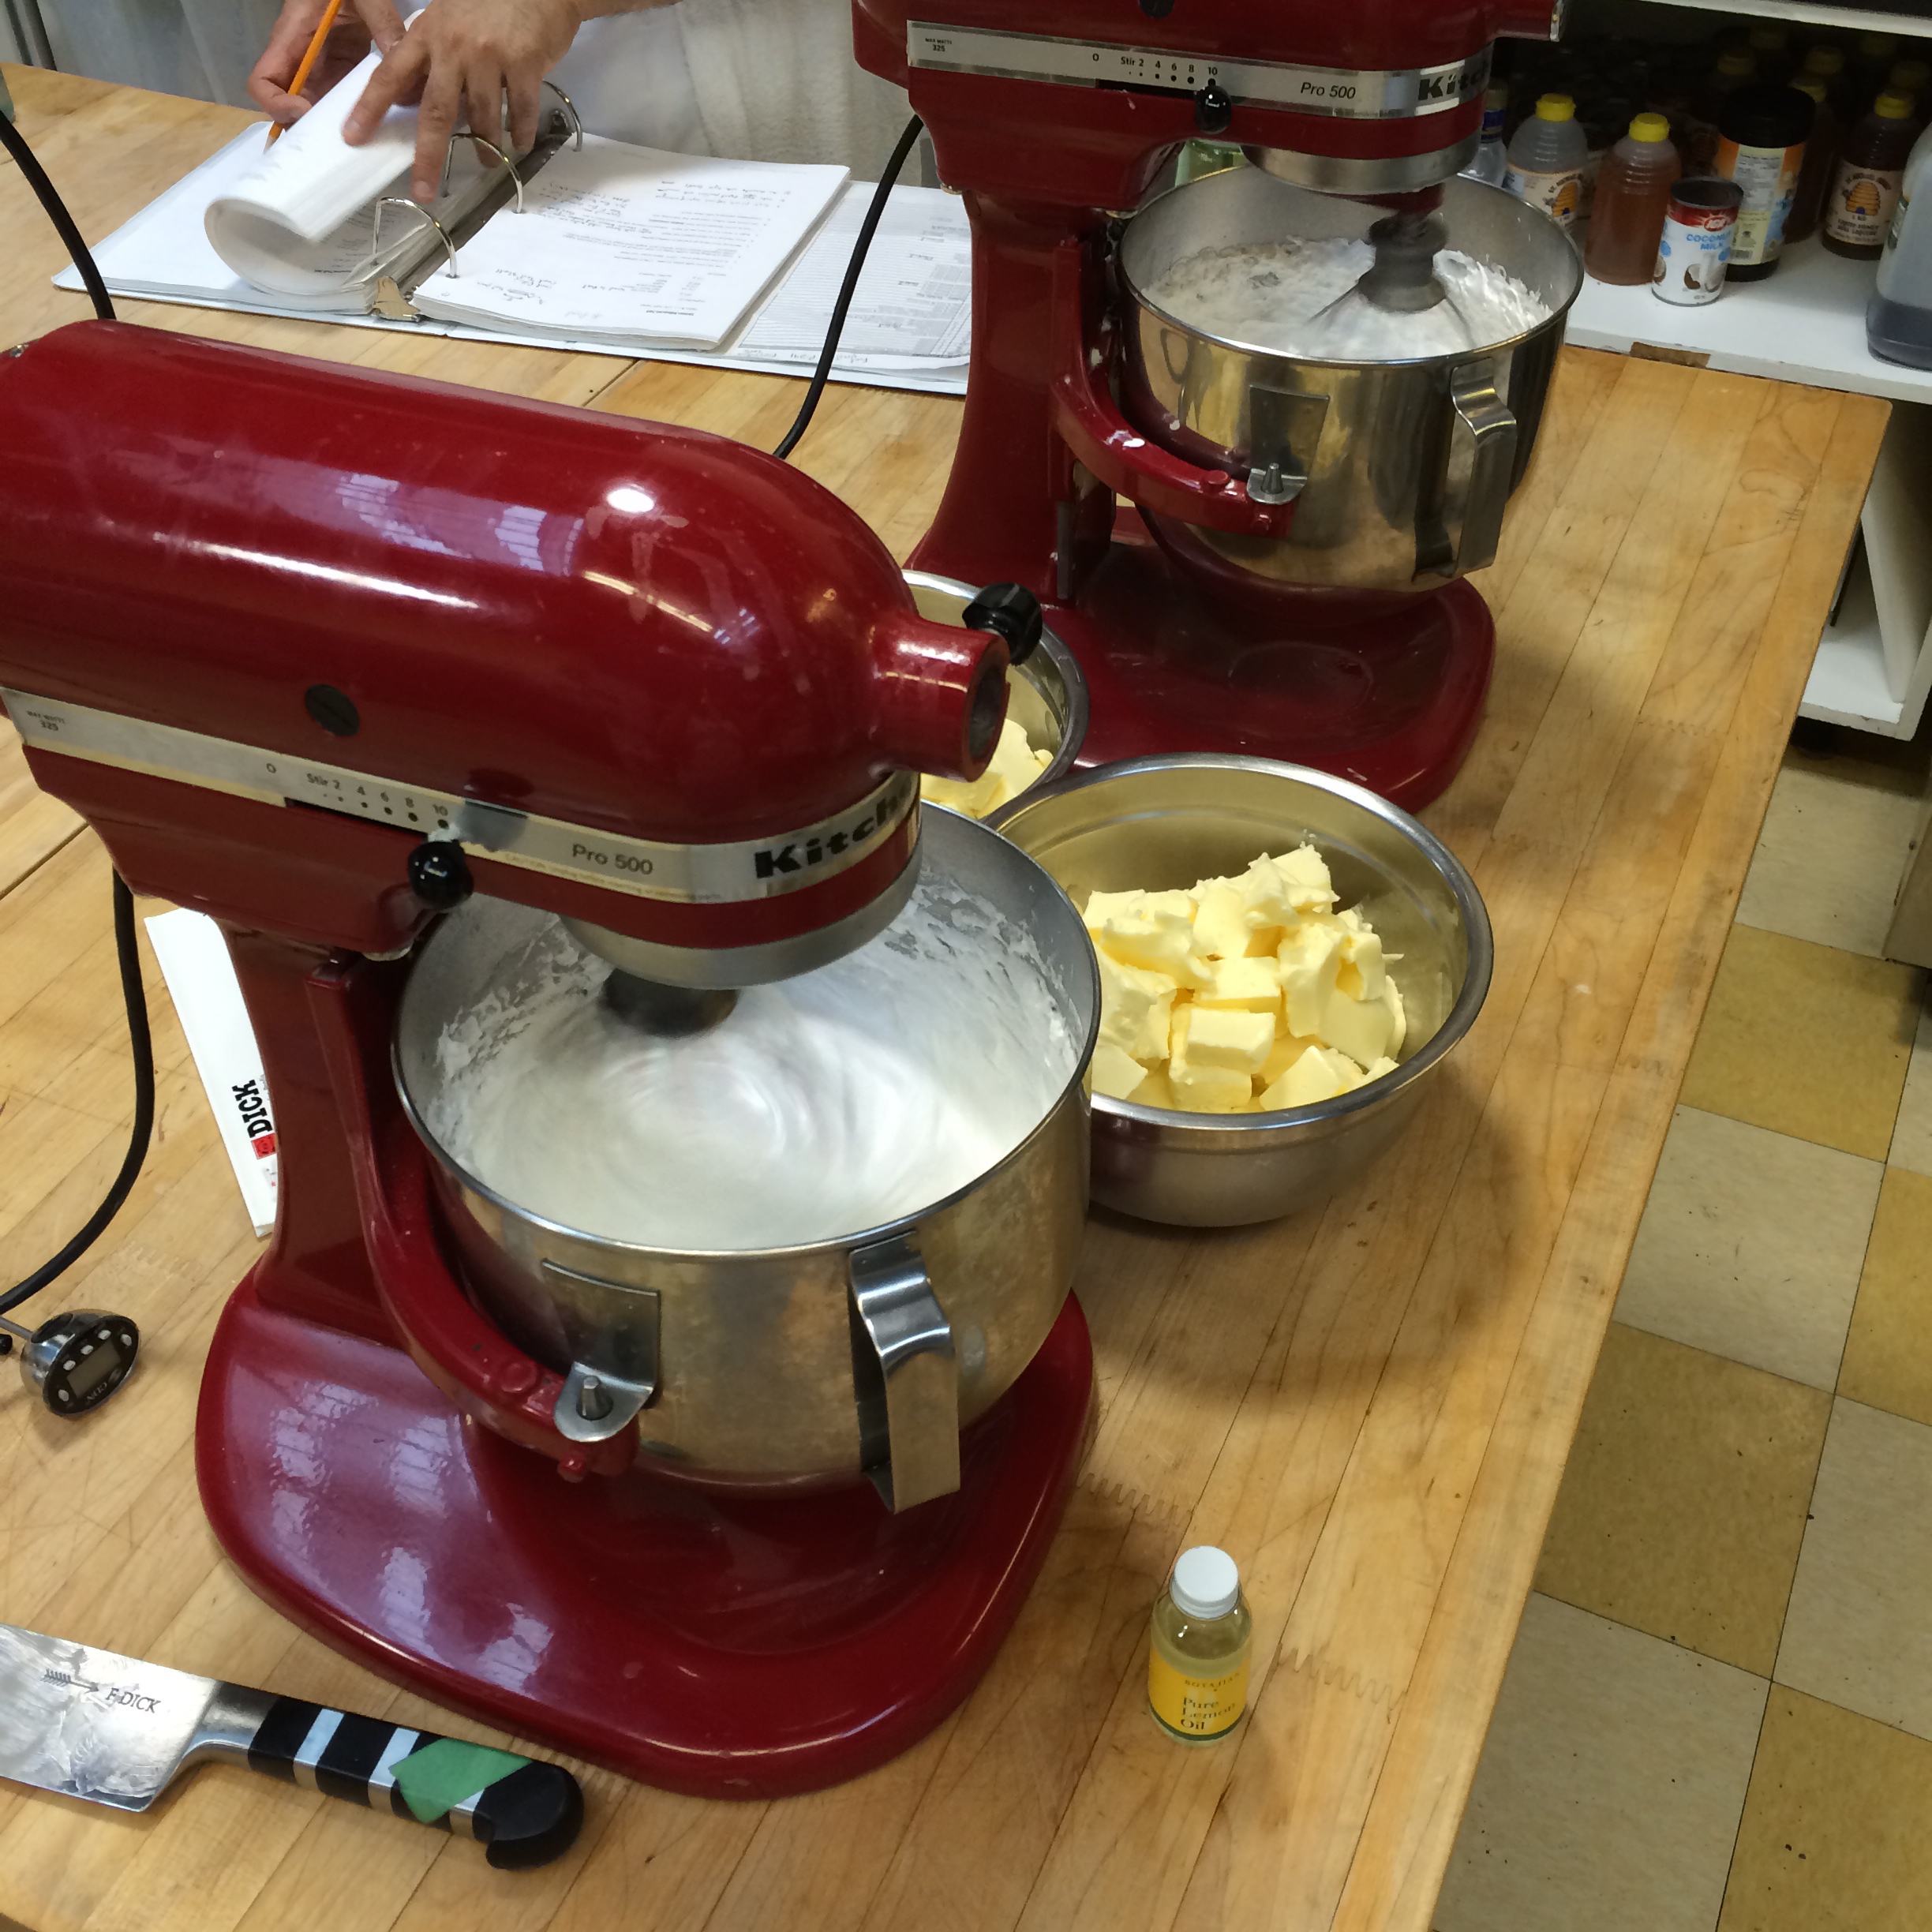
We weren’t able to use the larger mixer so I had to make a double batch of lemon italian buttercream in two mixers at the same time. Boiling sugar is poured into the icing, later followed by butterr…
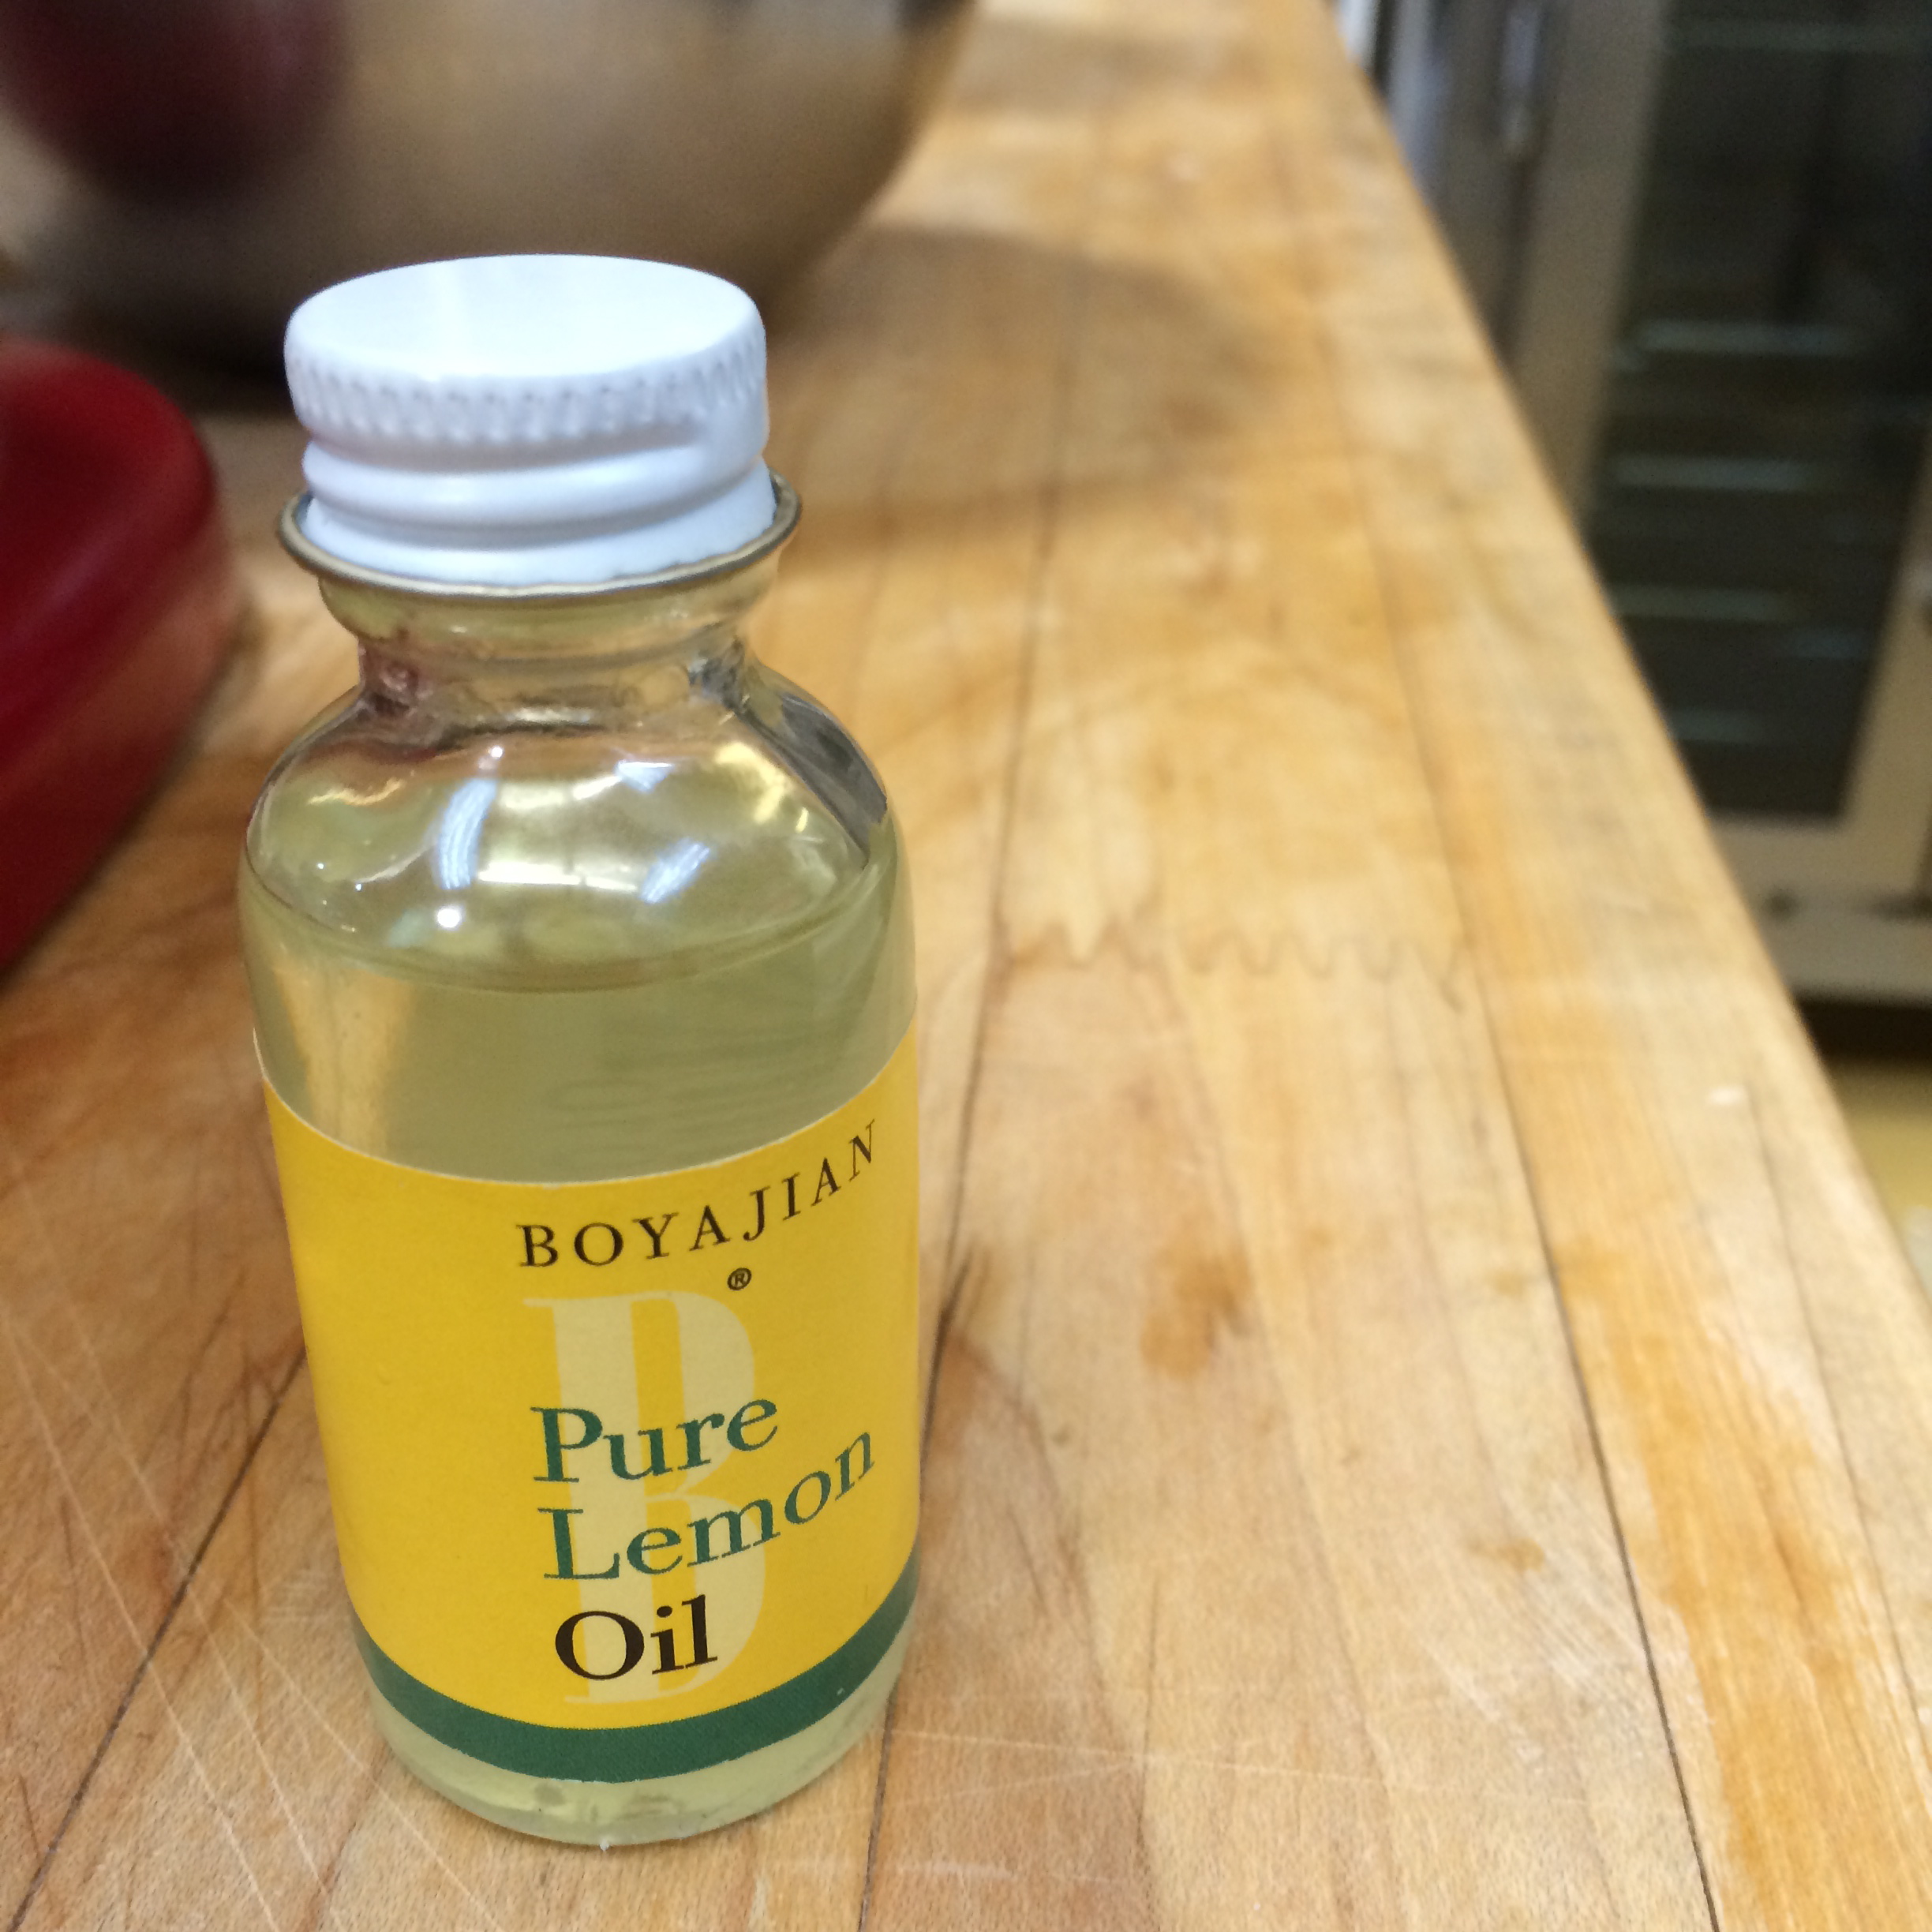
Intense lemony flavour….
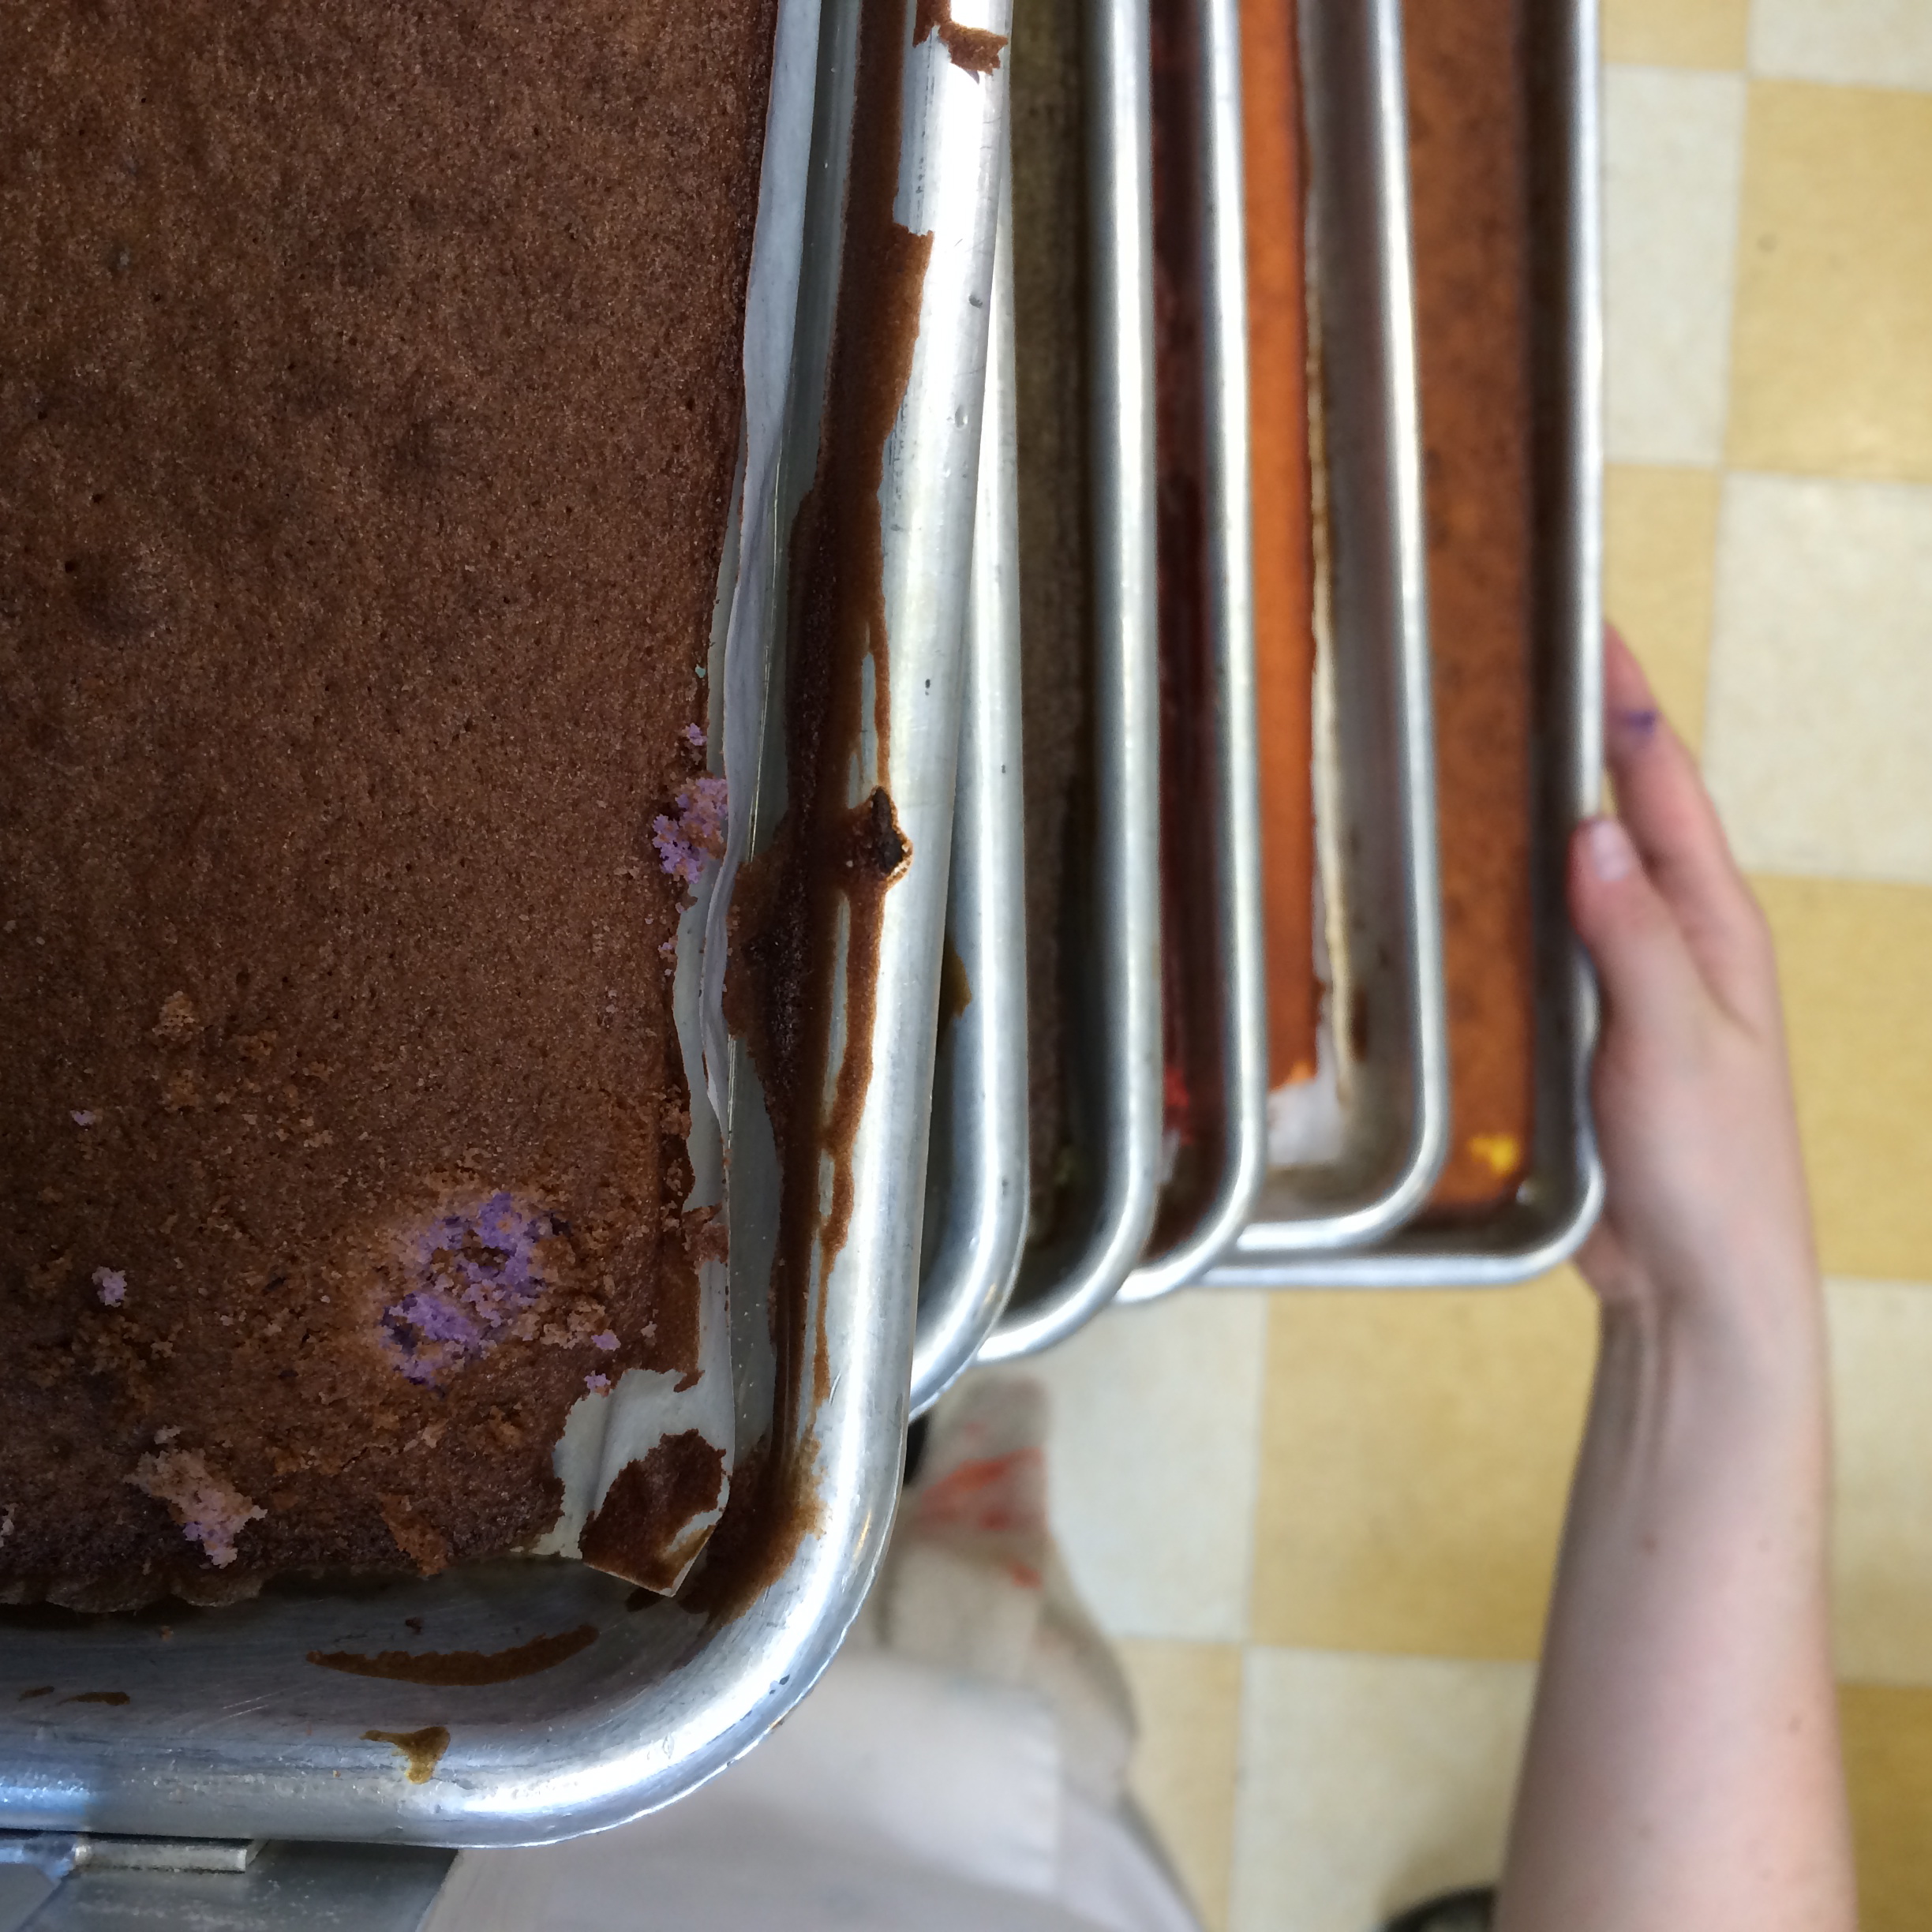
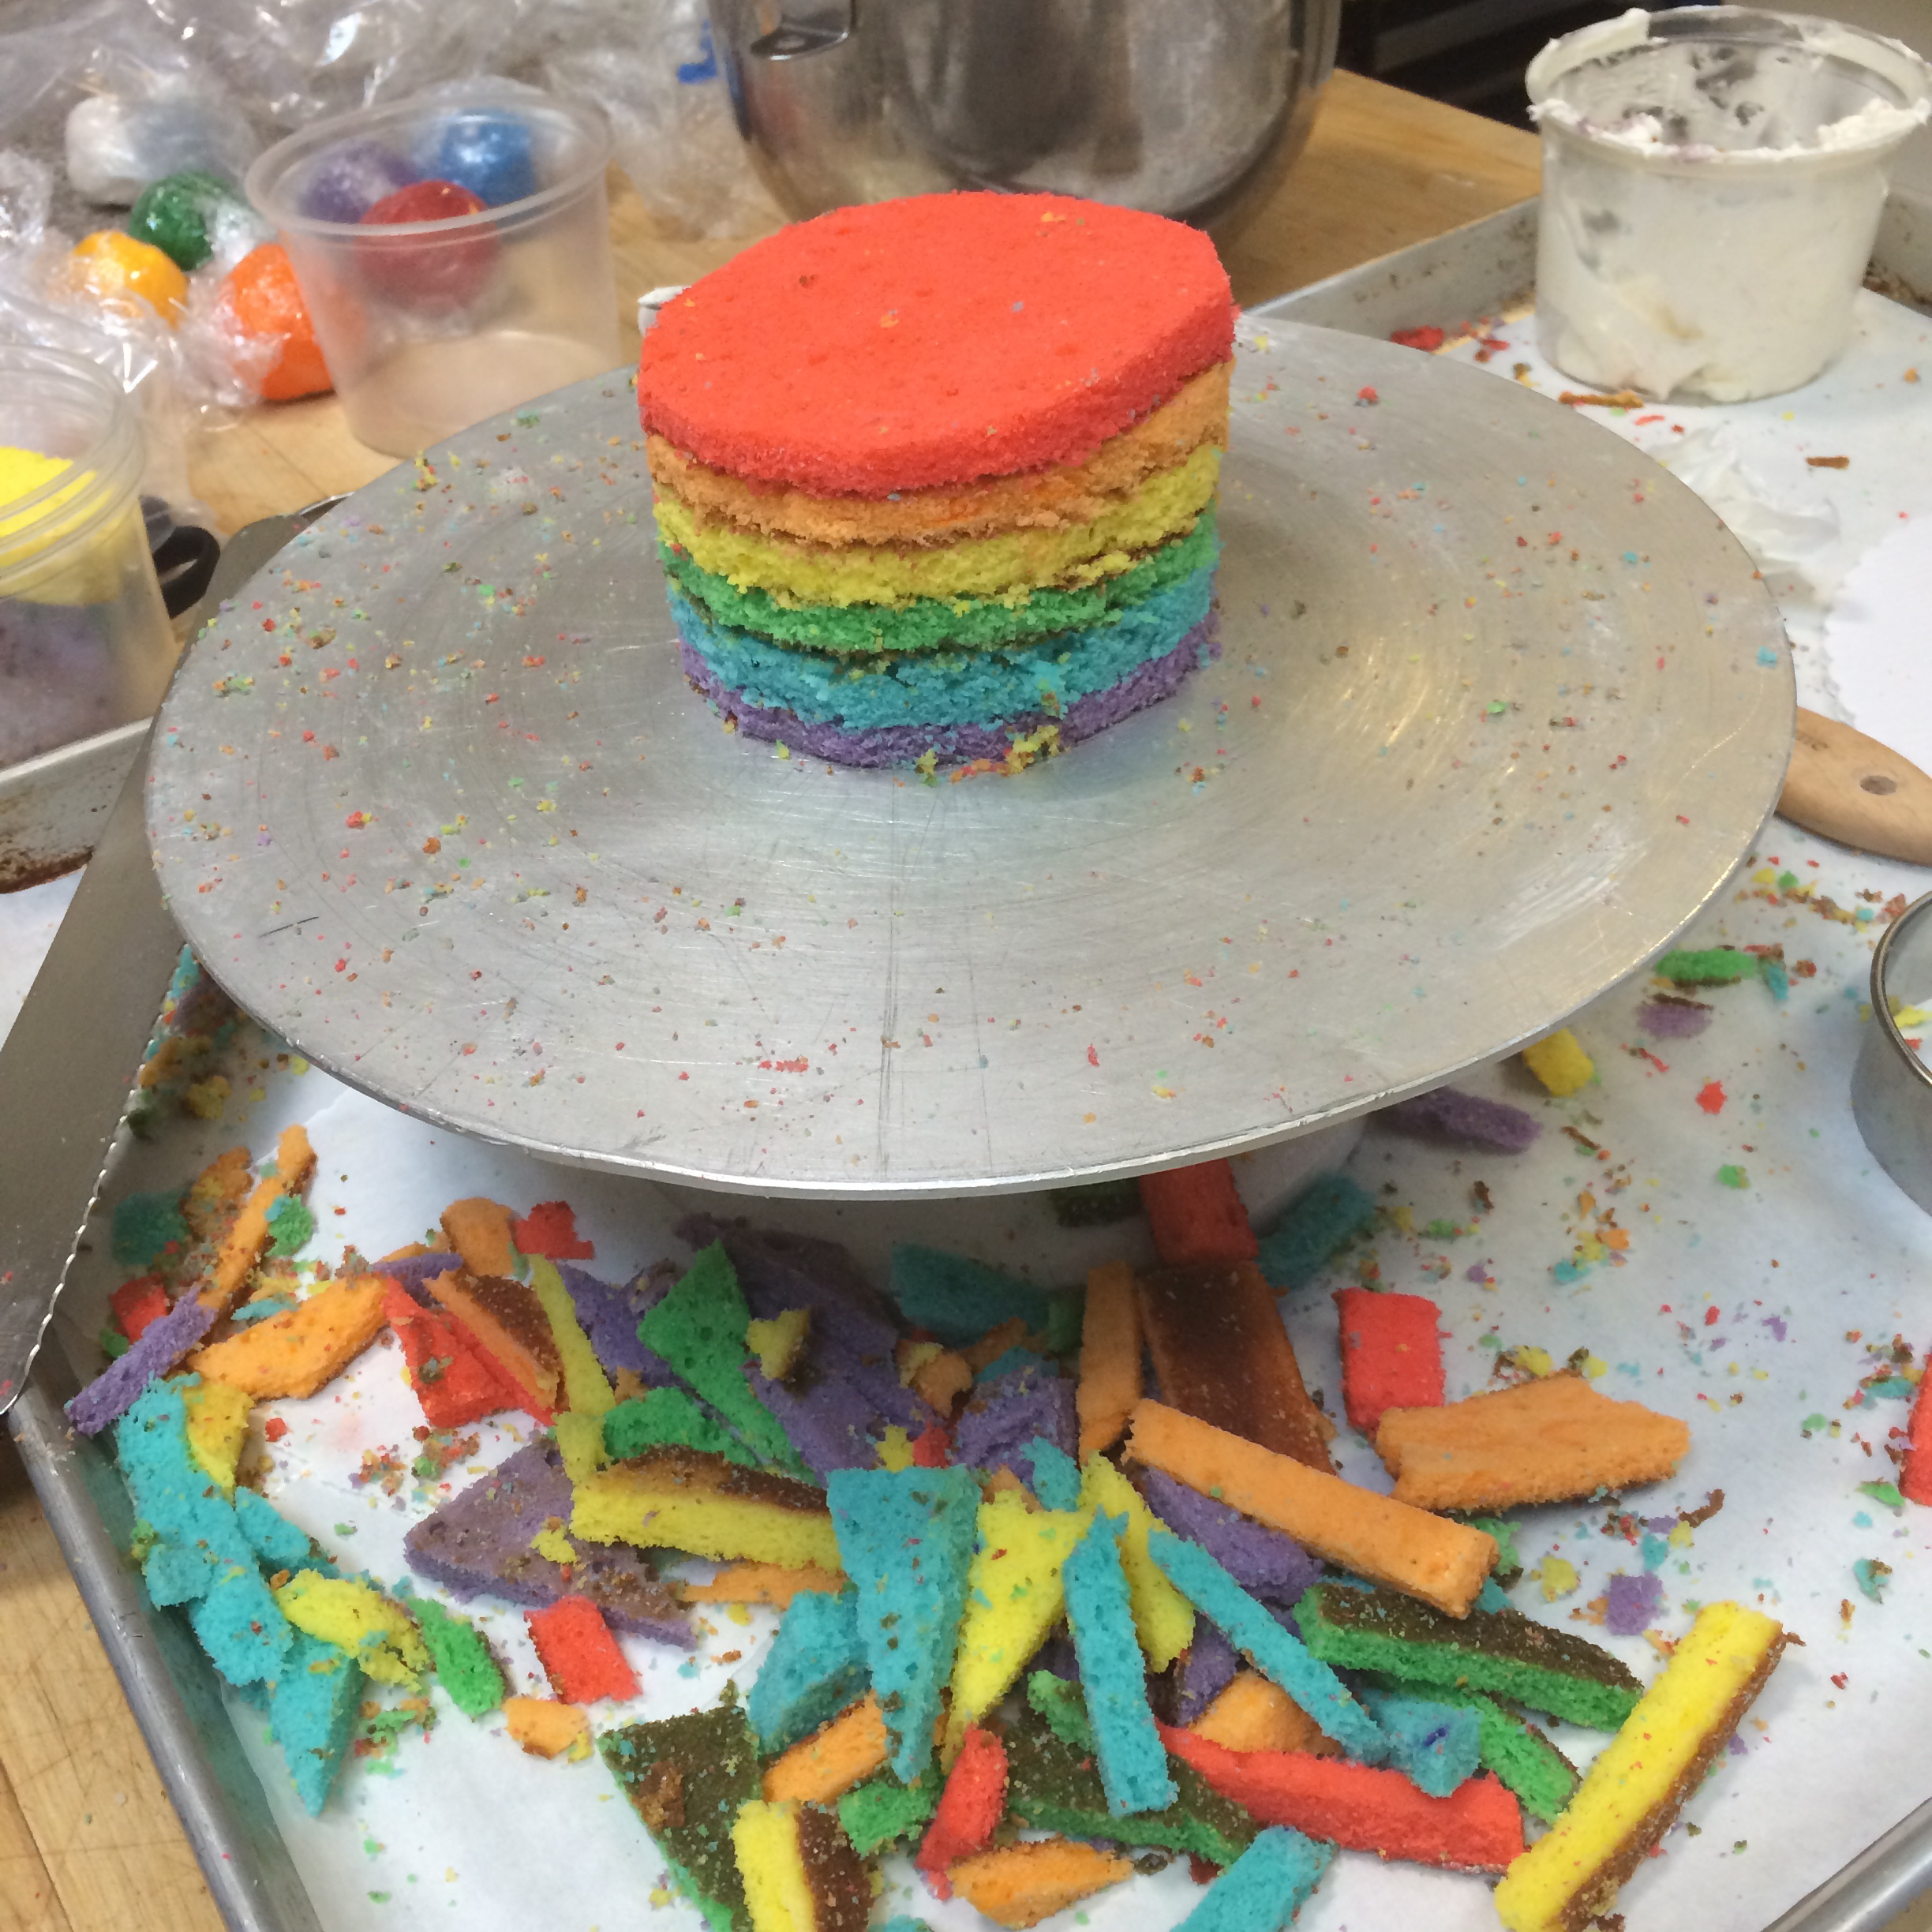
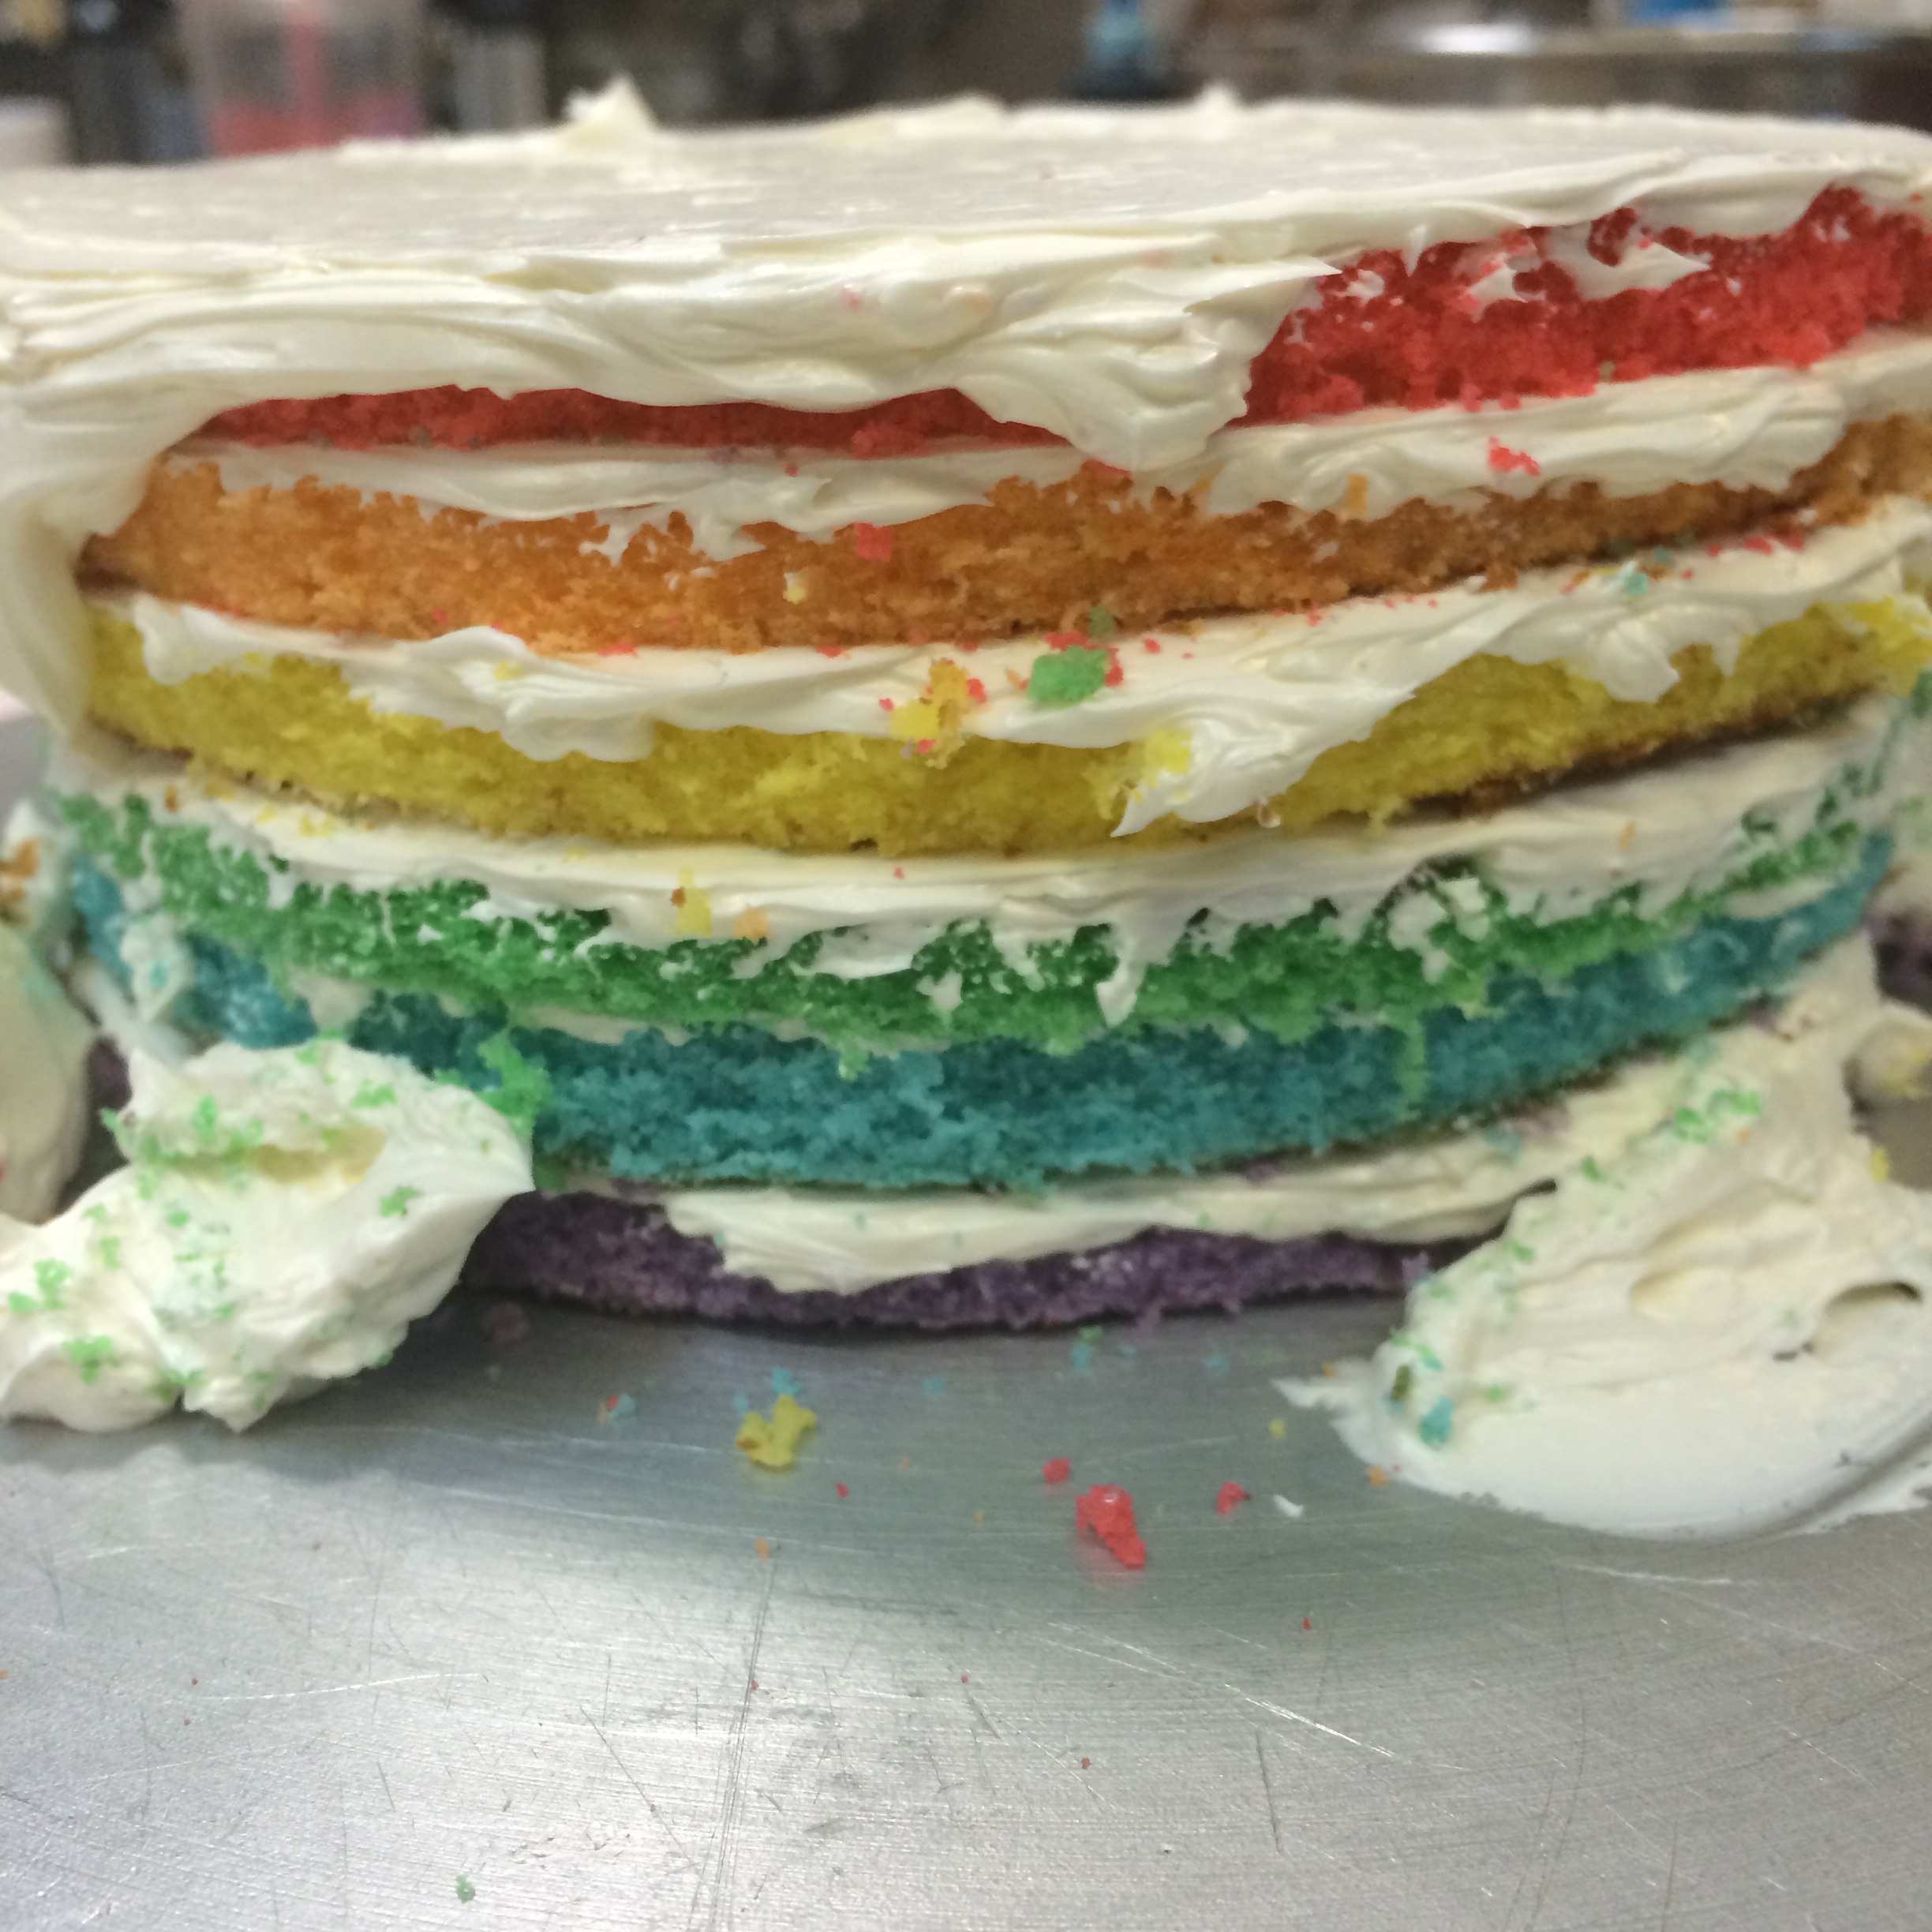
All the cake layers are ready to be cut to size, I baked A LOT of cake on the first day.
Green and yellow baked at the same time. I made two colours each round, and baked 6-trays of cake. This ended up being way too much cake. Easily made enough cake to make a 6-tier cake.
Making the lemon pound cake.
My sketch of the original concept and the final product. Pretty close! We changed our minds a bit as the cake developed.
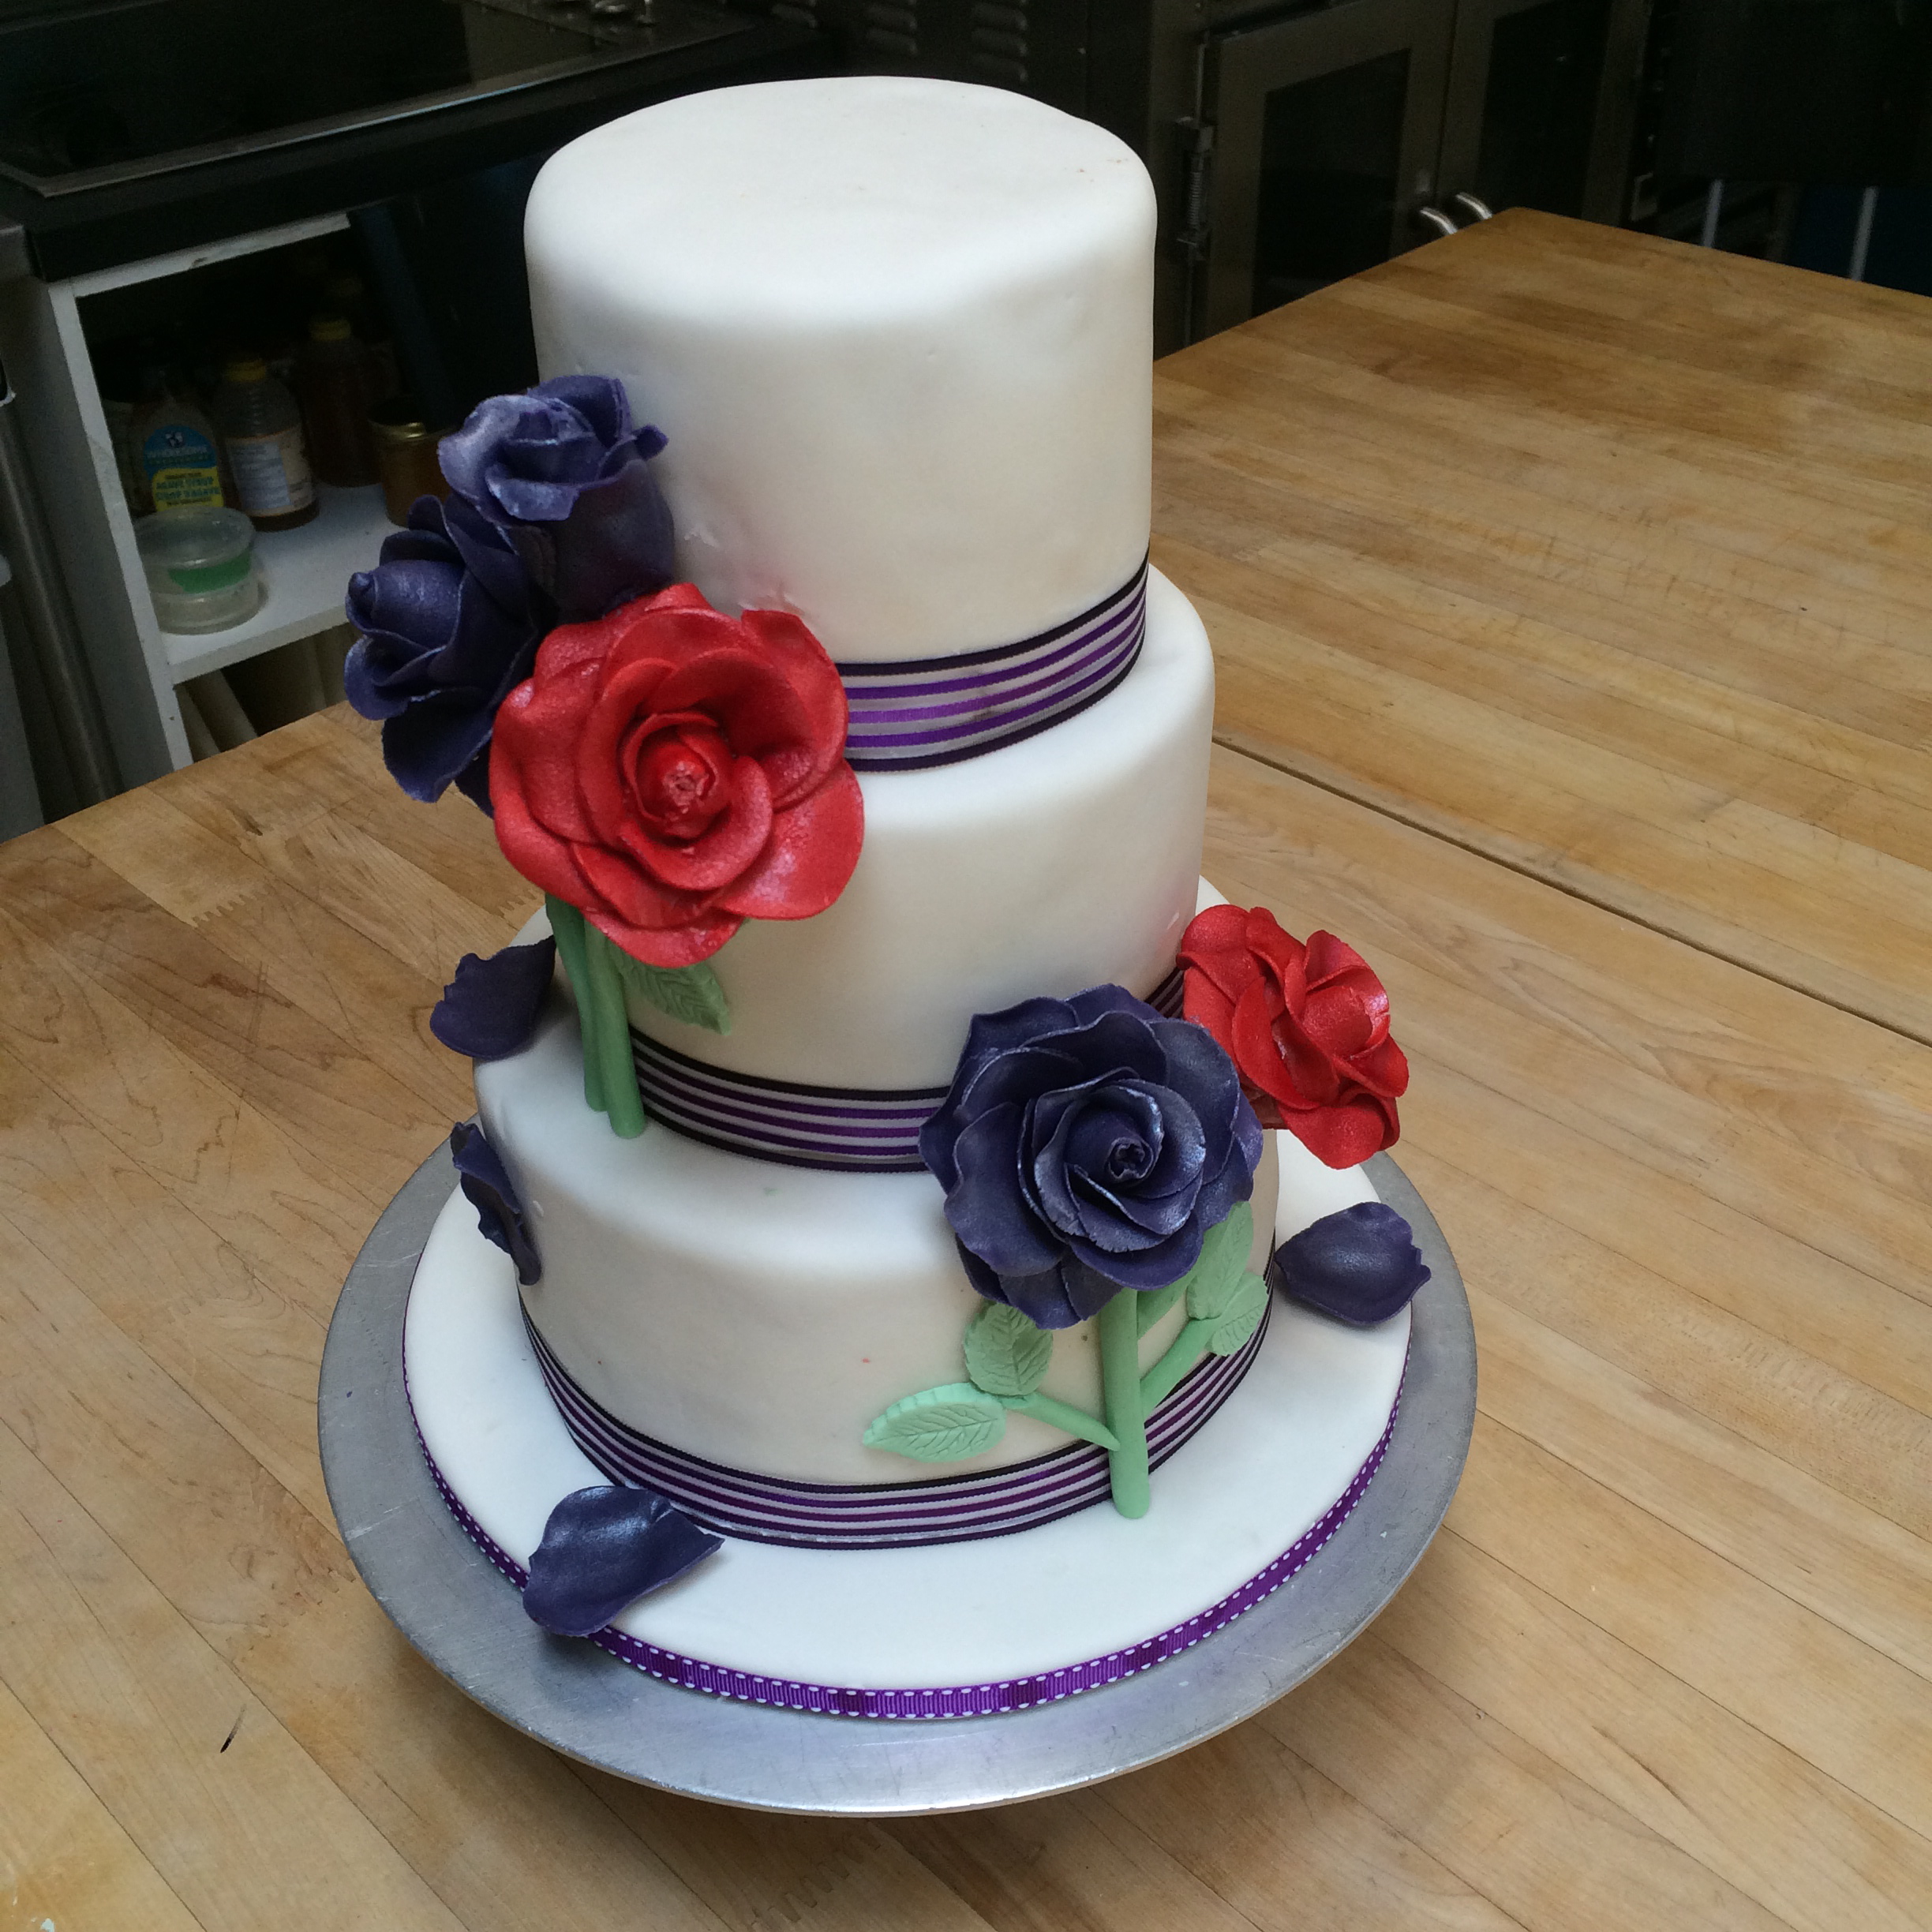
One of the teams made a romantic floral cake. I loved how their flowers turned out.
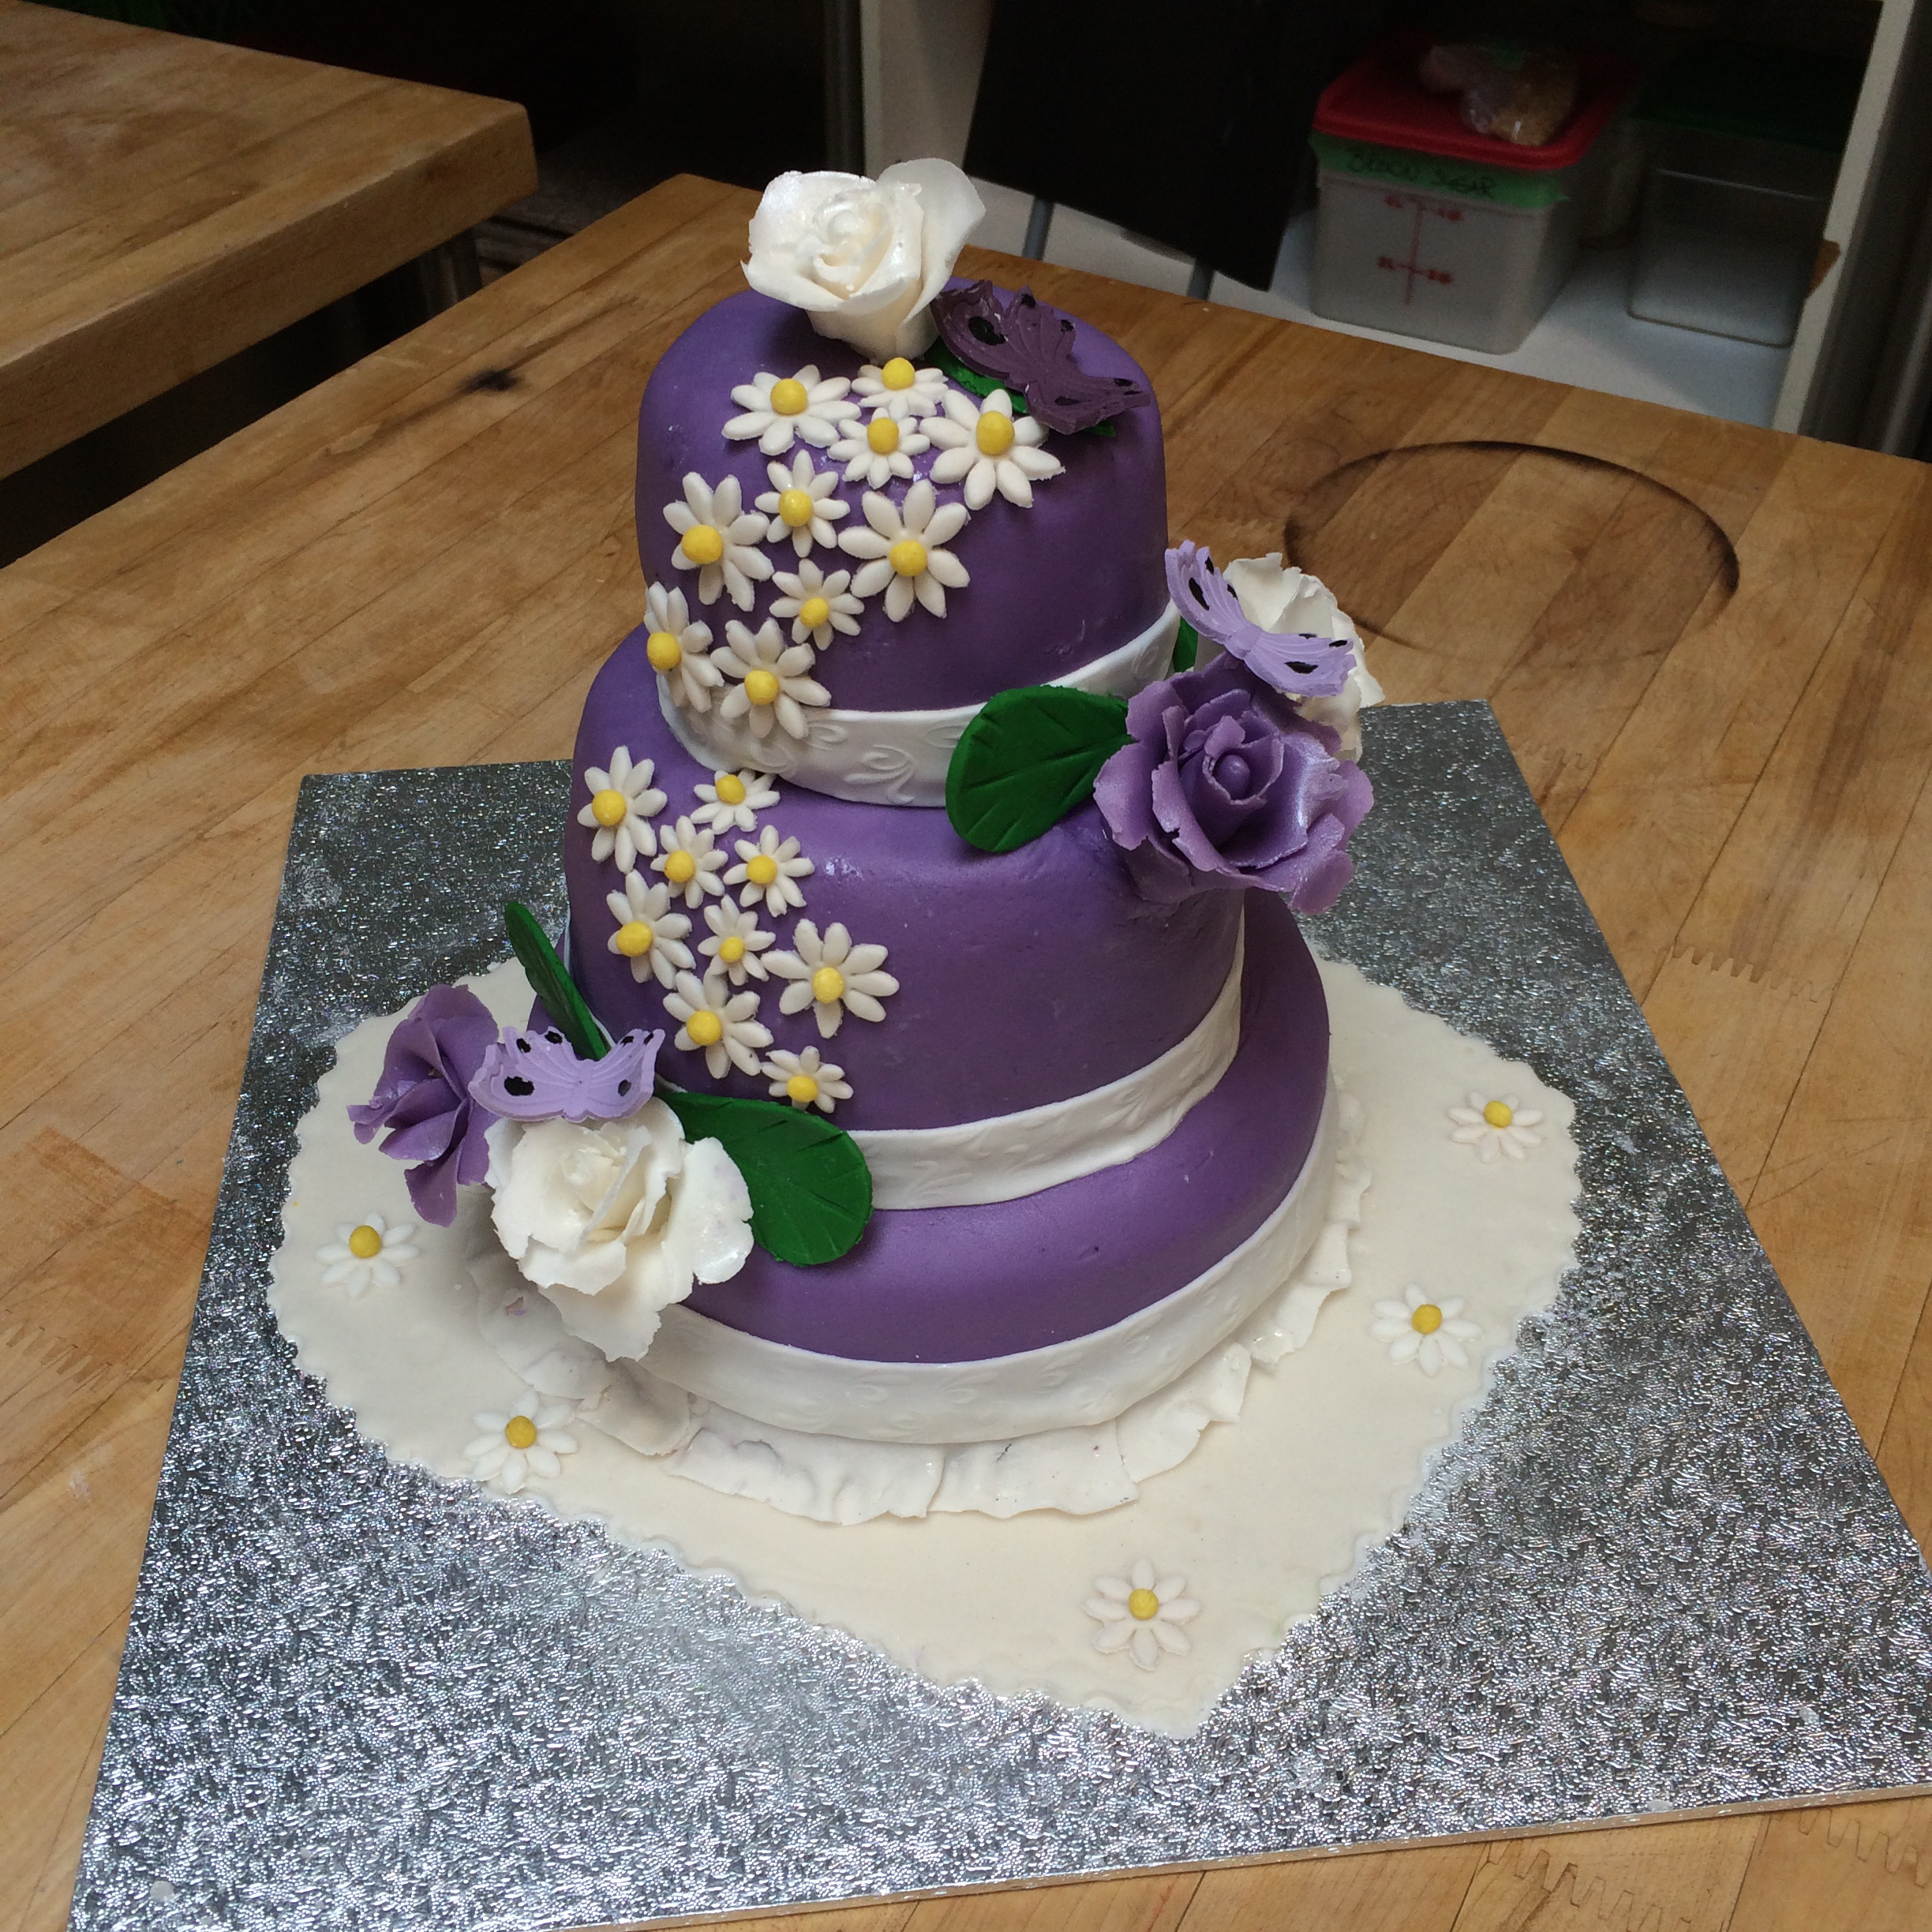
Another team made this cool purple floral cake.
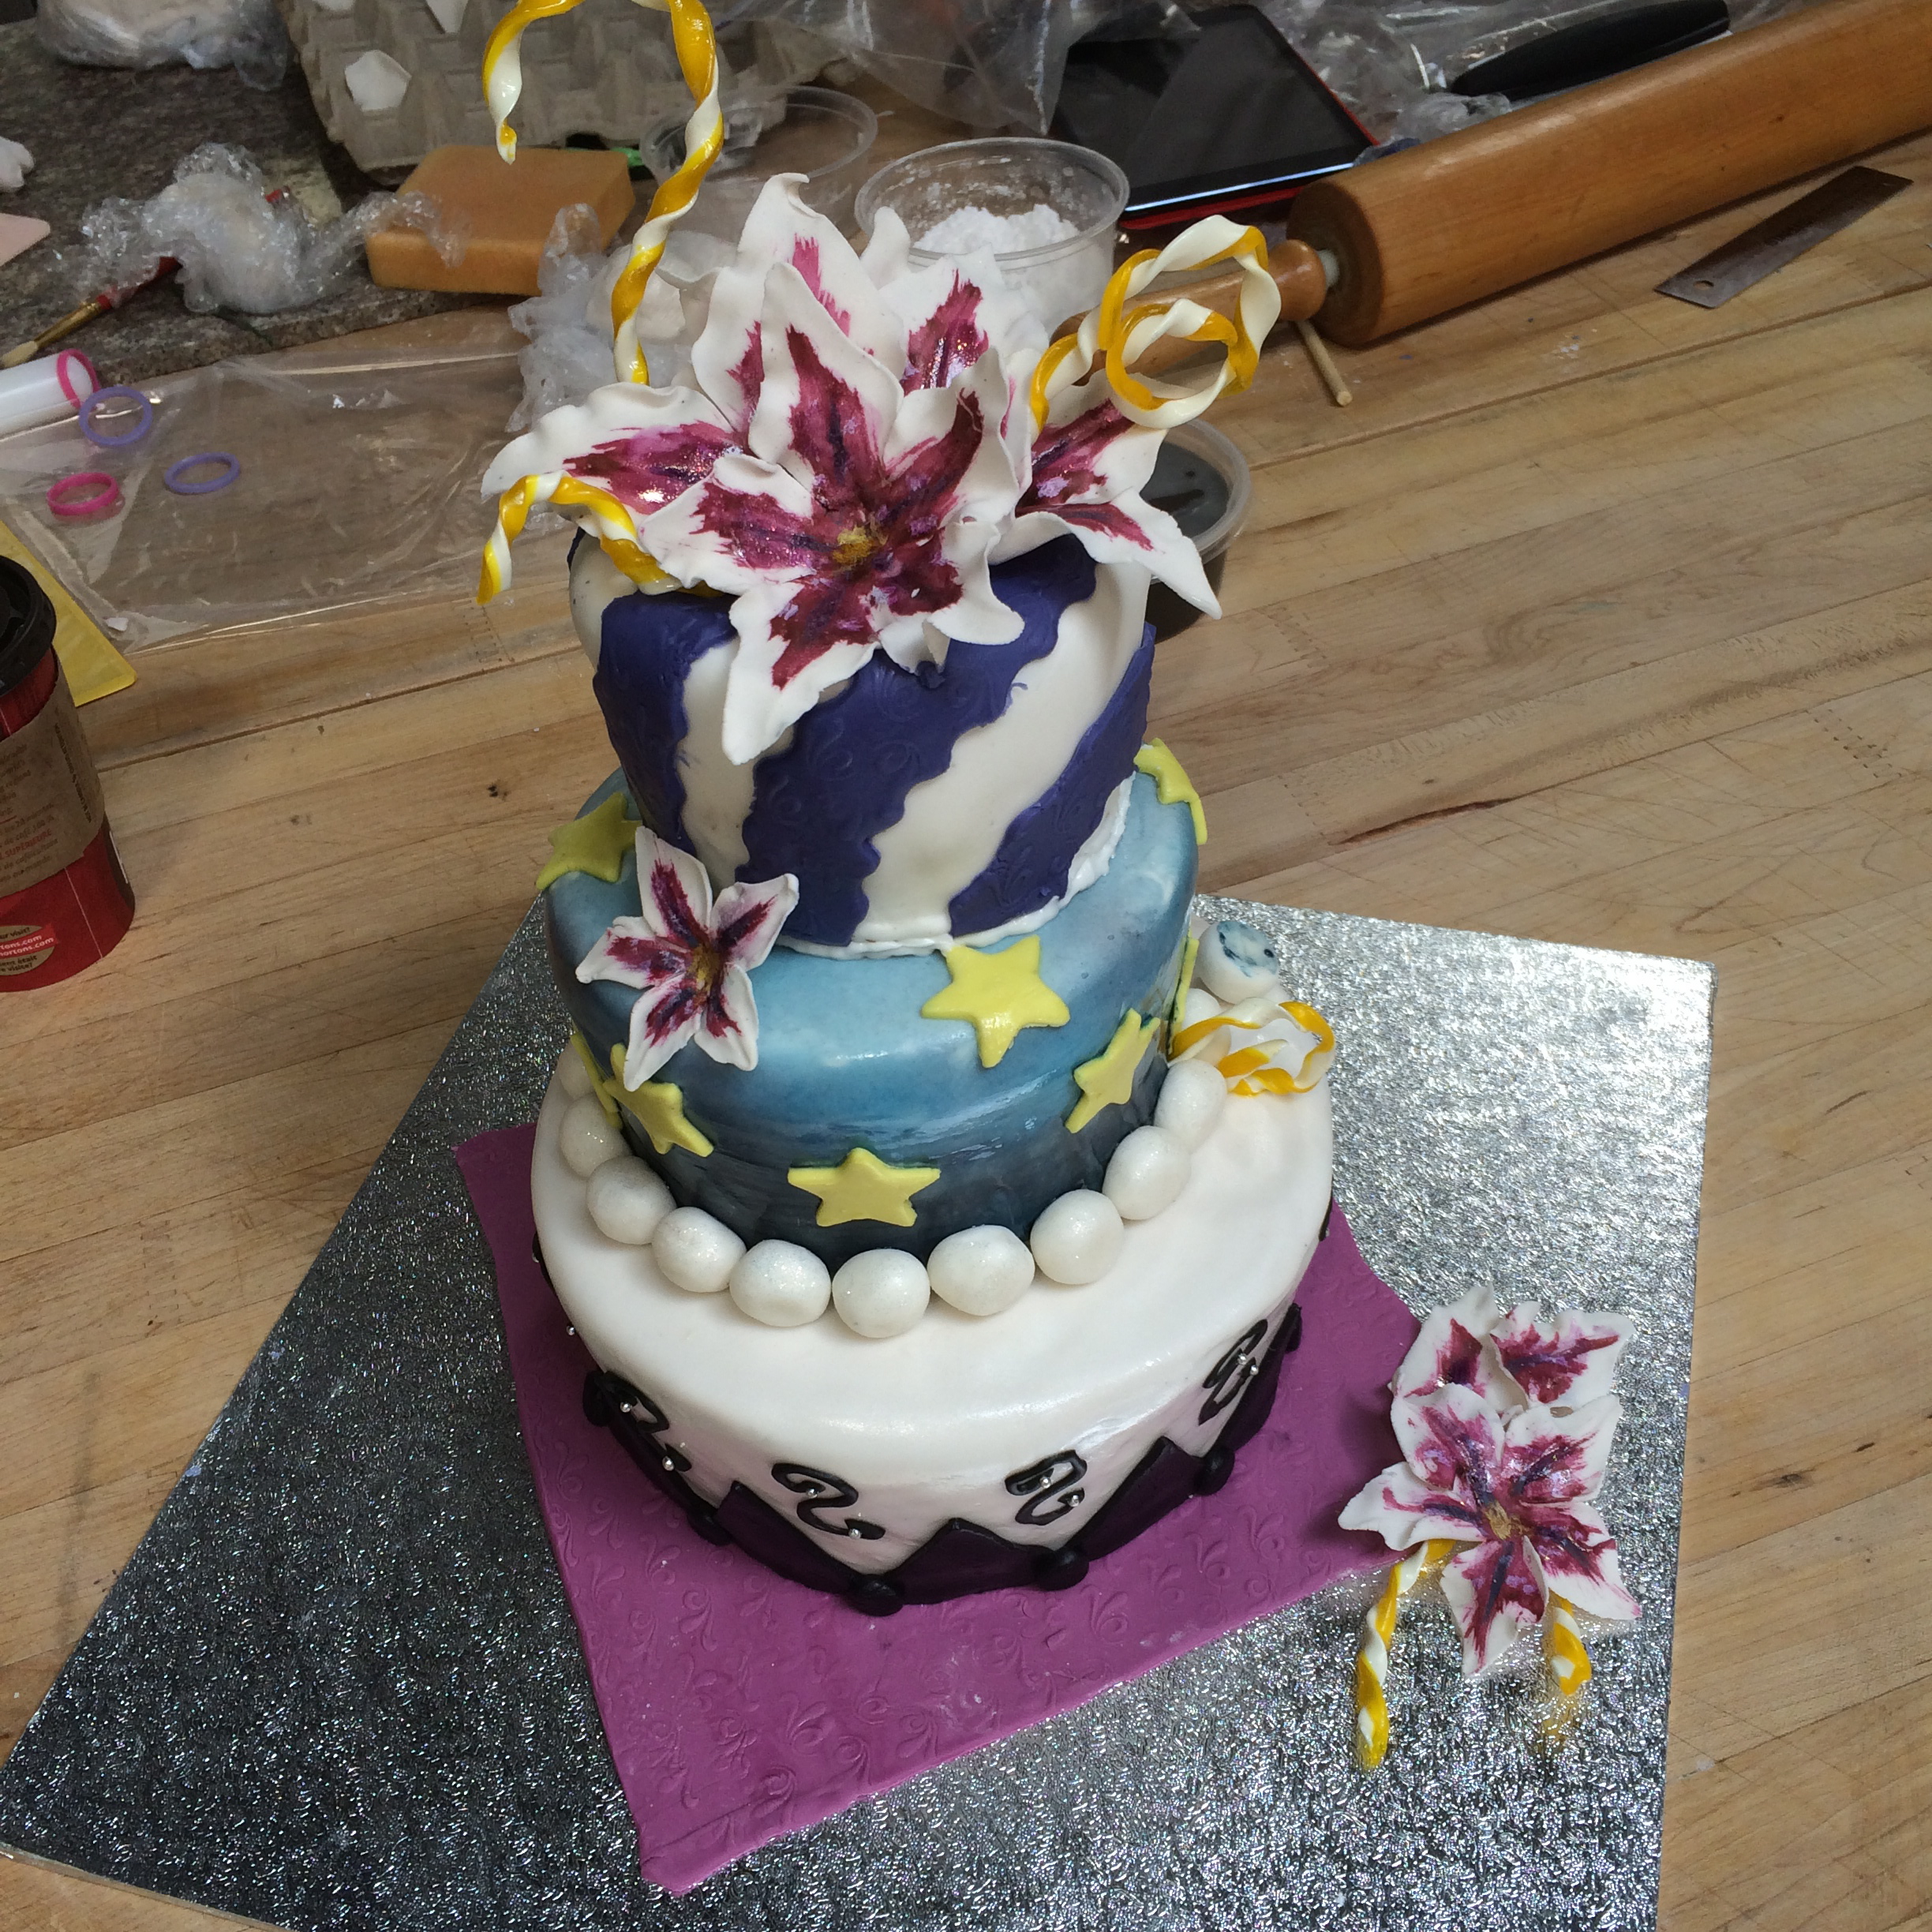
Super fun cake, each tier with a different feel, the top part has sugar curls as well.
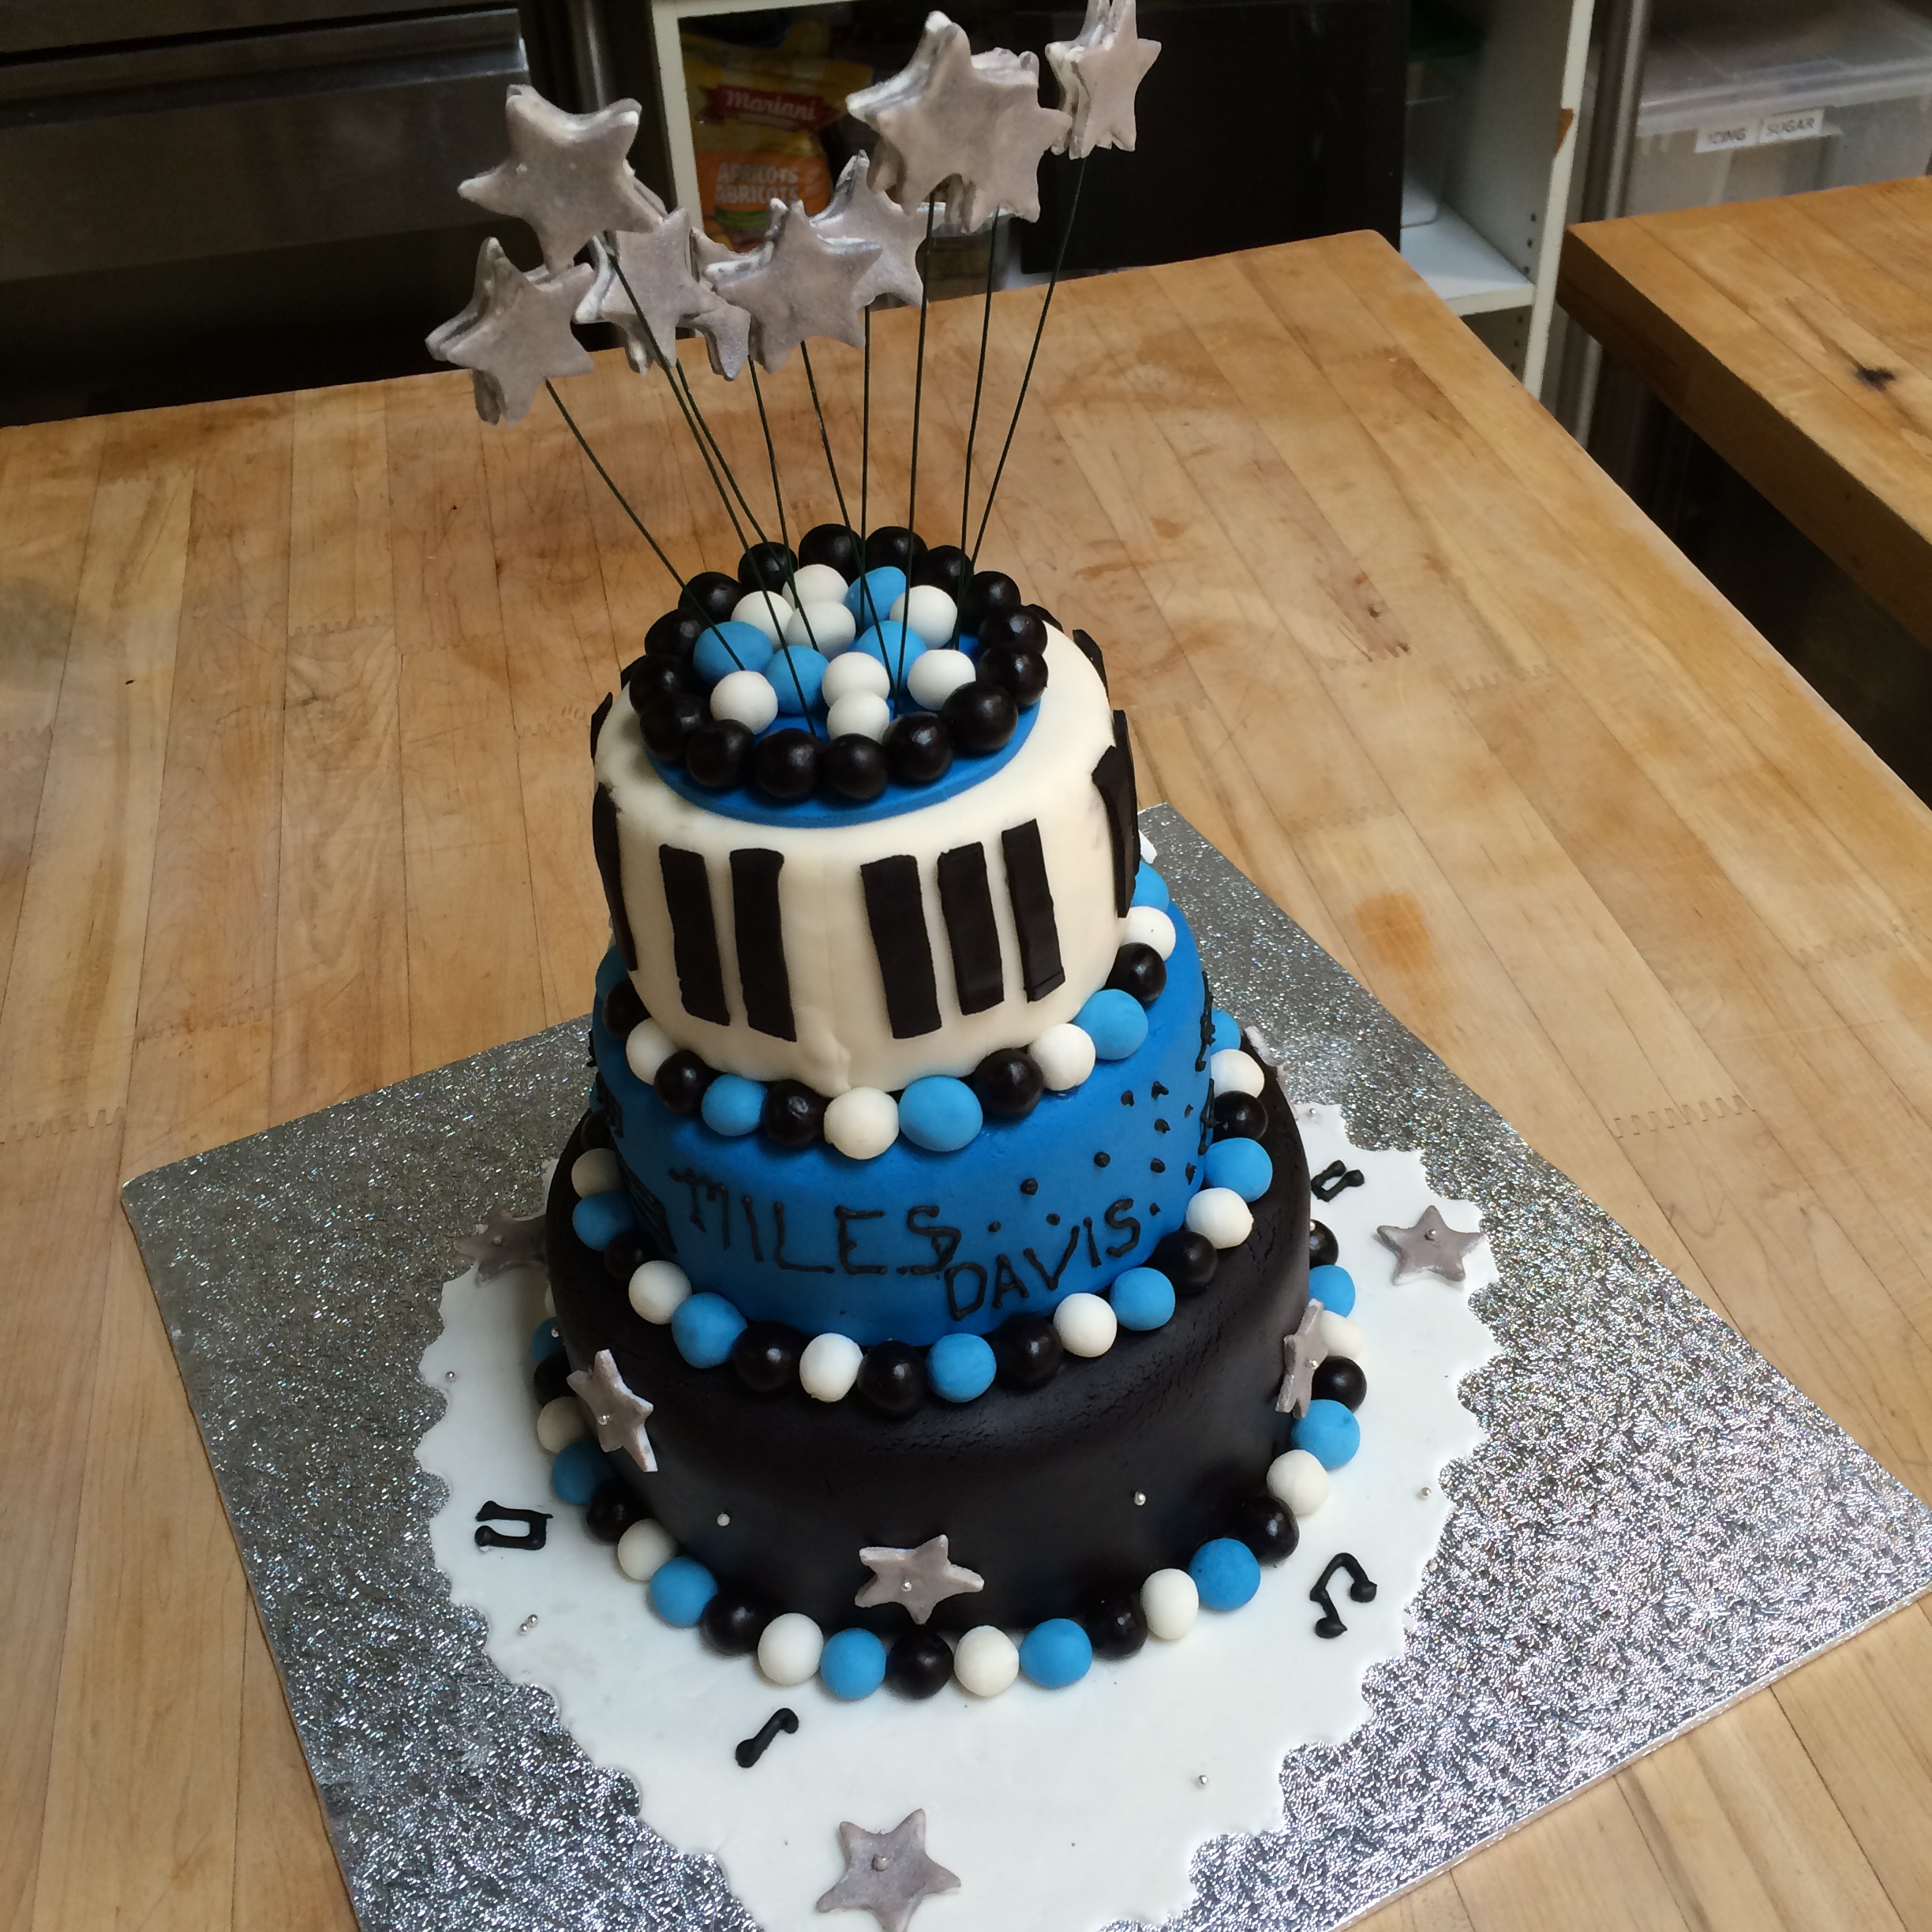
Another team made this music cake.
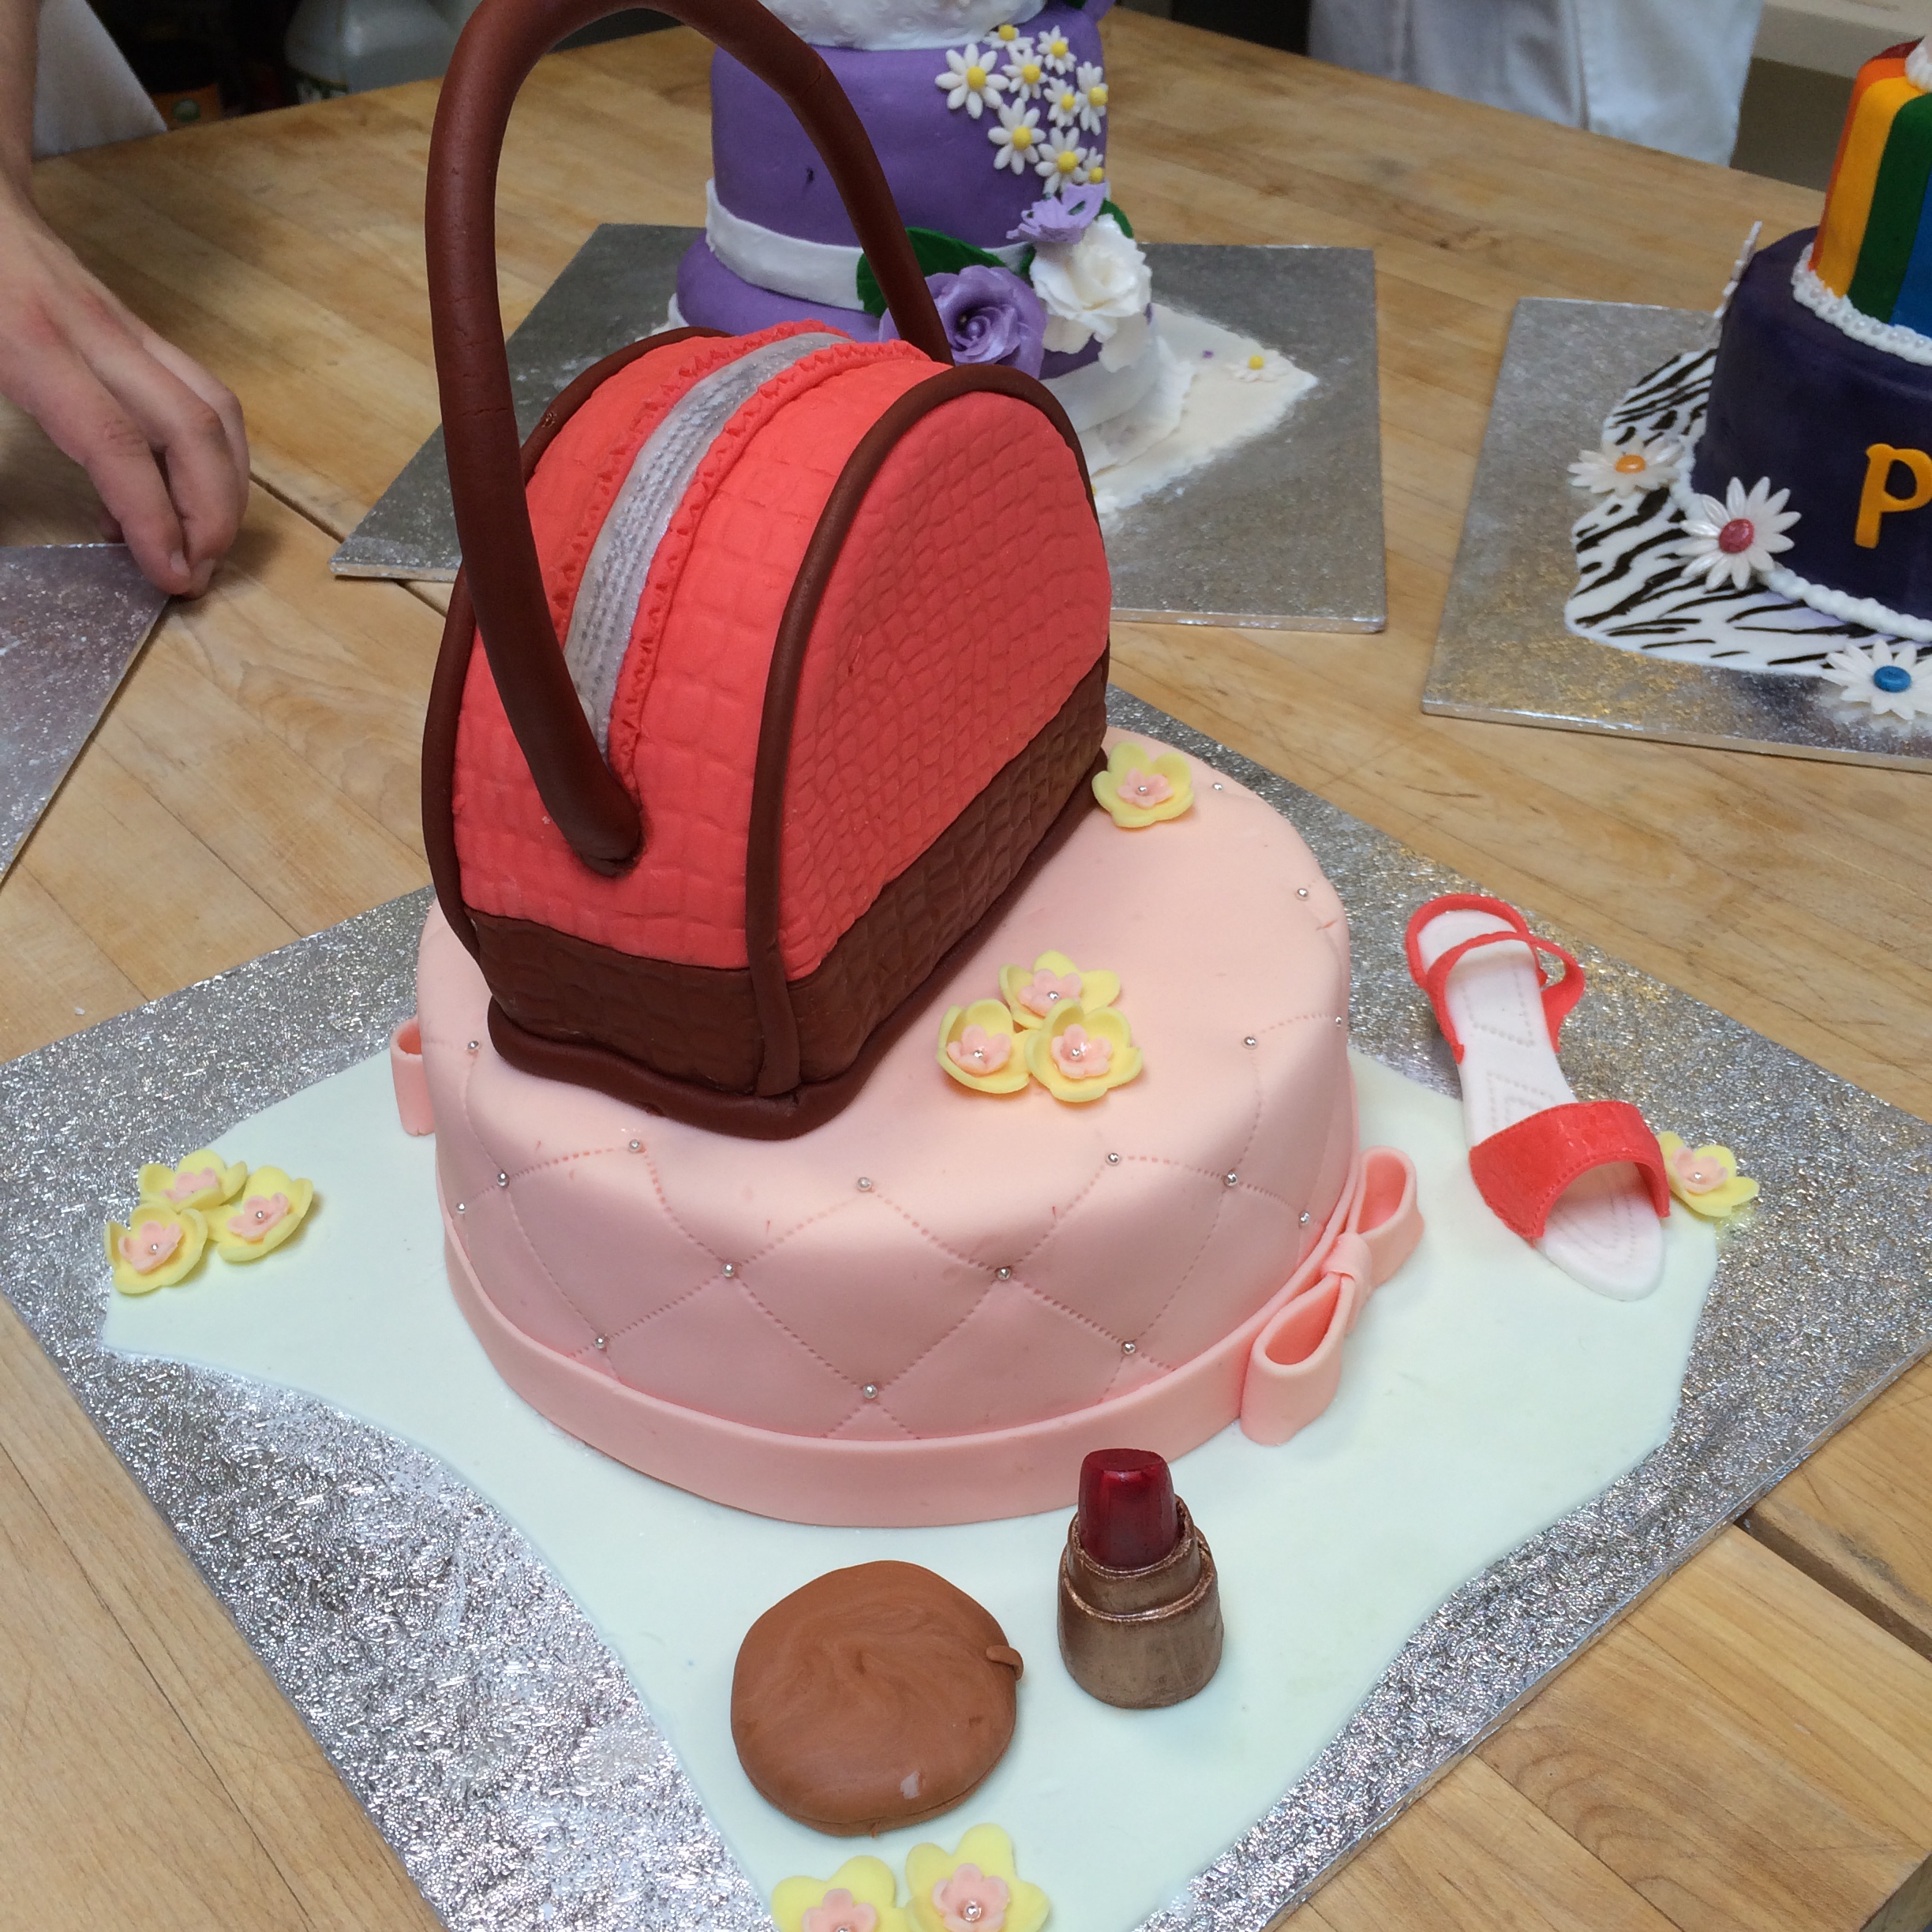
My Chef made this fashion / purse cake.
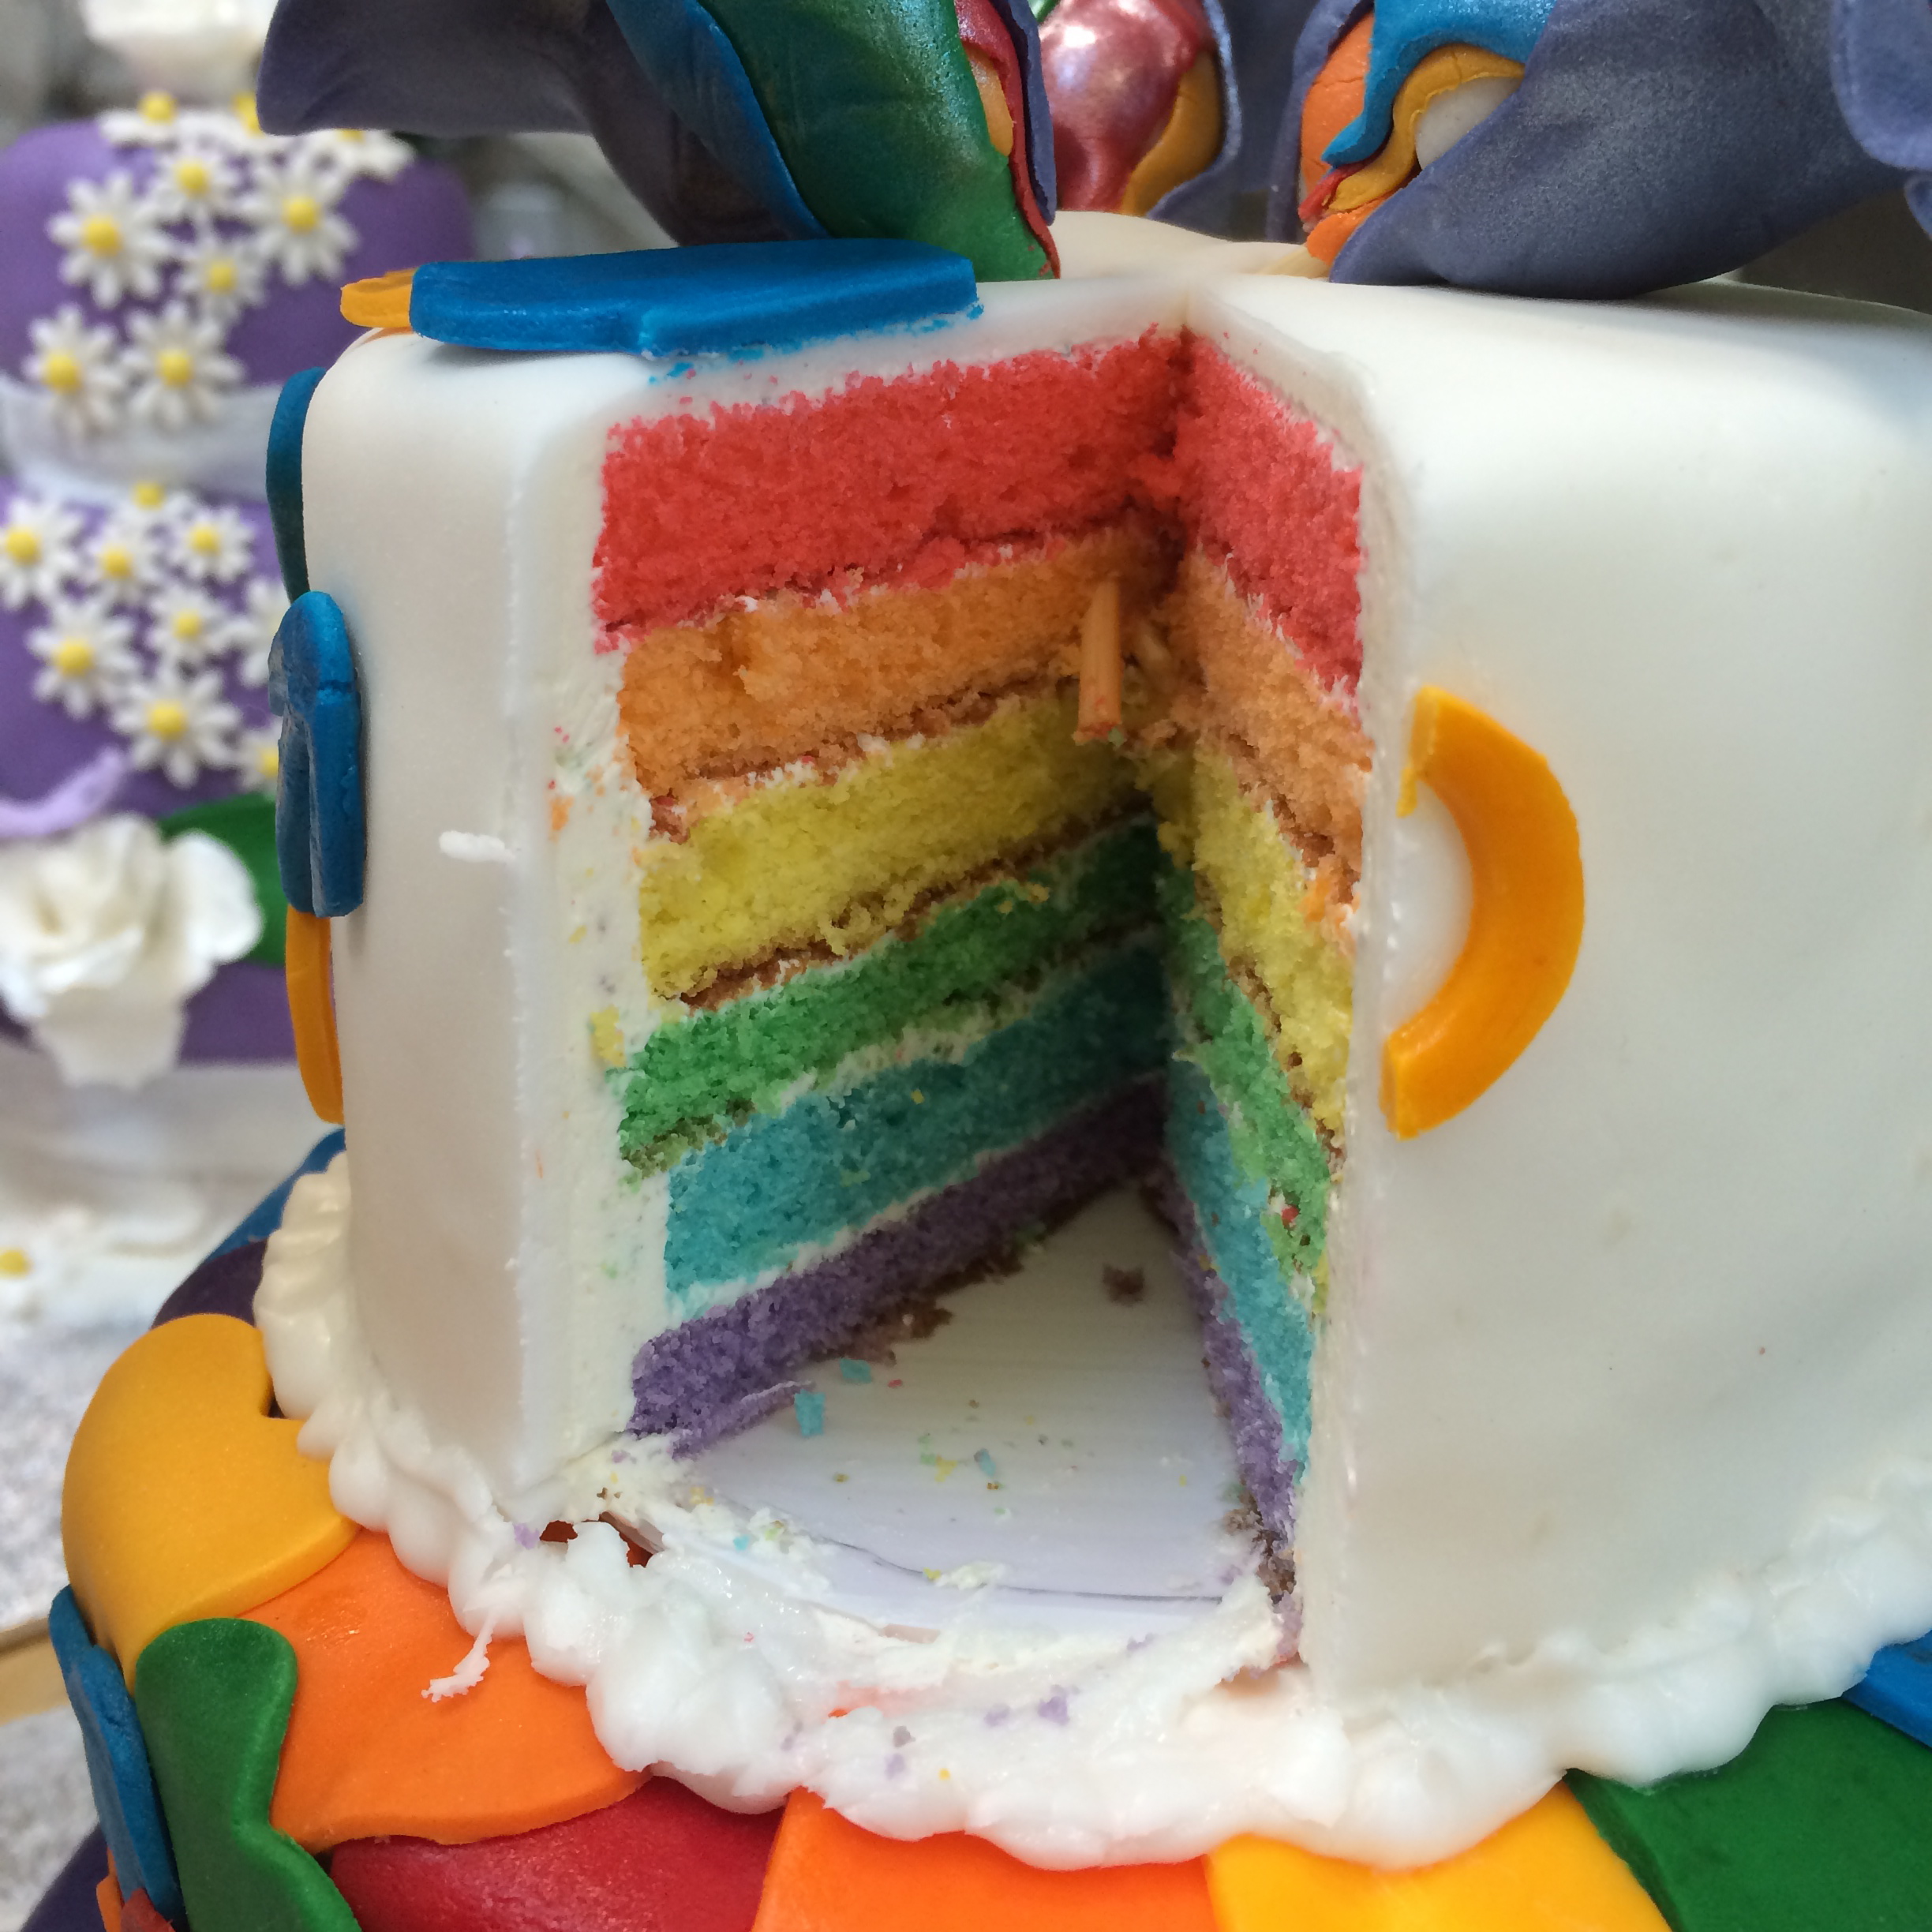
The inside of our cake, all 6-layers of rainbow.
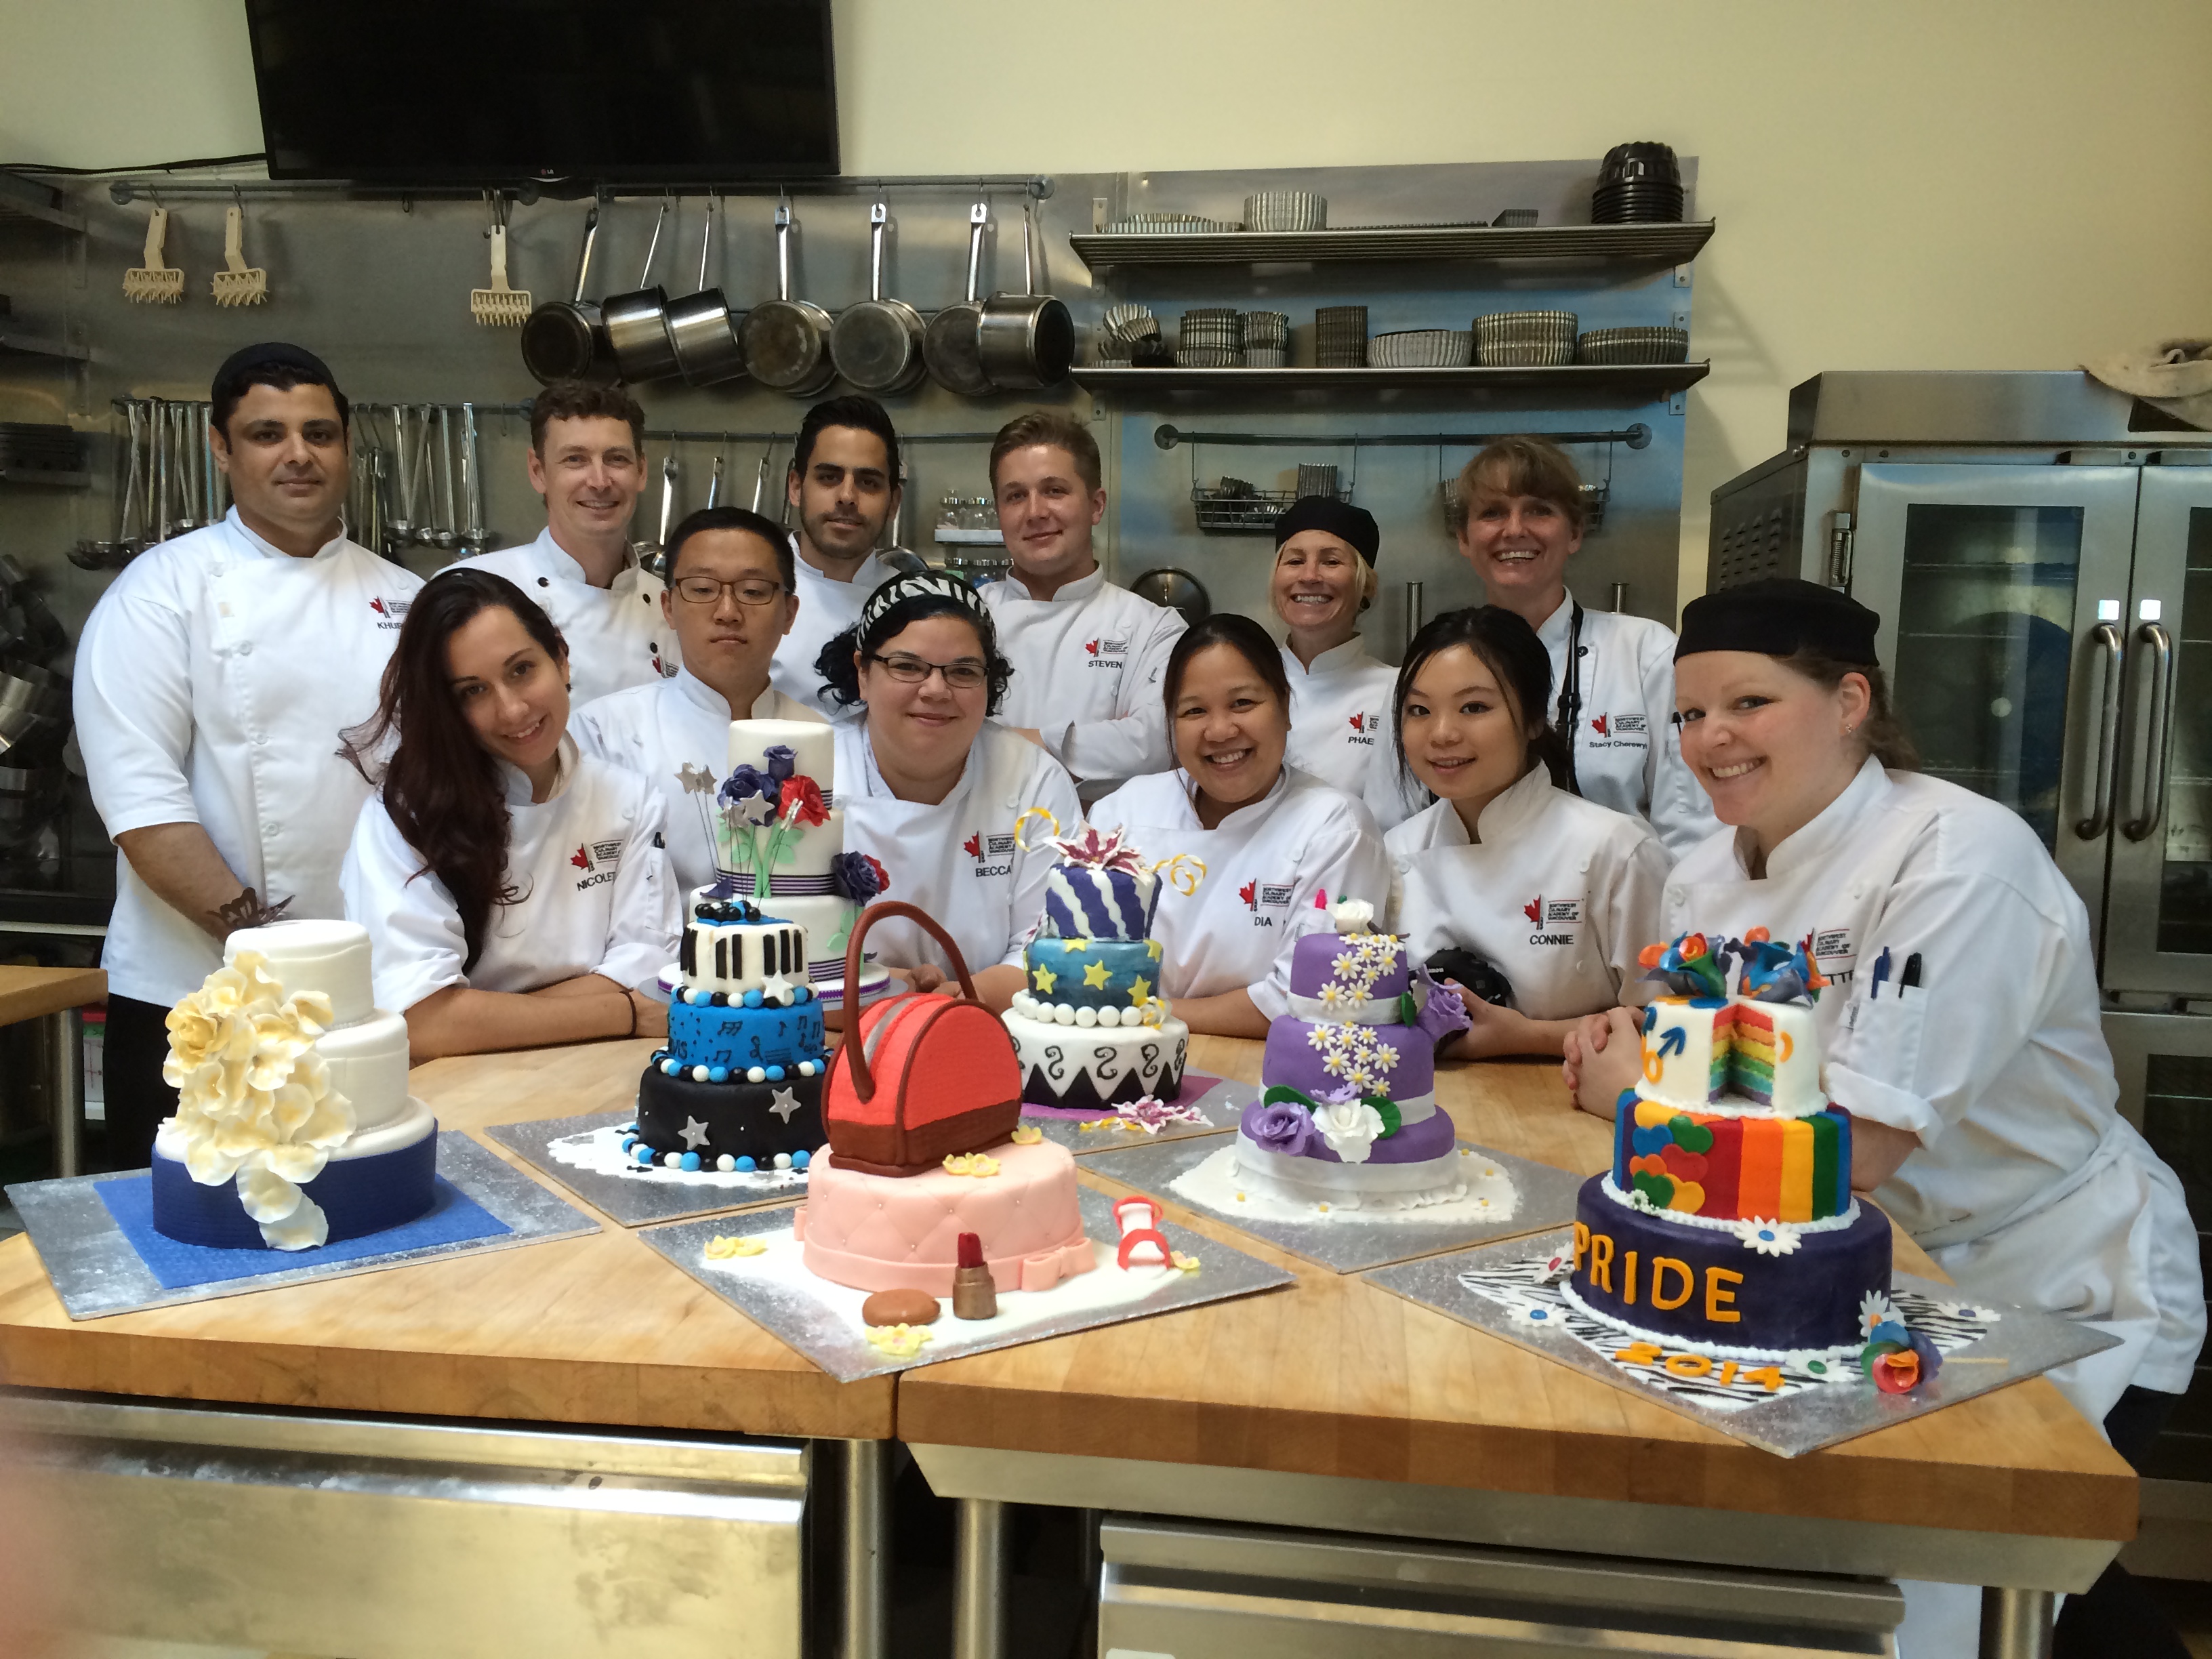
A proud class photo, with our Chef instructors too, and all our celebration cakes!
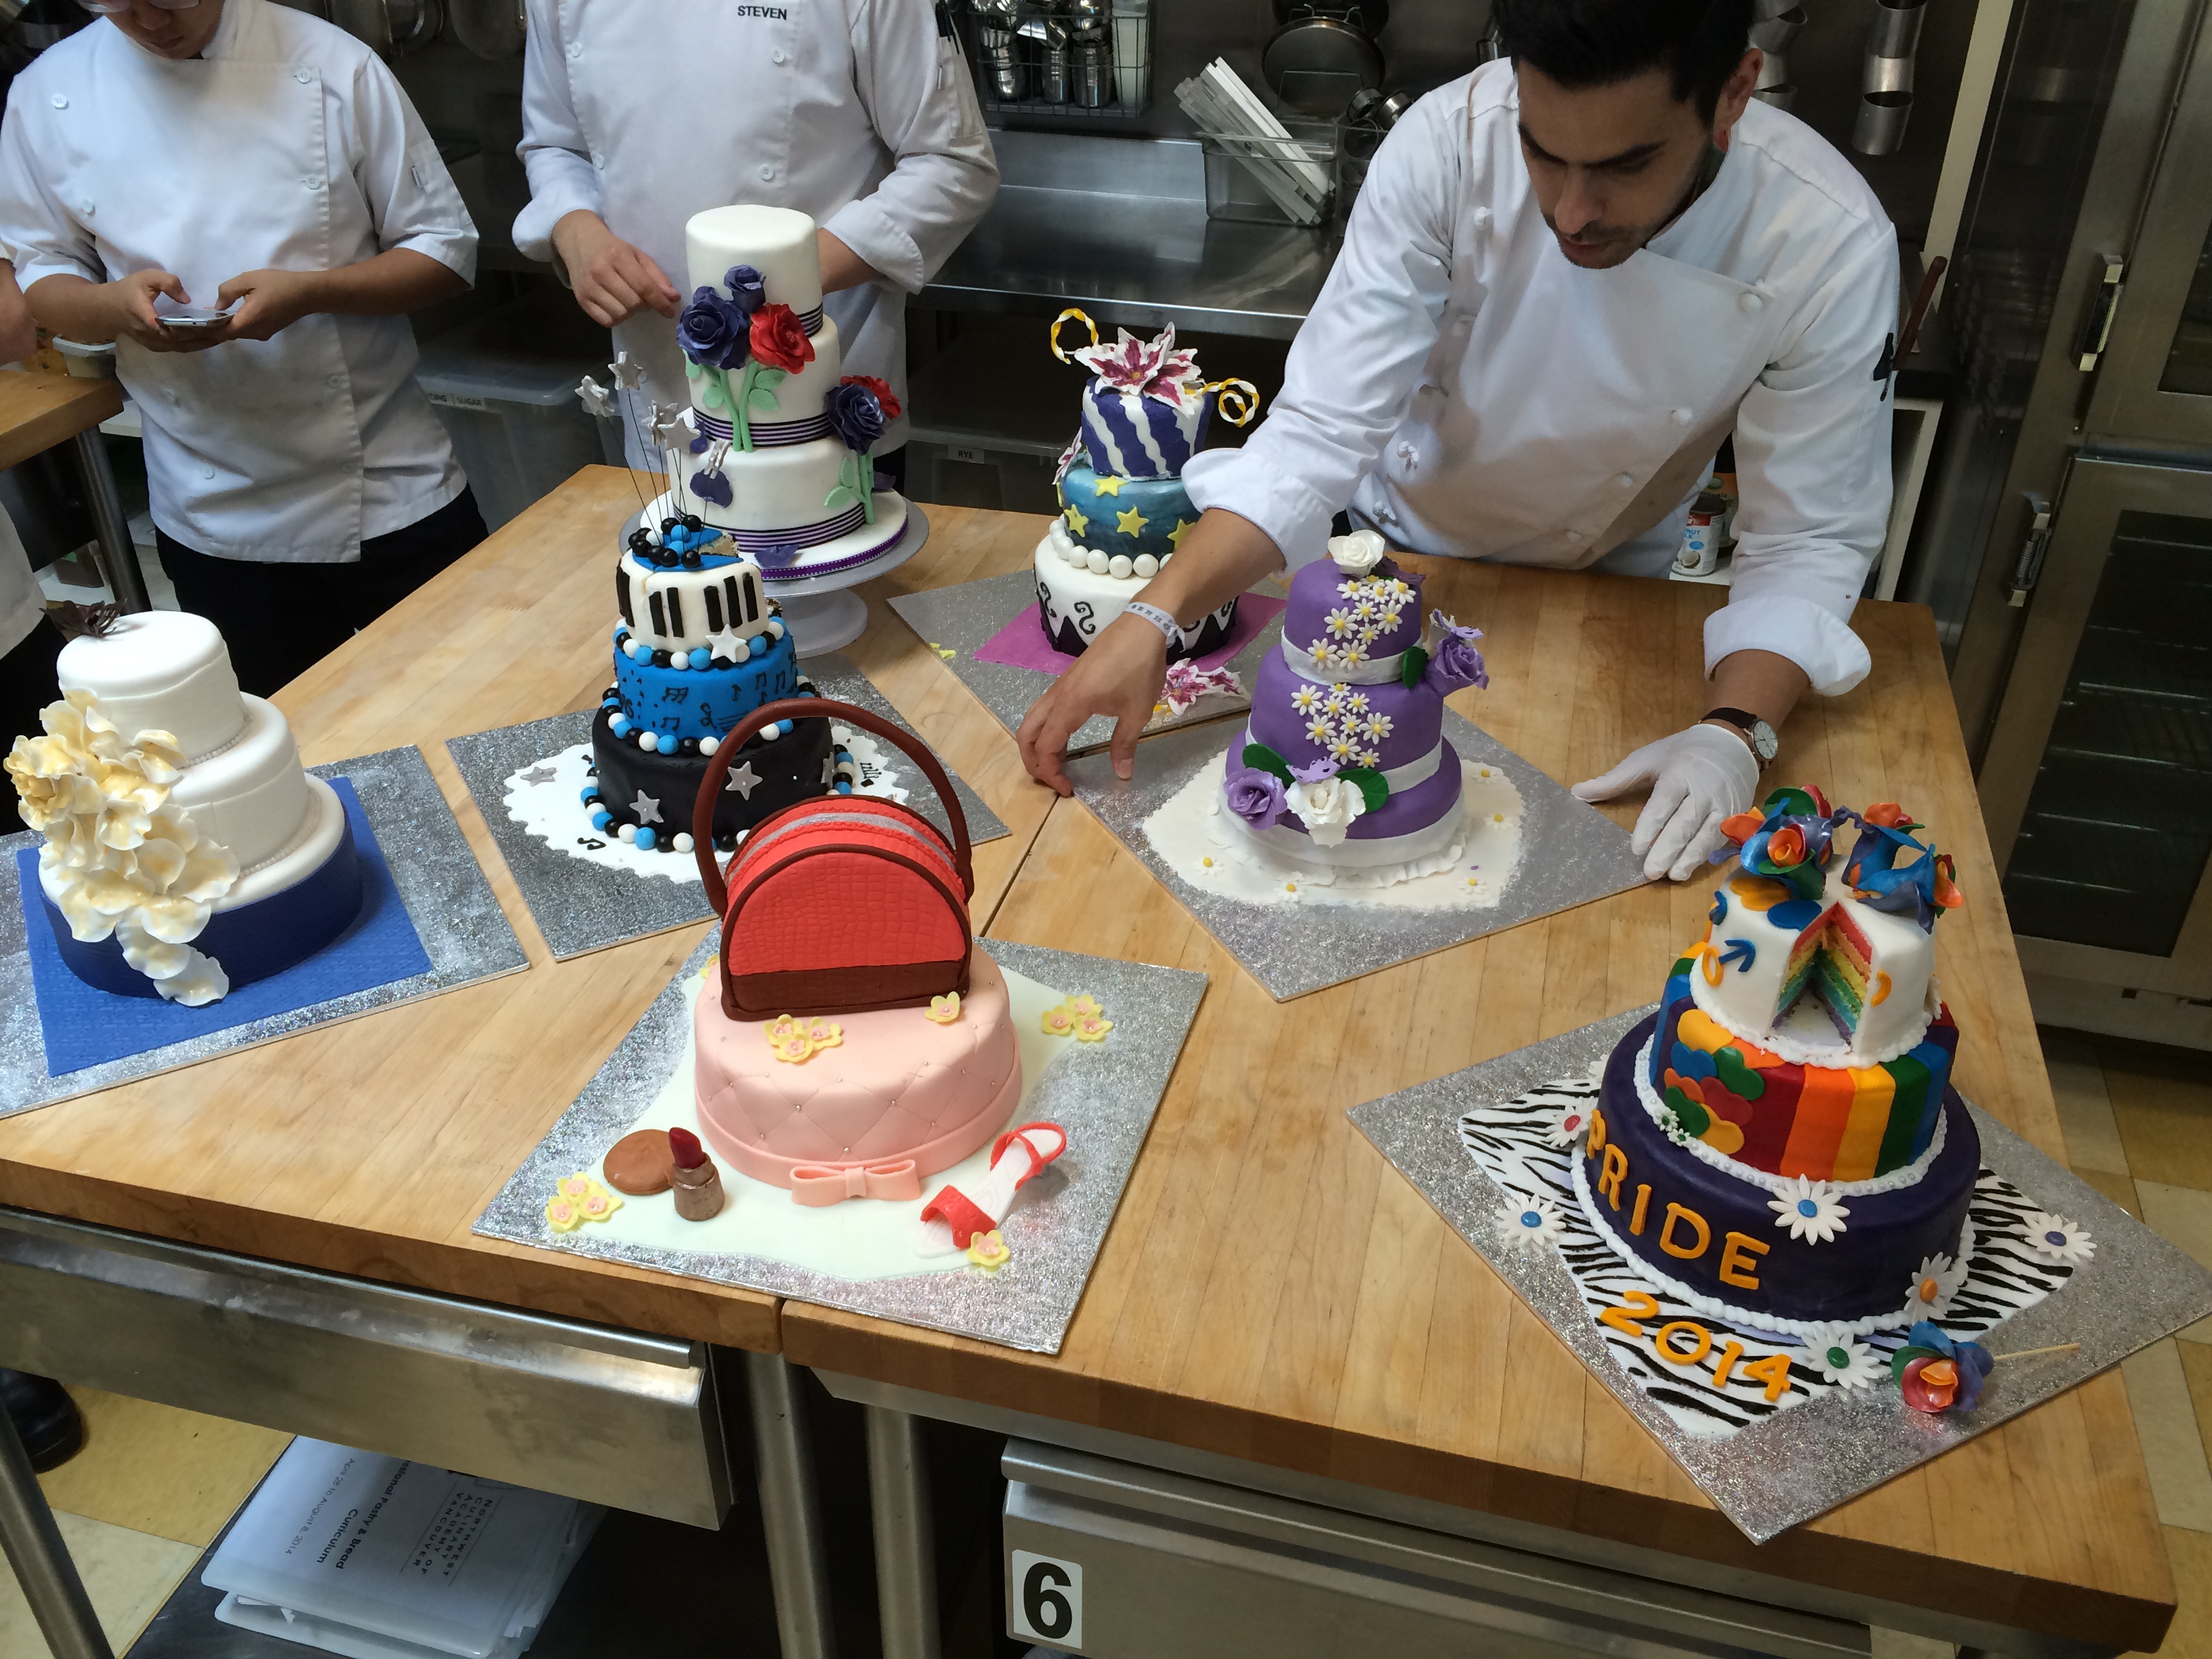
Seven celebration cakes.

A very cool cake with a dramatic rose draping over each tier.
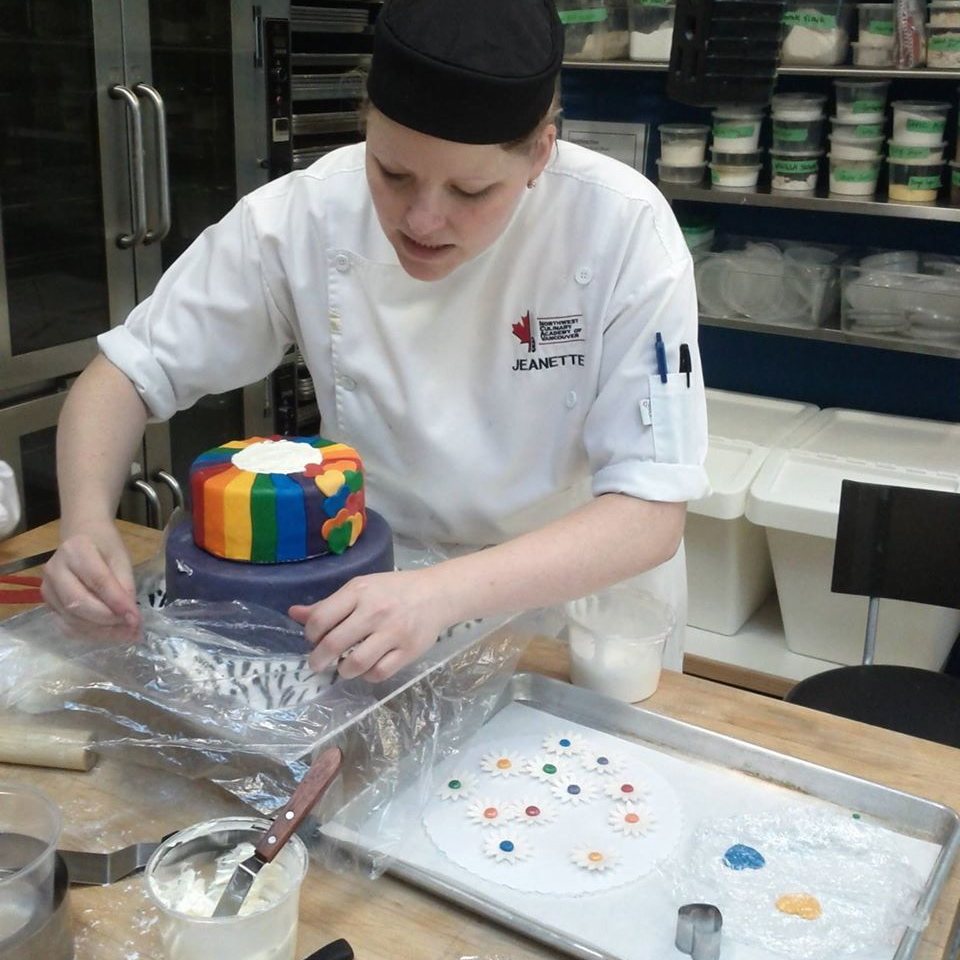
Me preparing to air brush and protecting the bottom of the cake. I learned that we should have air brushed the colour on before we stacked the tiers…
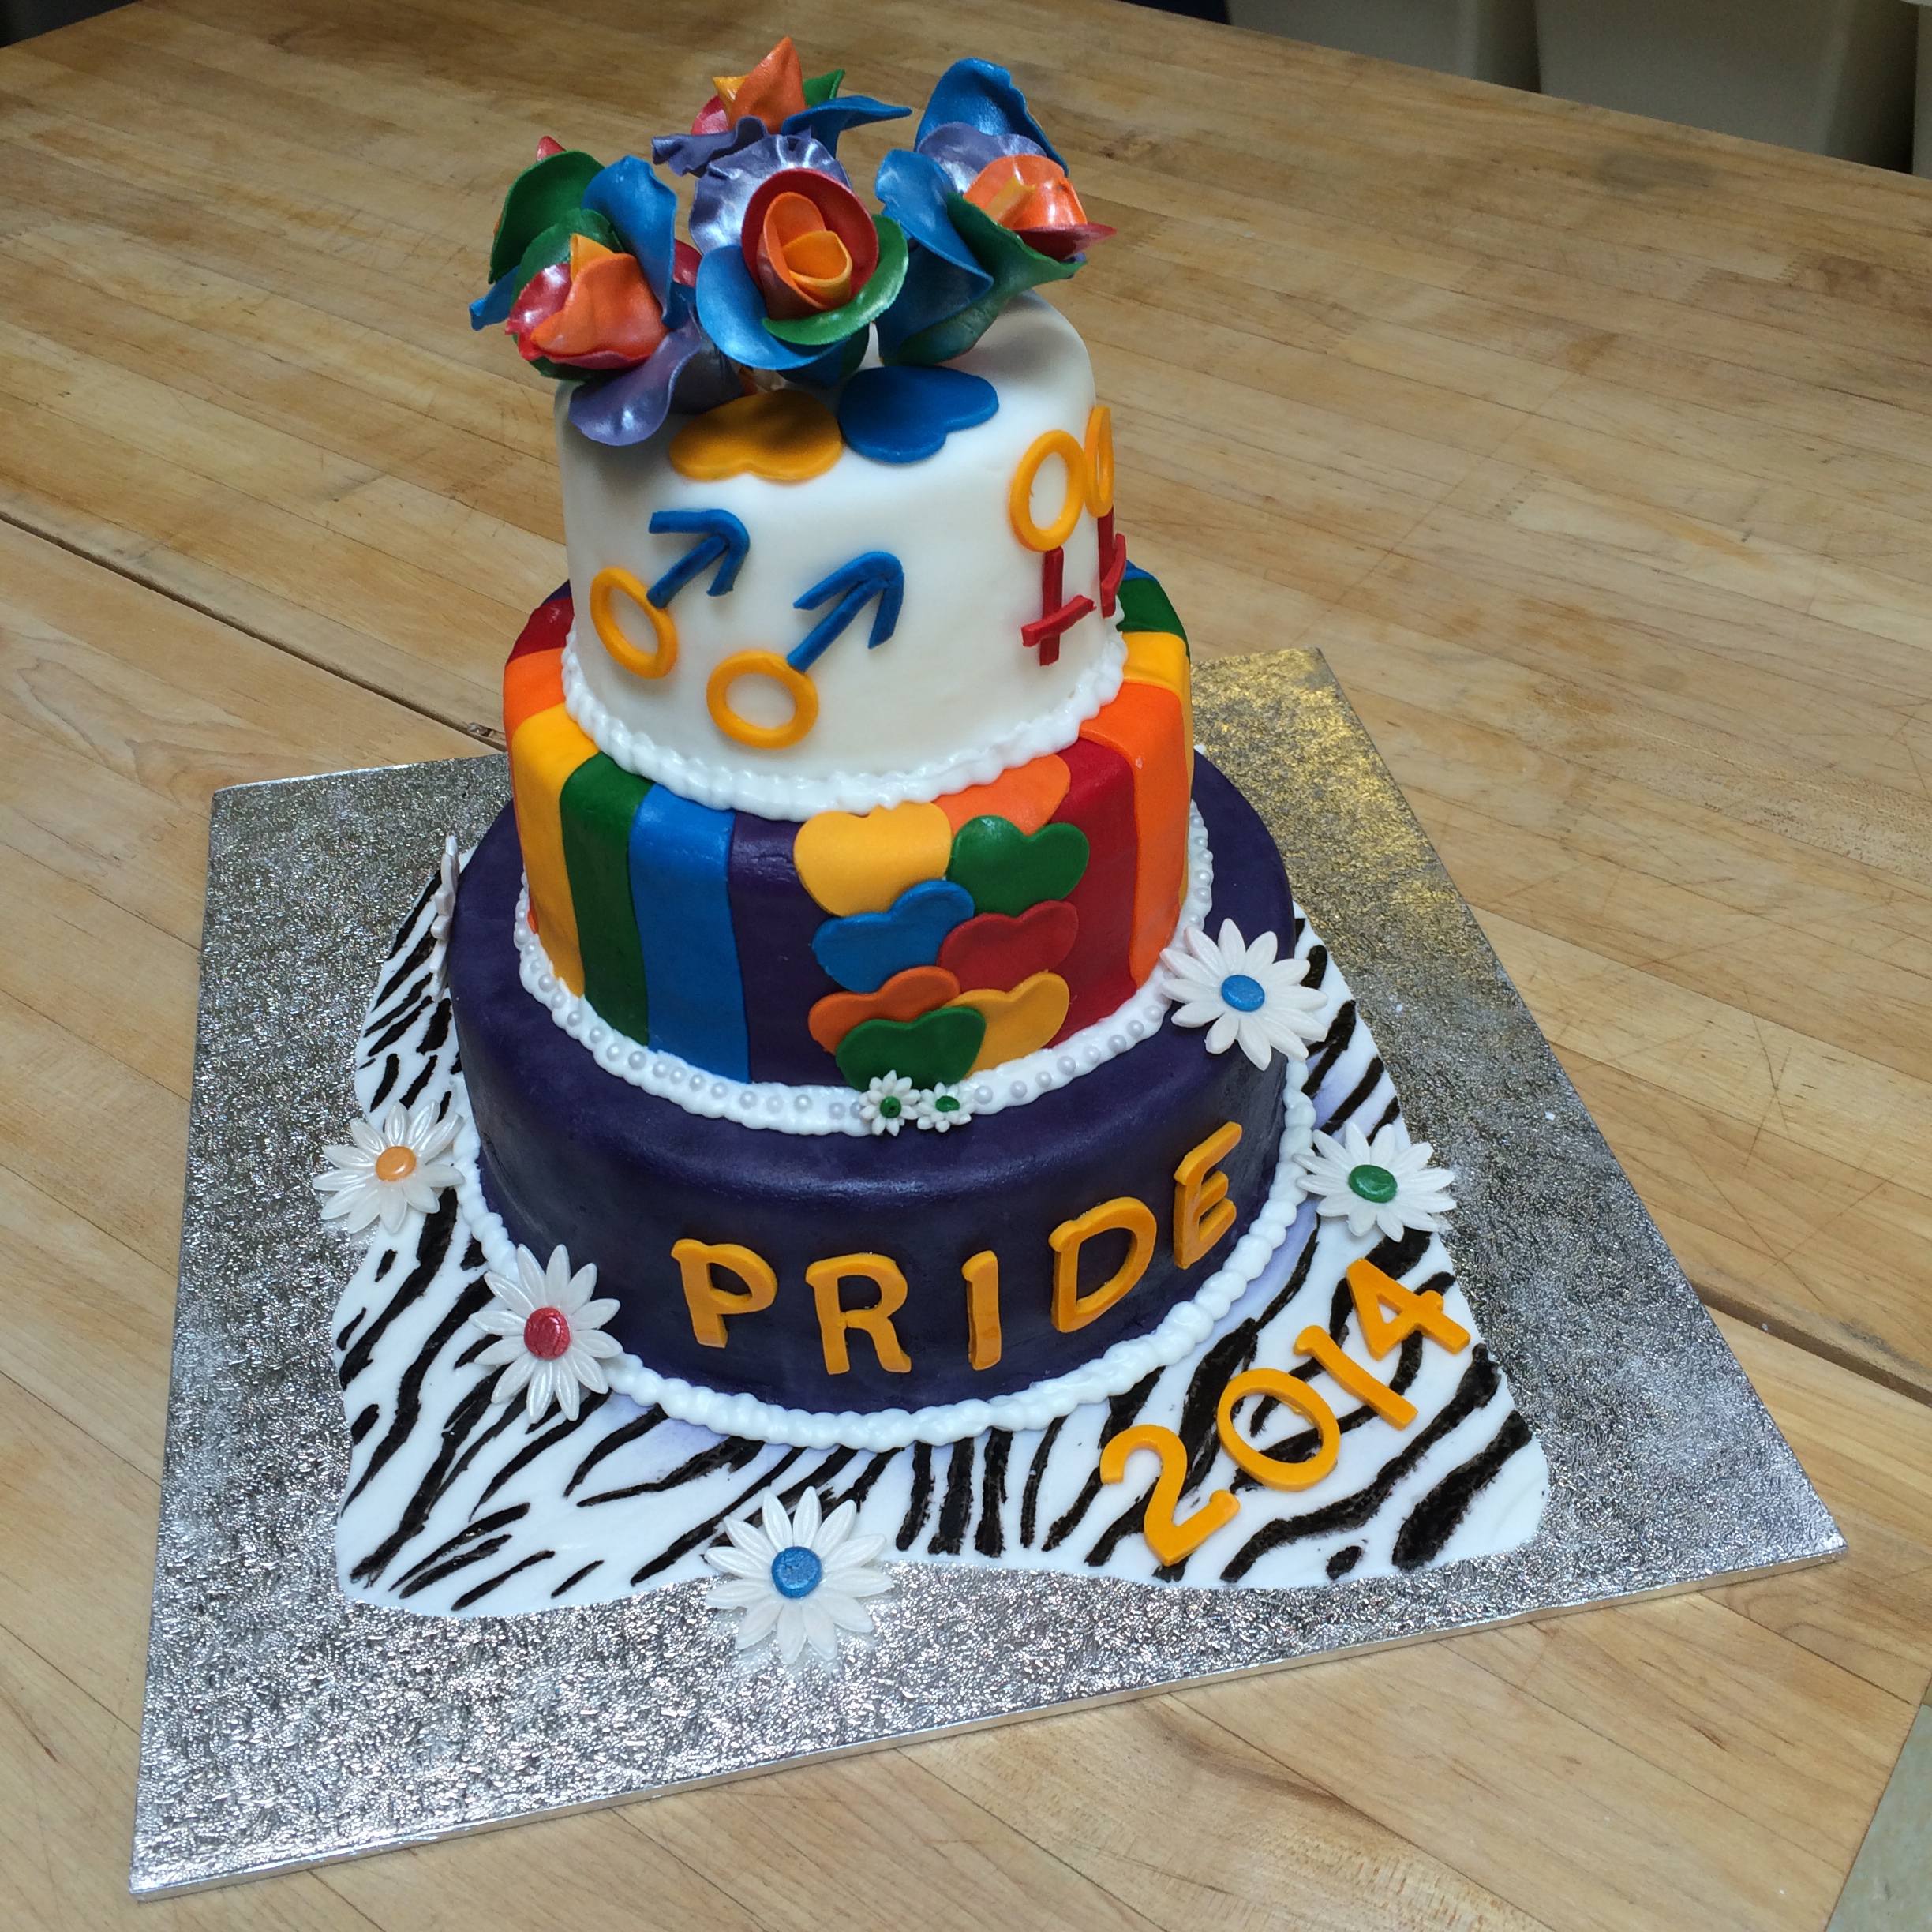
VOILA! Our finished cake, 2014 Pride themed.
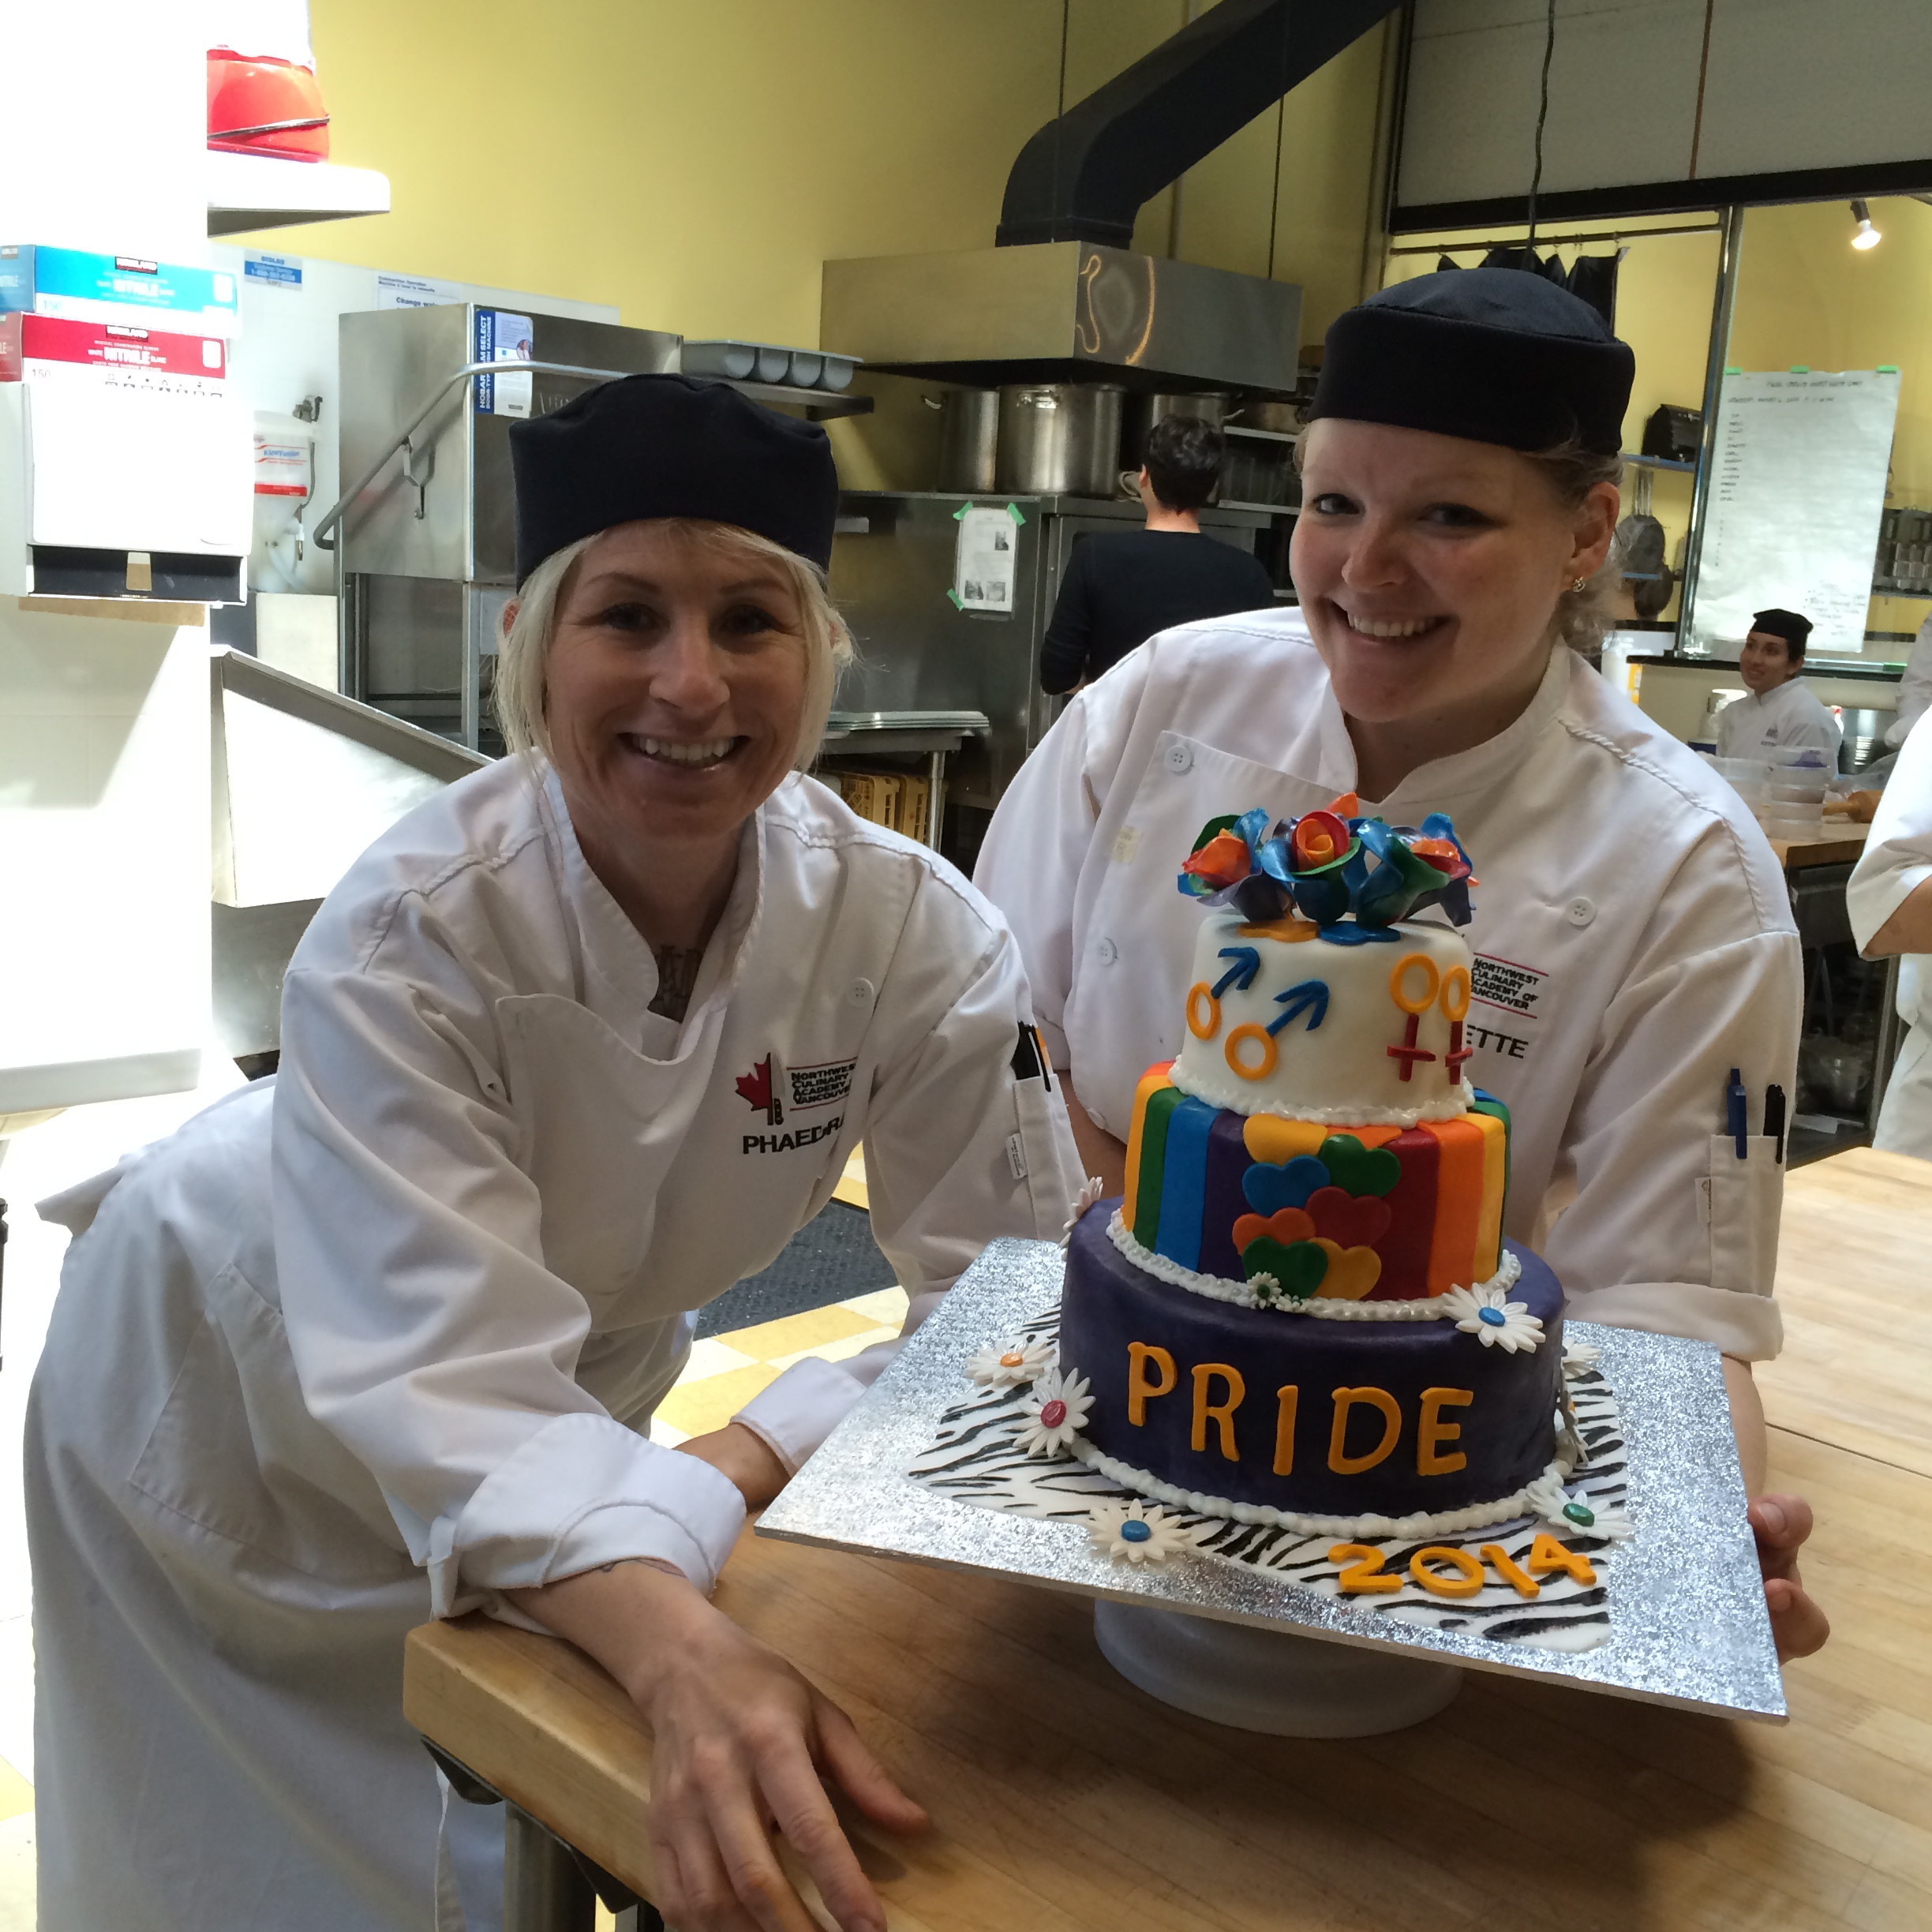
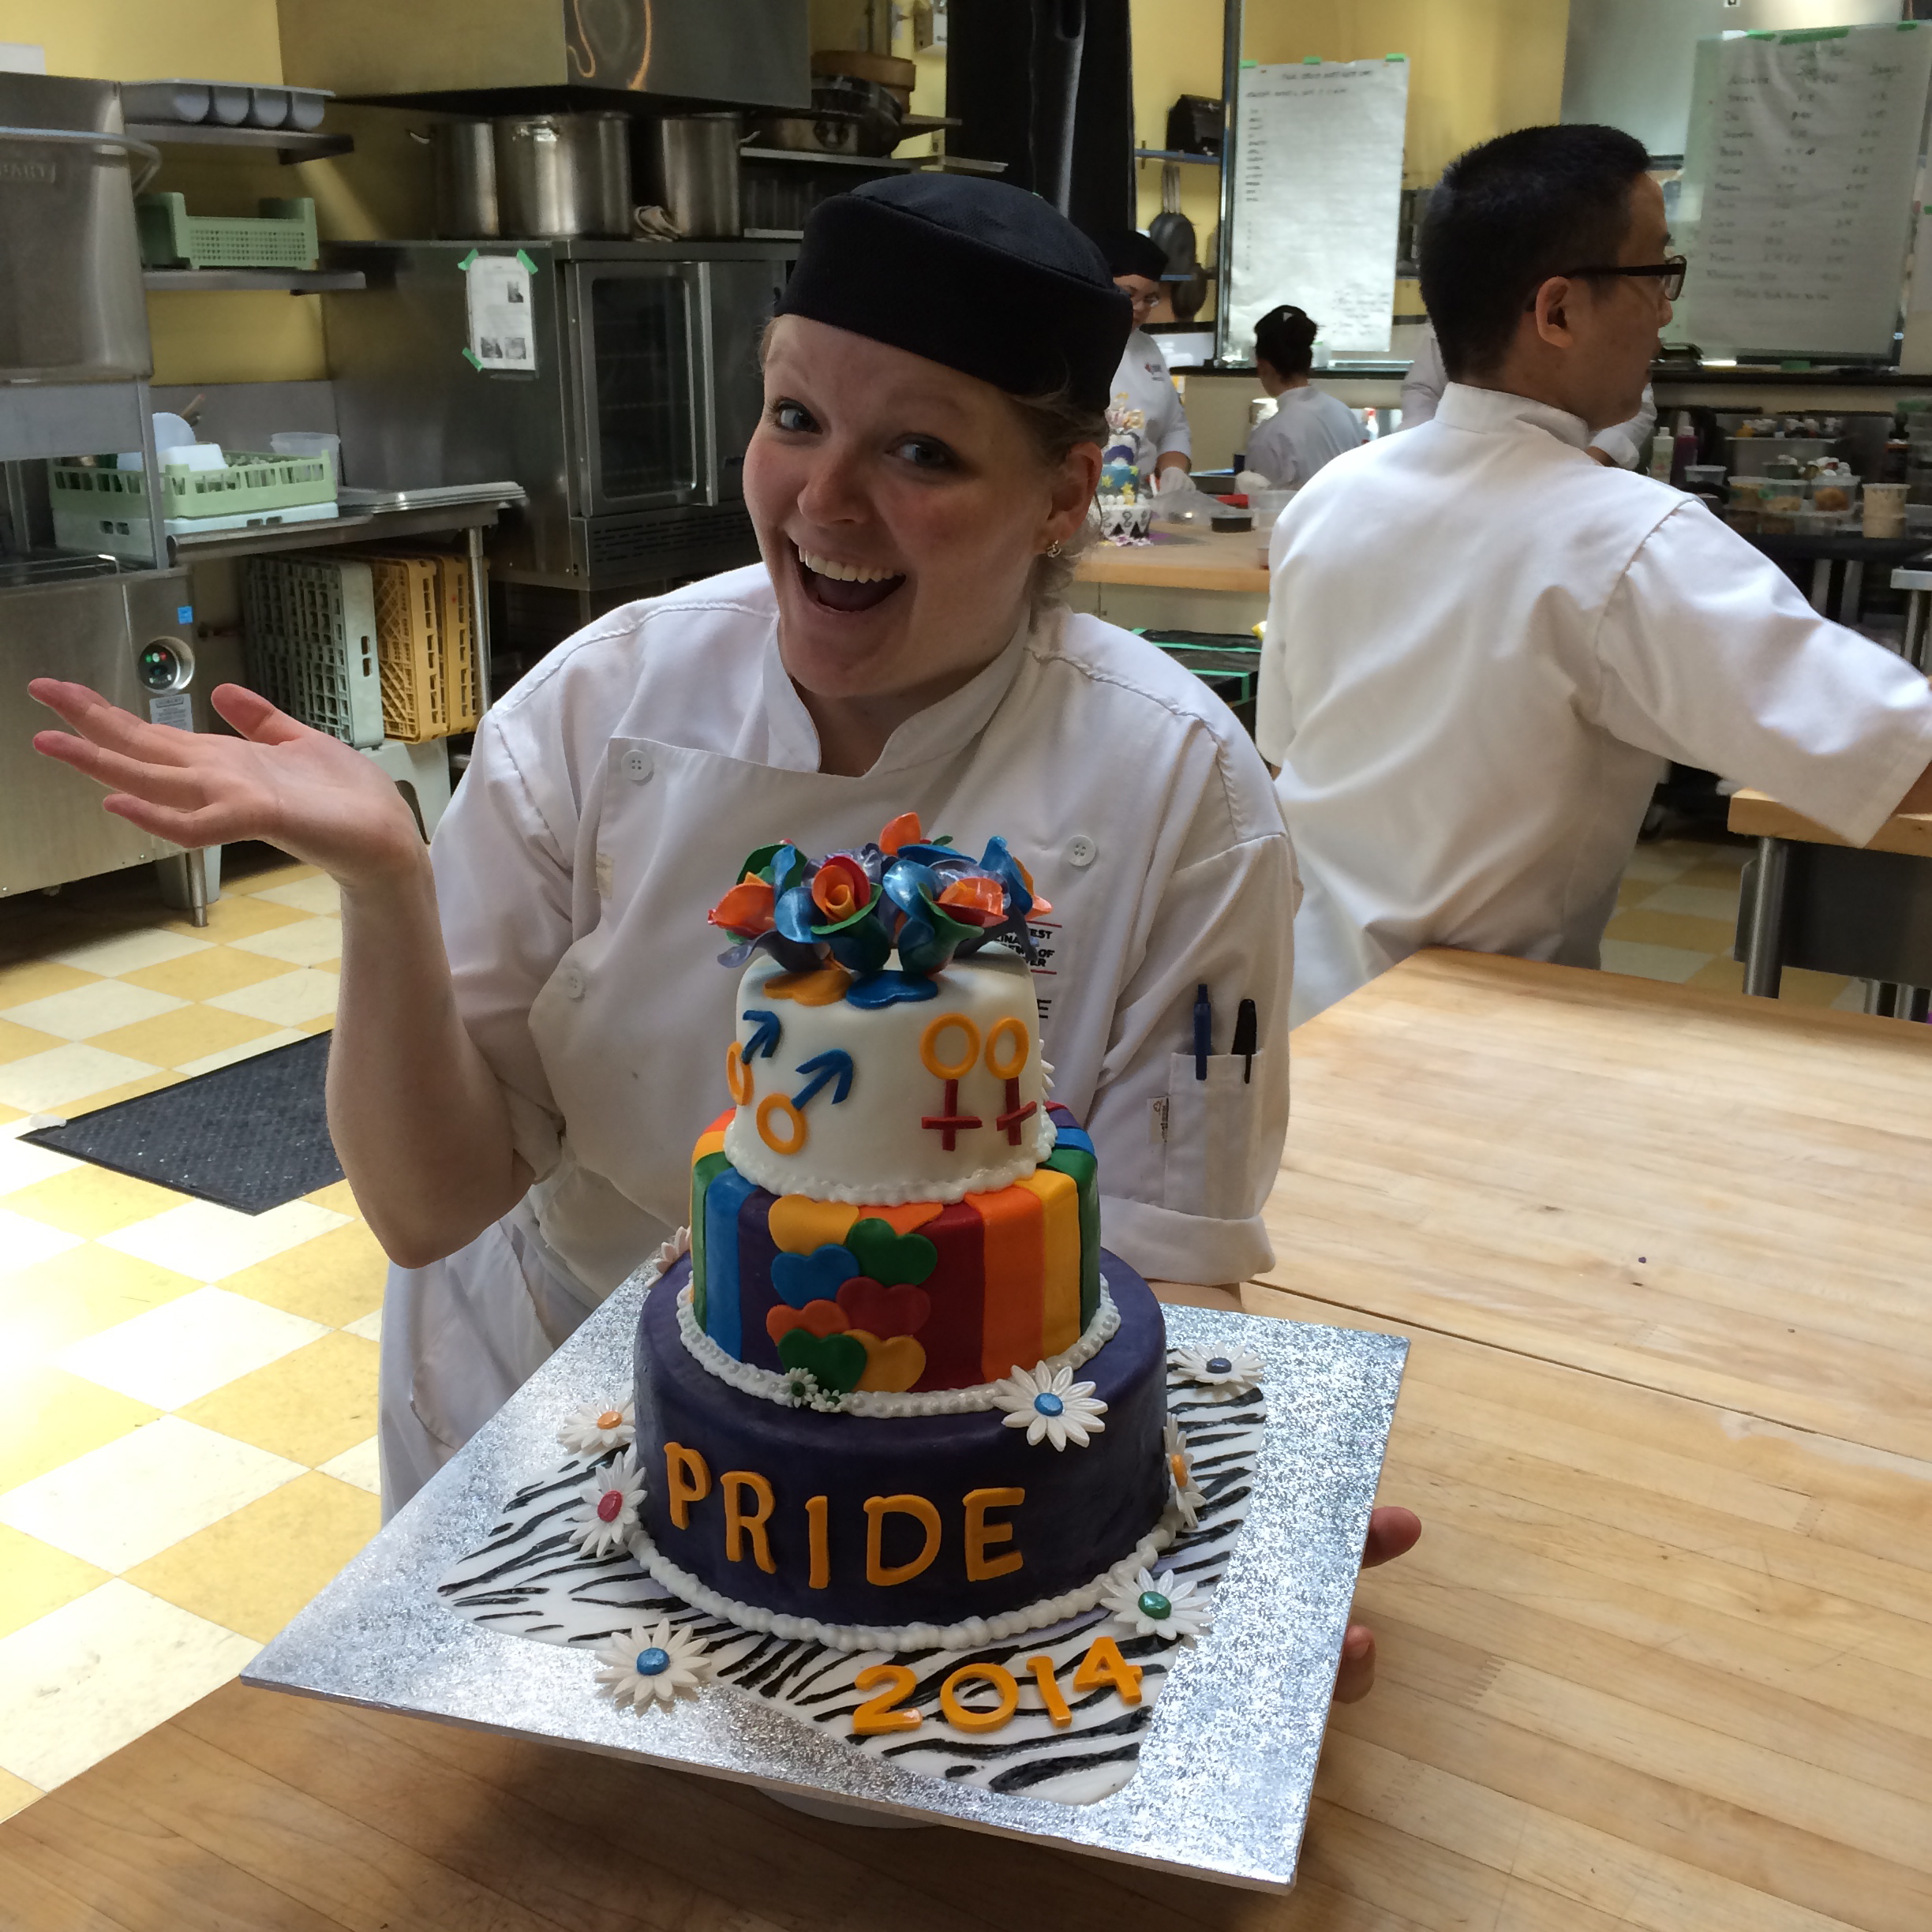
My station partner and I, proud of our final cake!
VOIAL!
Rainbow in every bite.
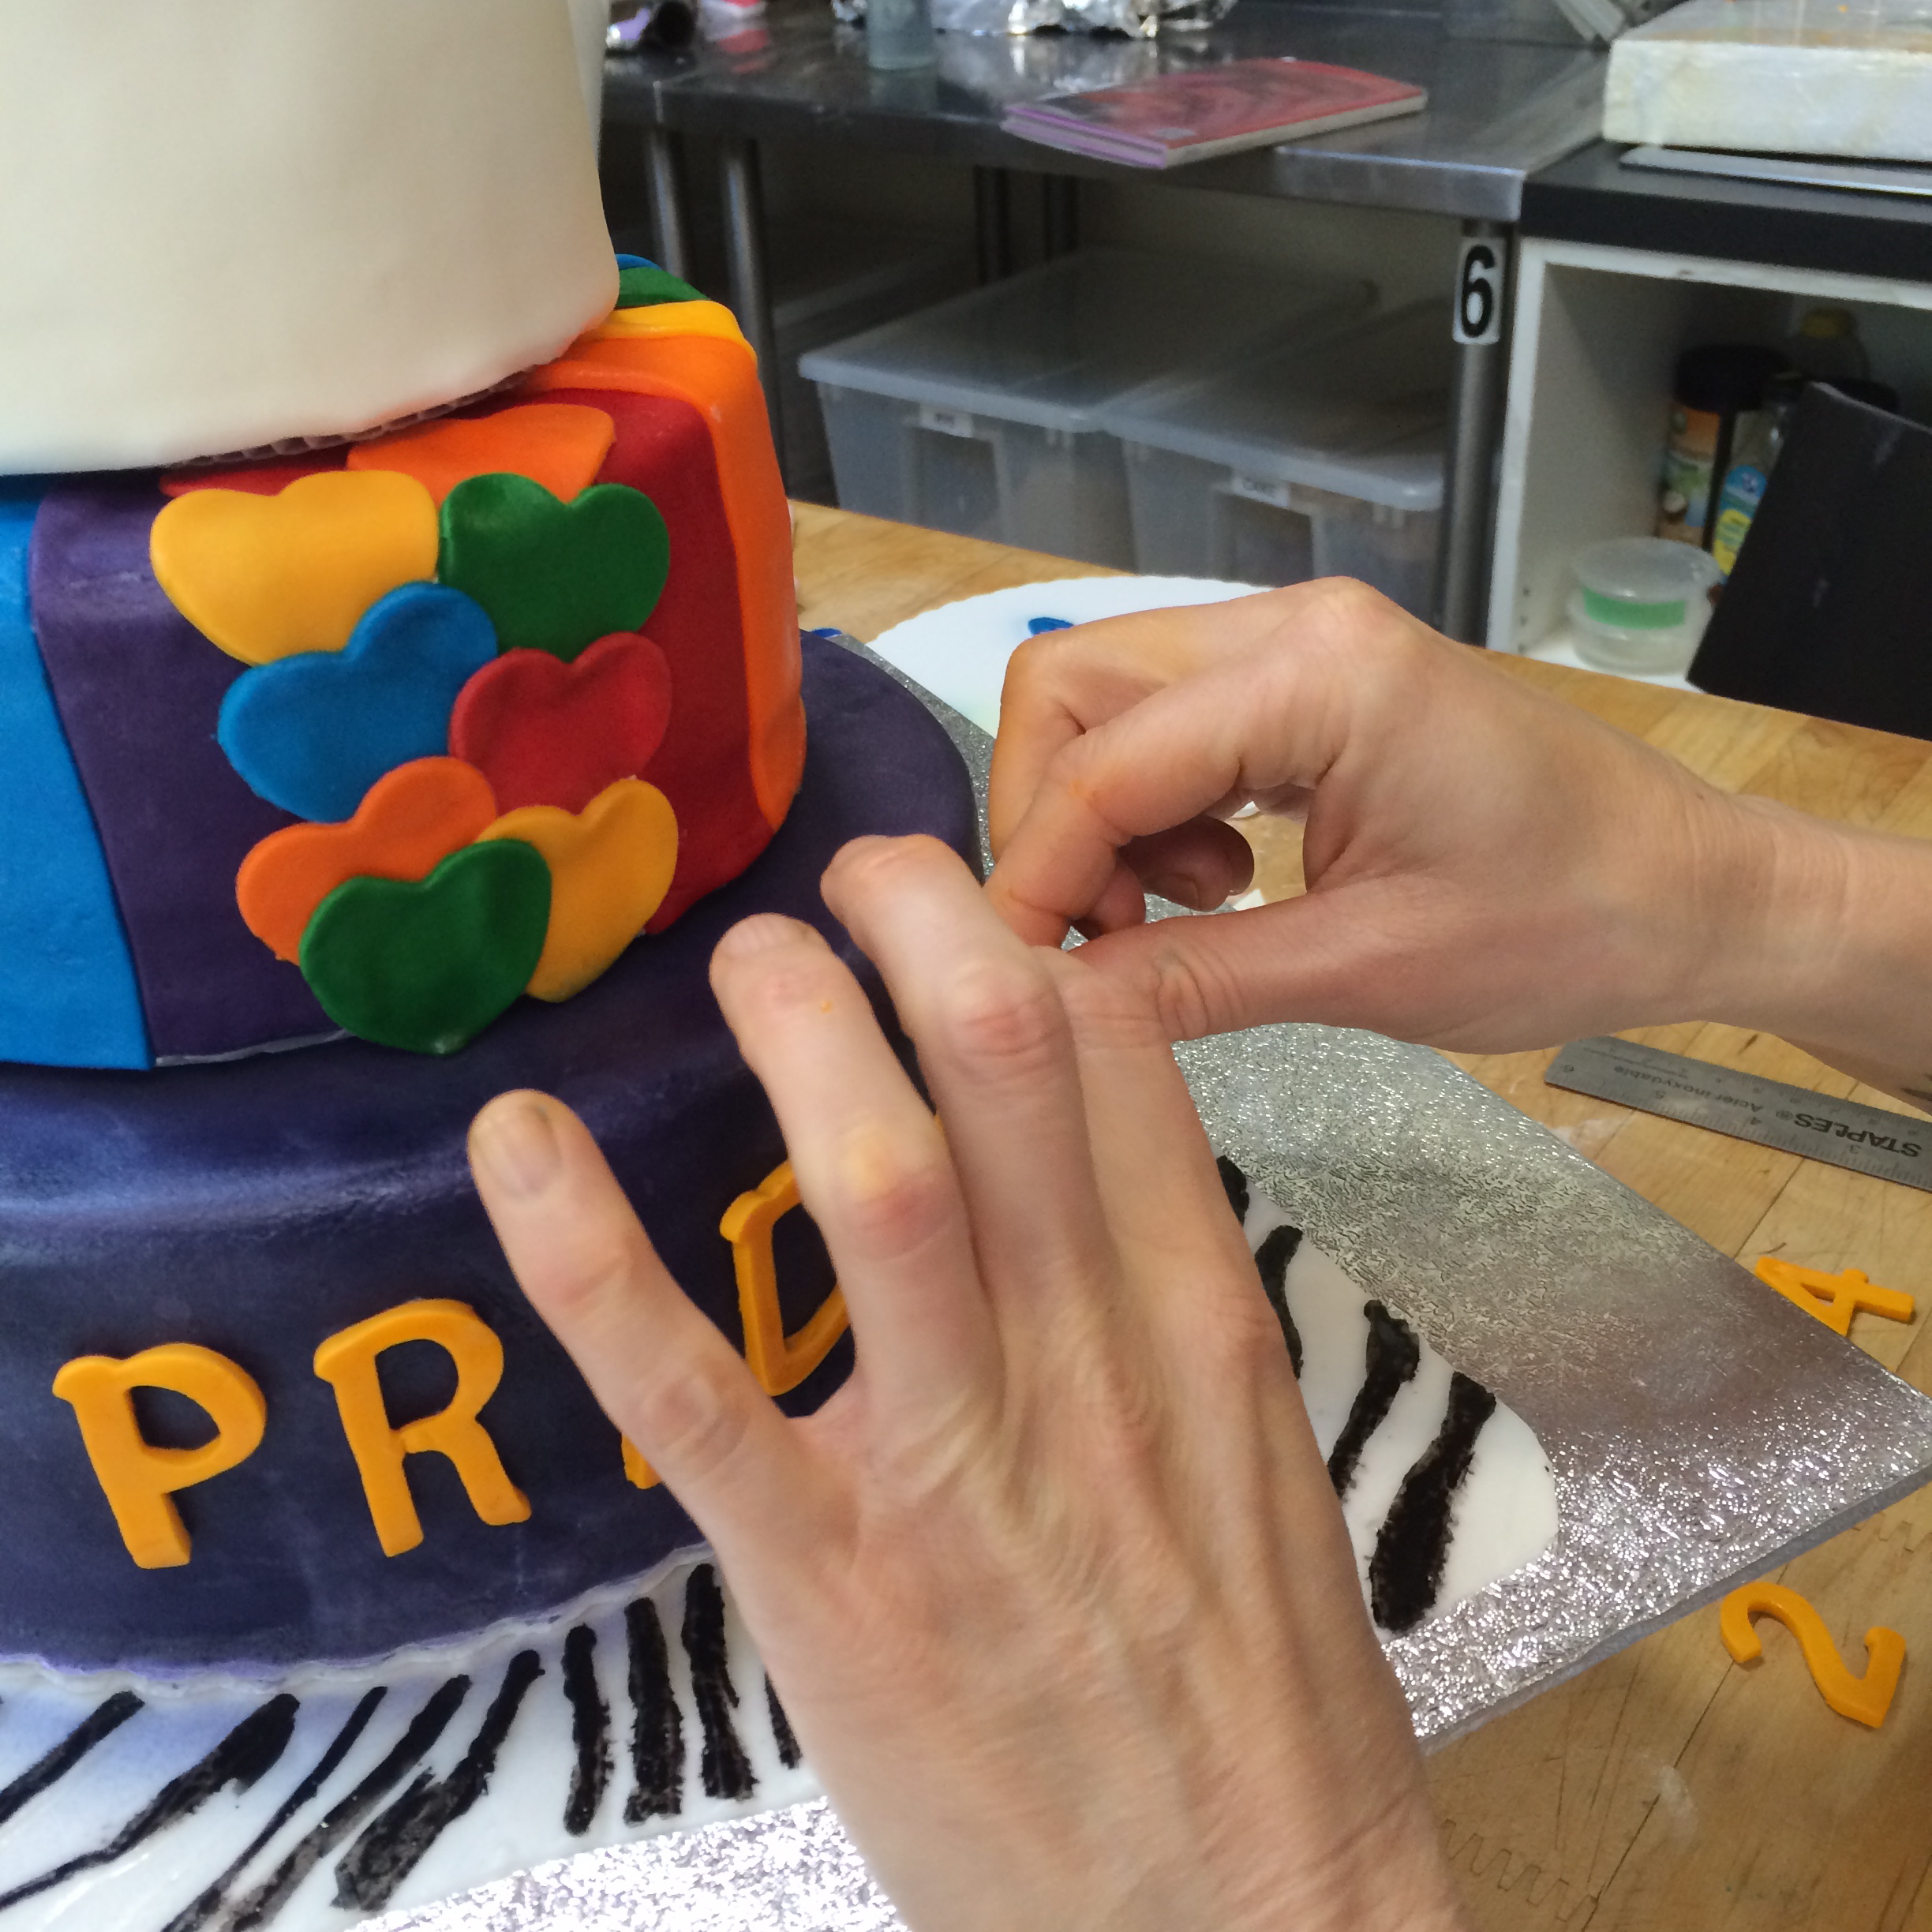
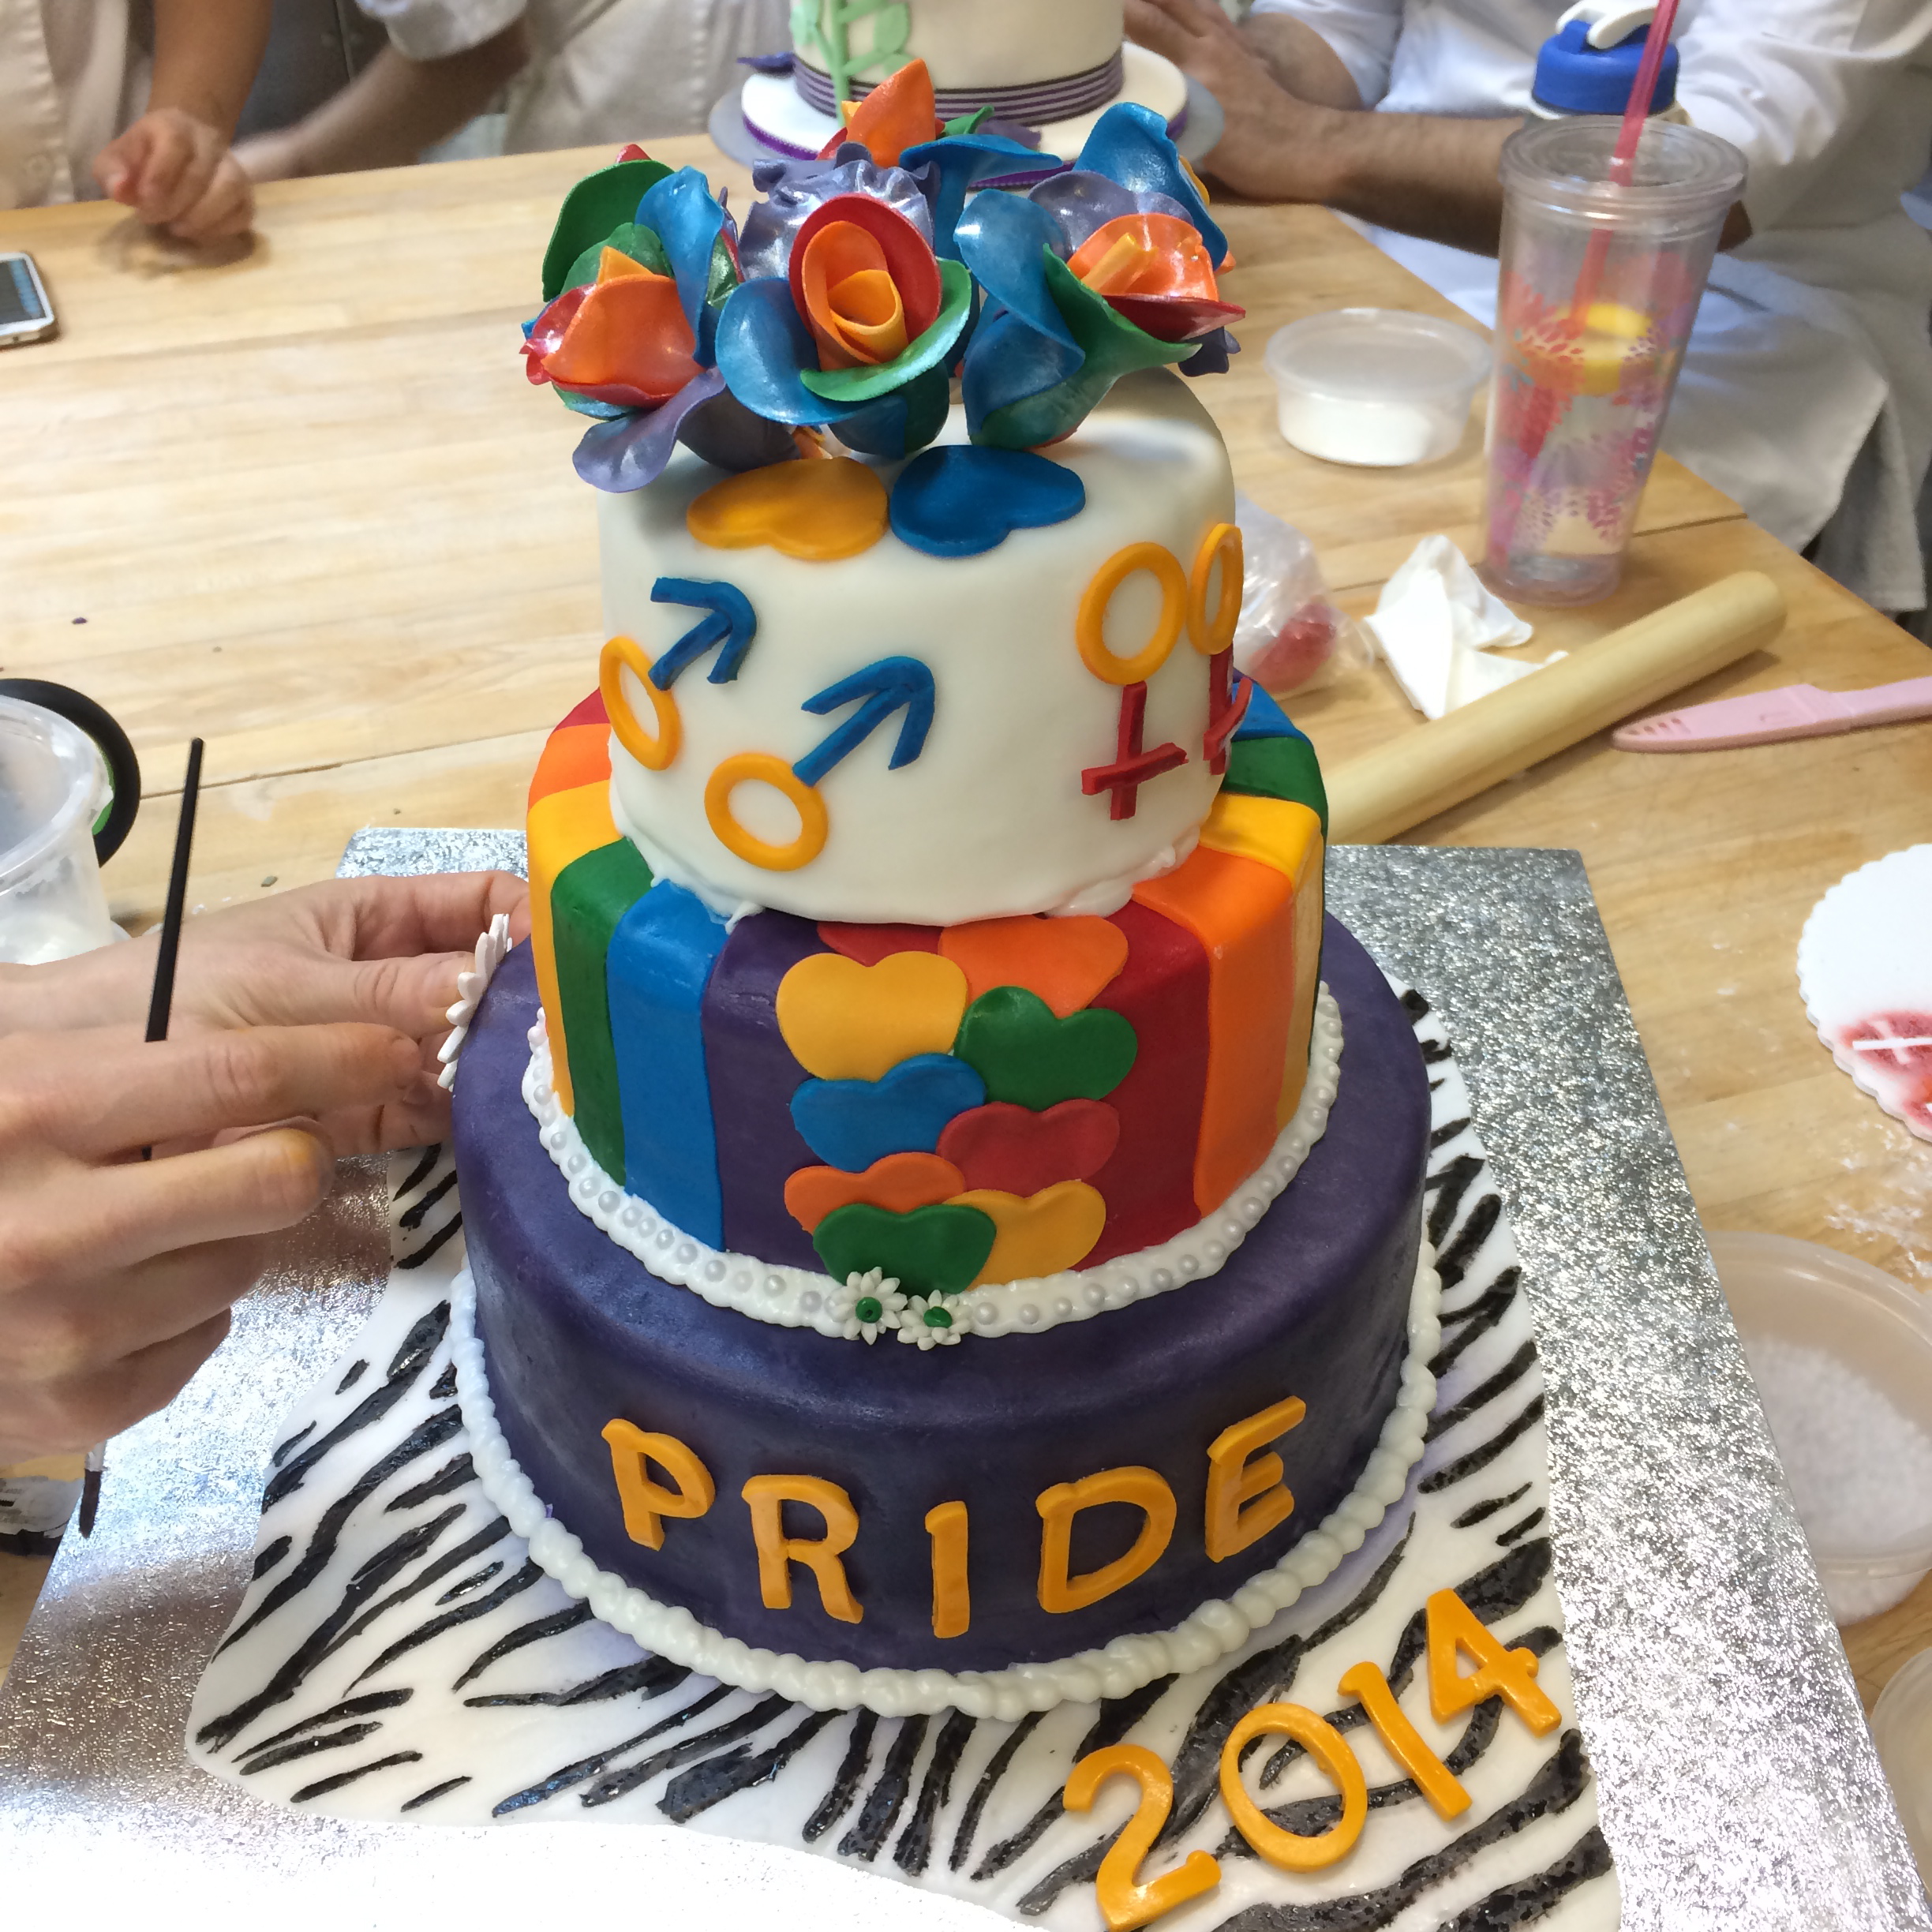
Adding the details…
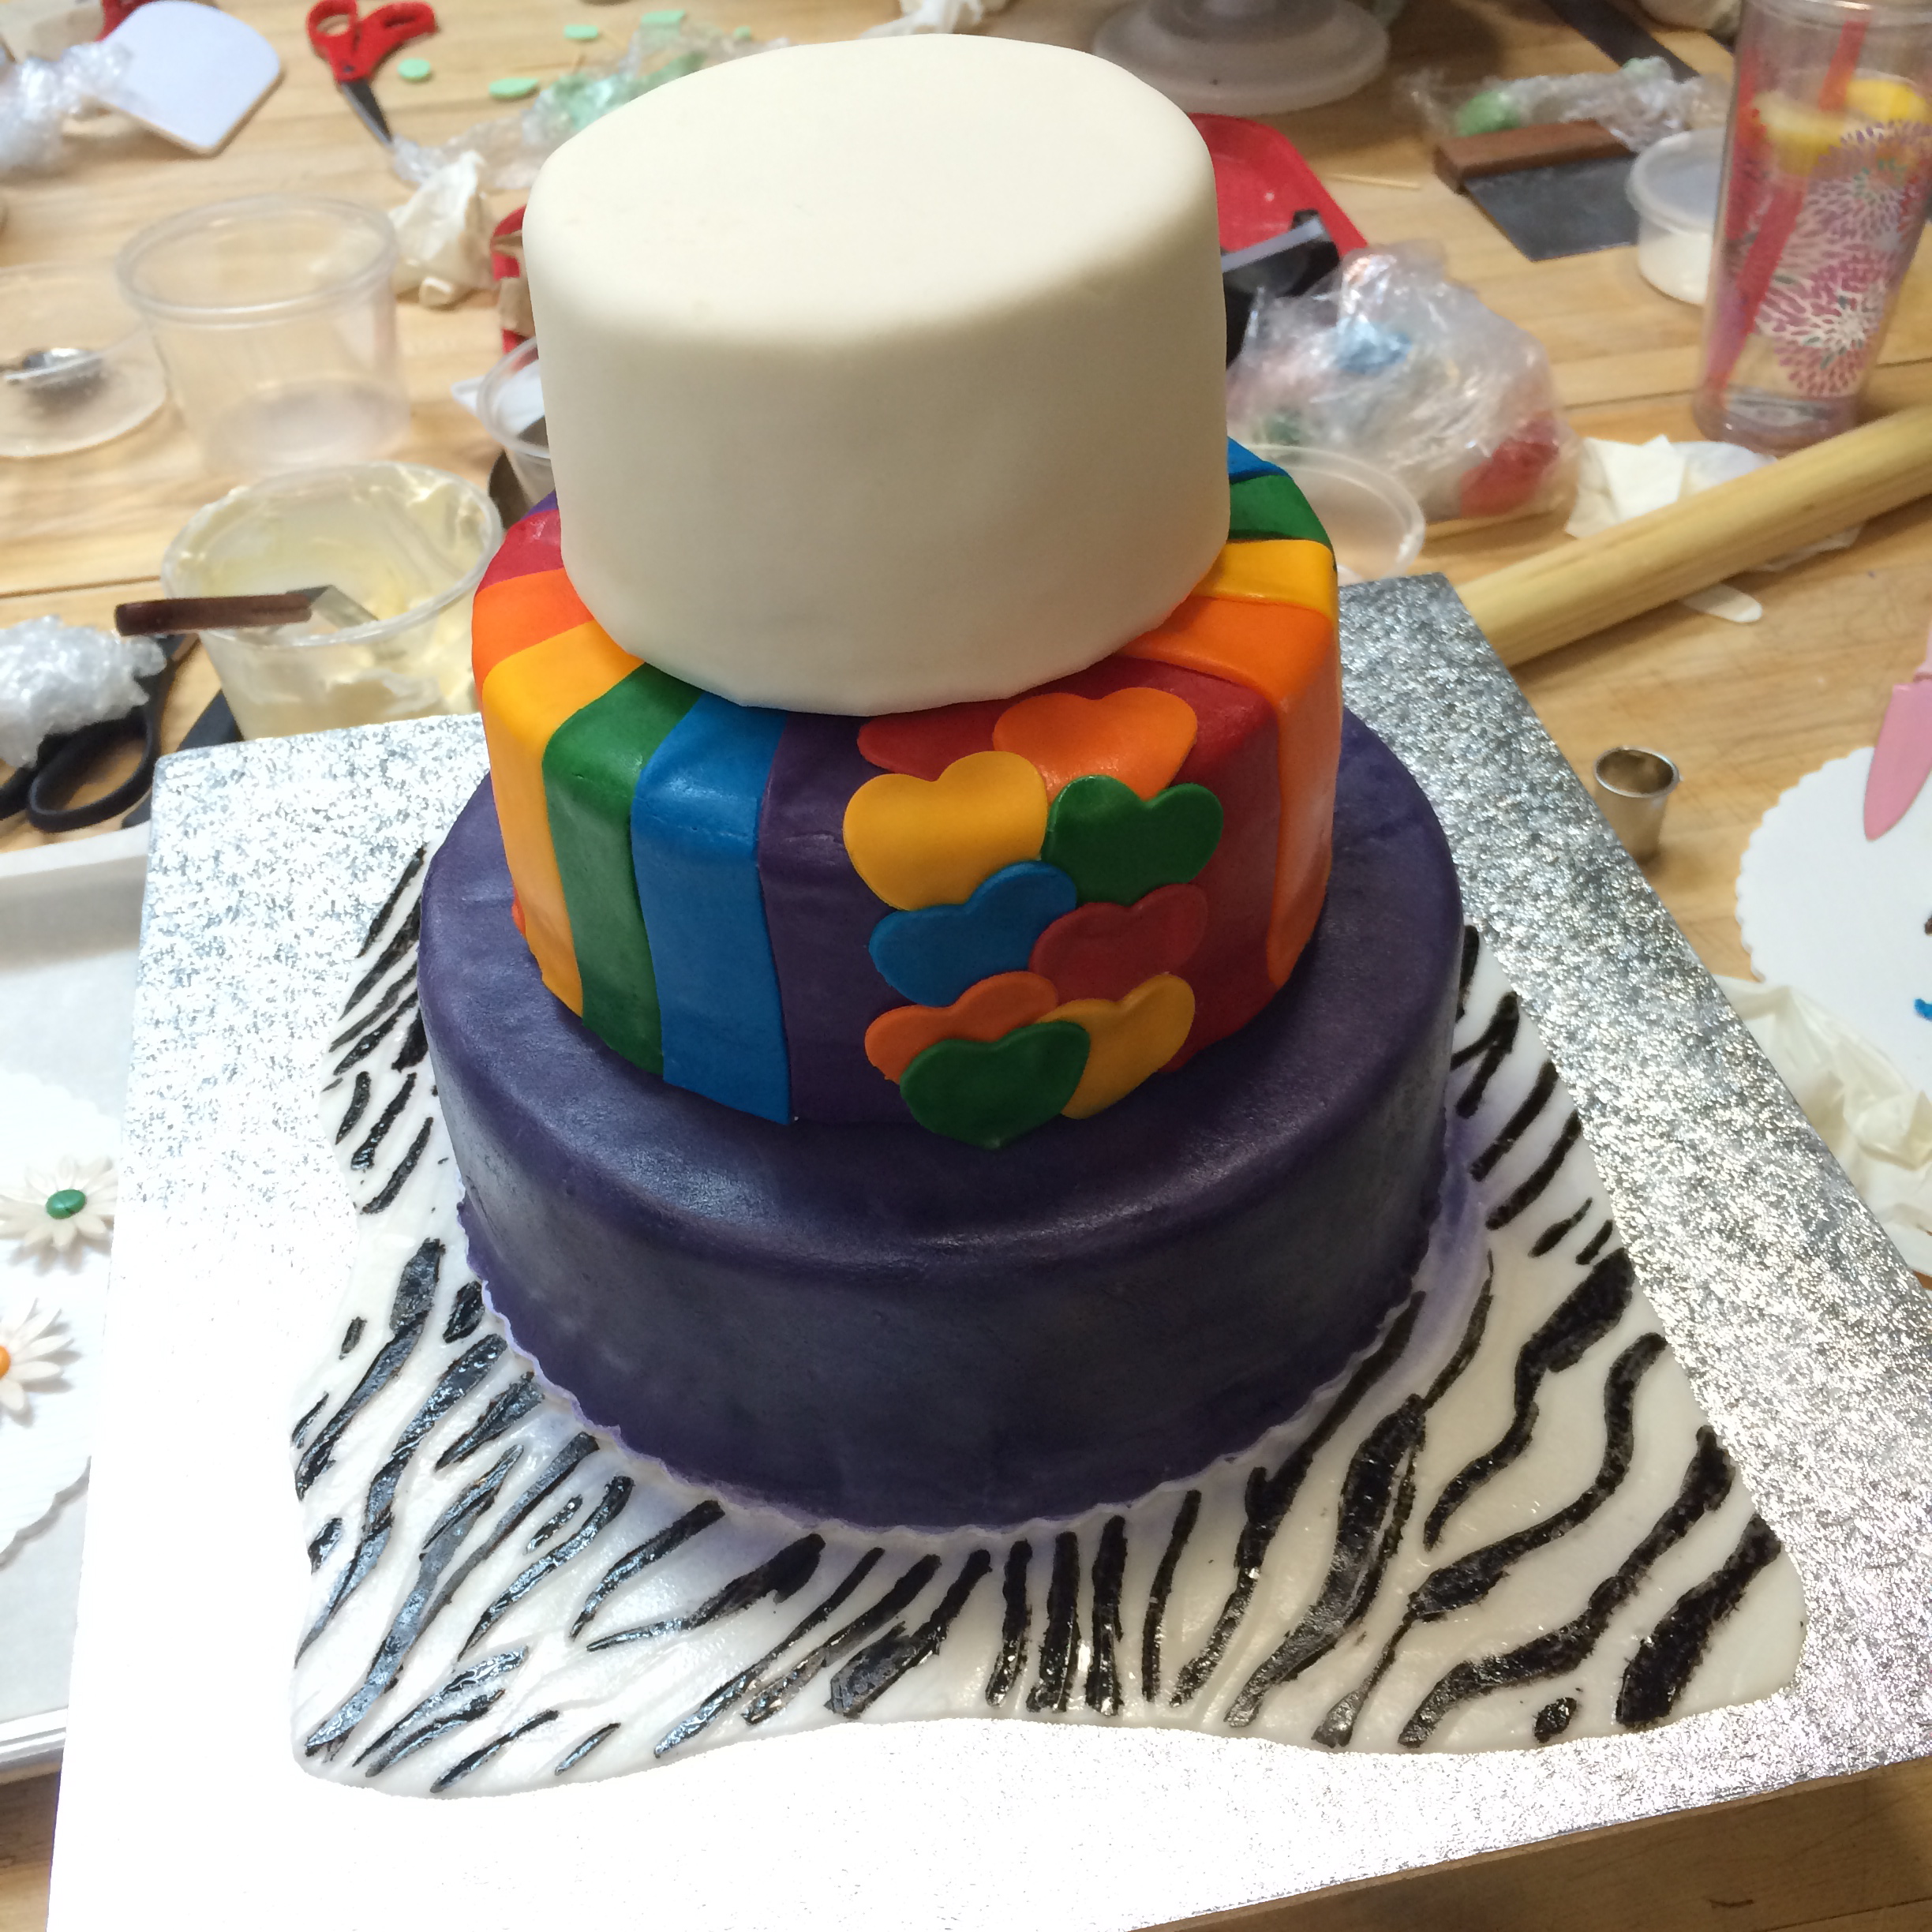
All three tiers are stacked!

The second tier made it, safely on the cake. It was the first time I’d placed a tier on a cake. It was tense and exciting!
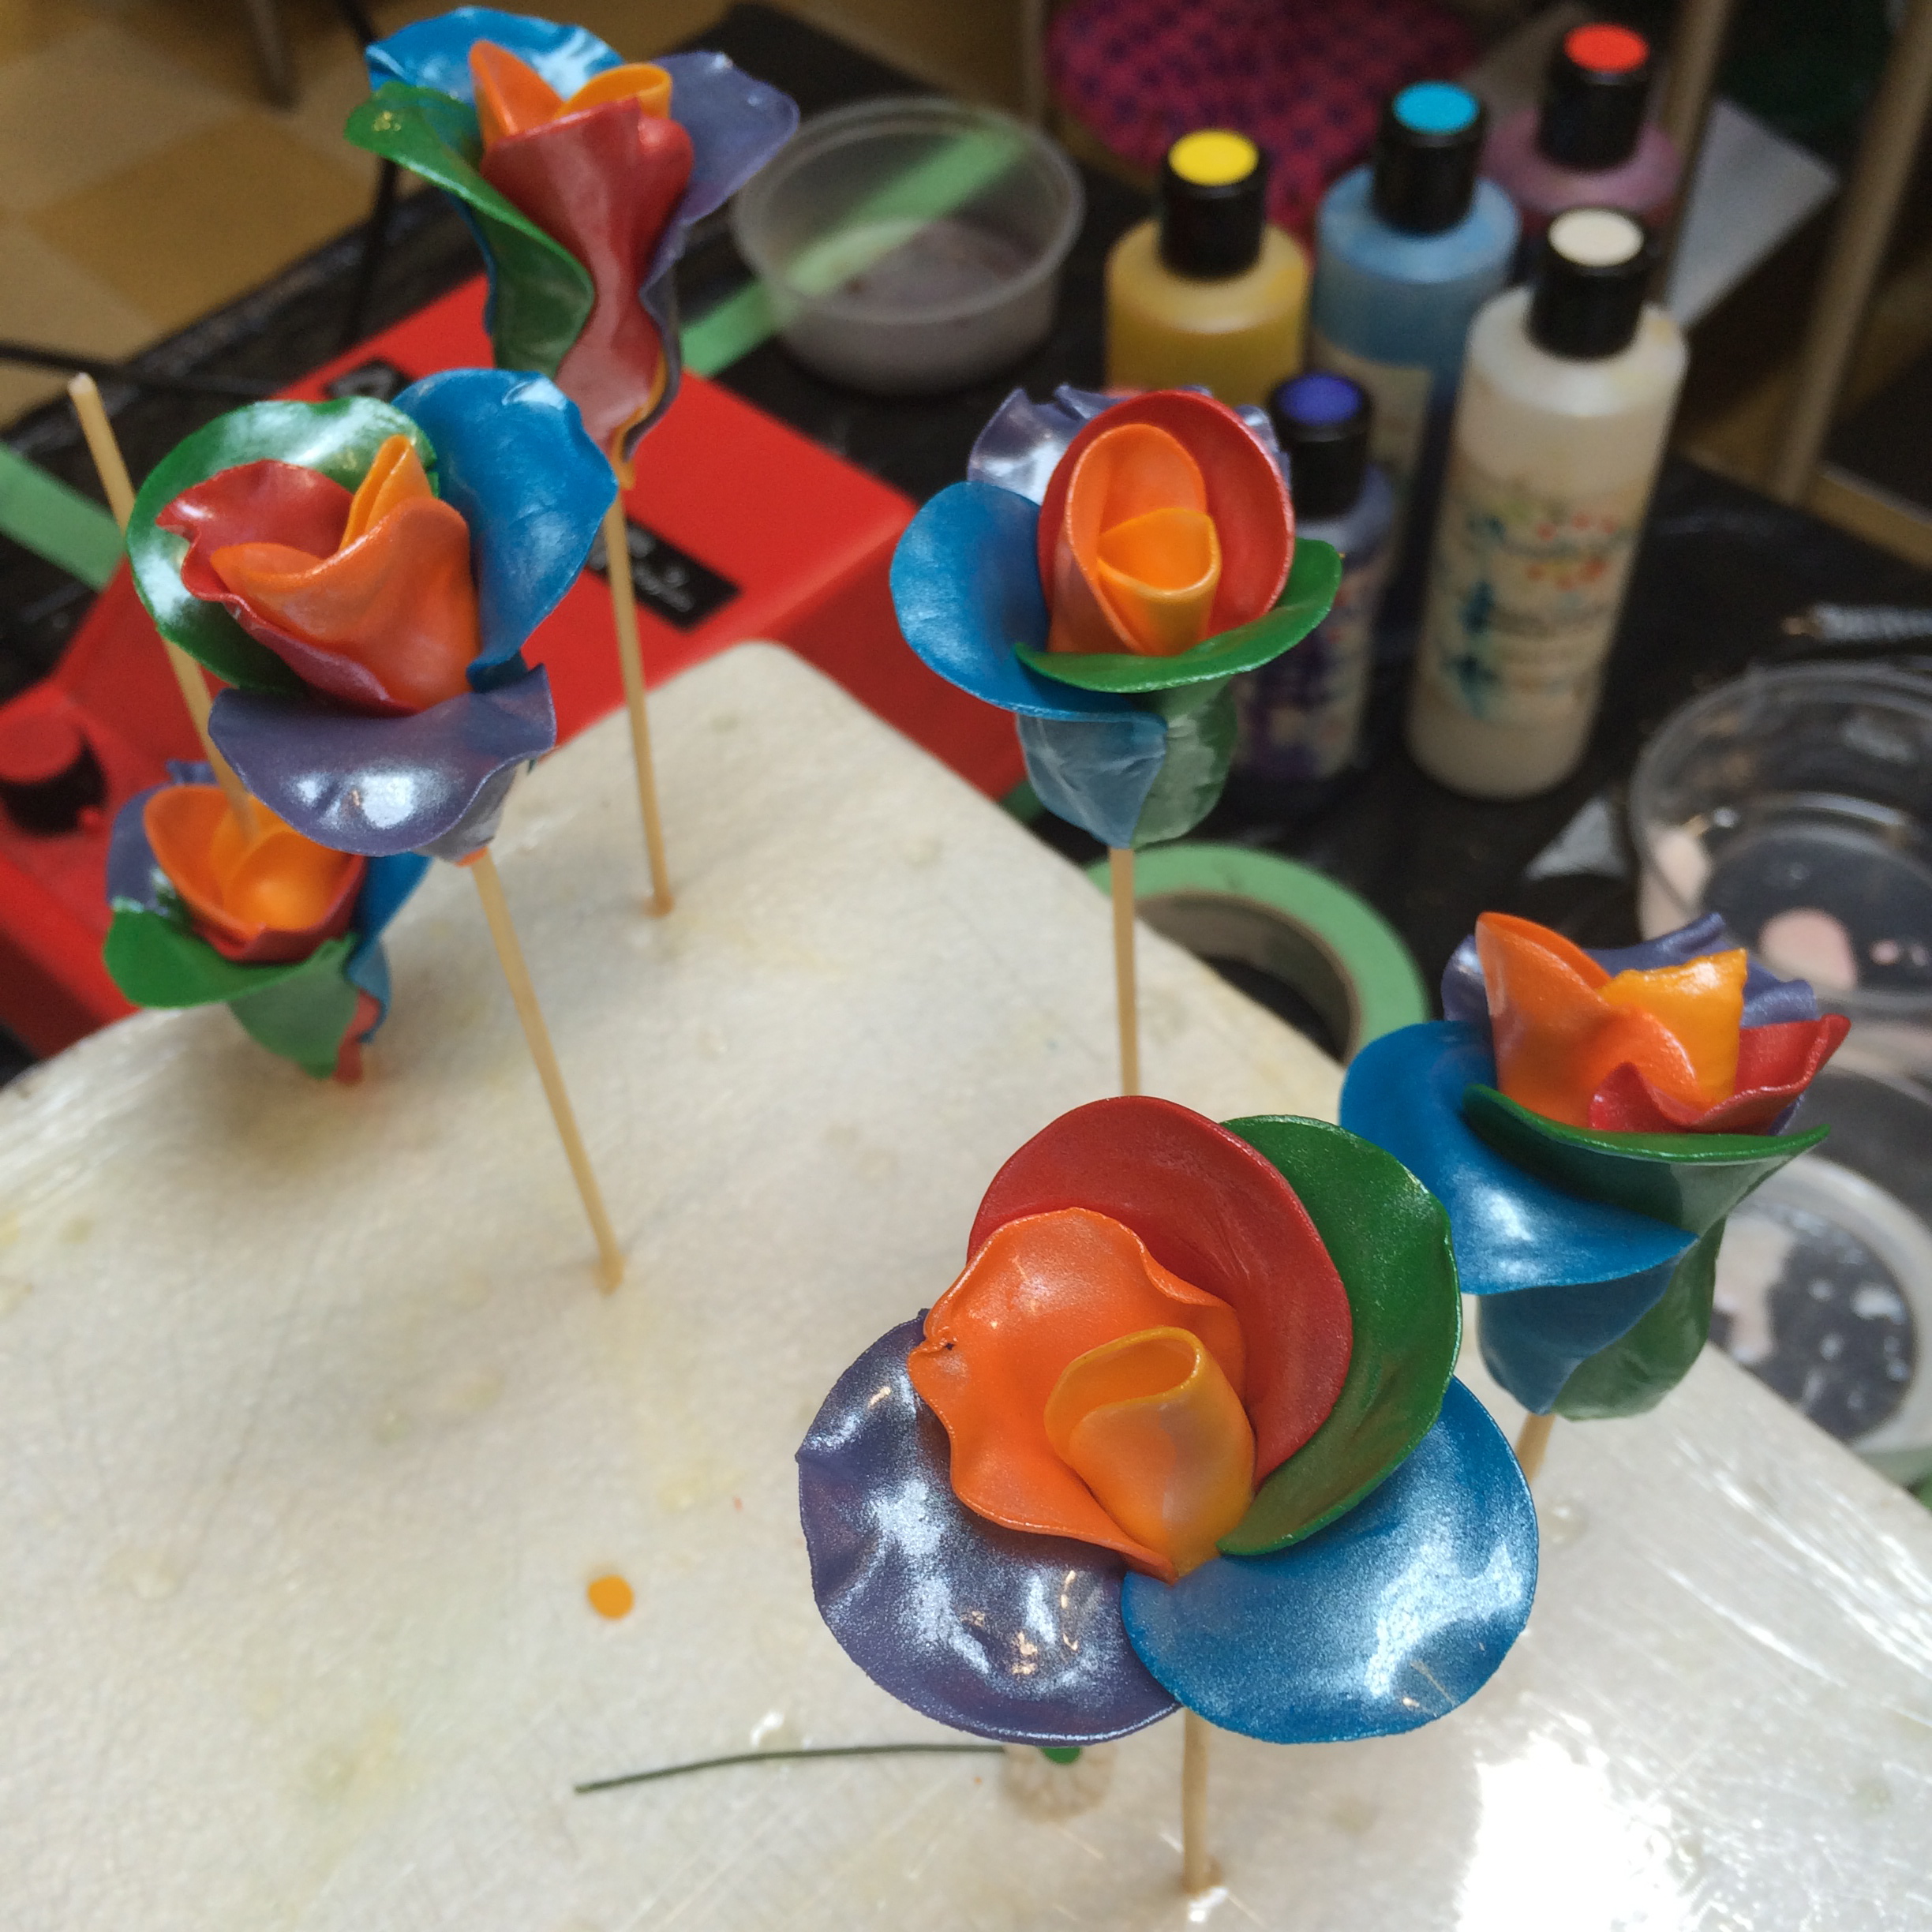
My rainbow roses, these were a decent amount of work to make but I was pleased with the end result. Made of gumpaste, and the shine is from pearl air brushing.
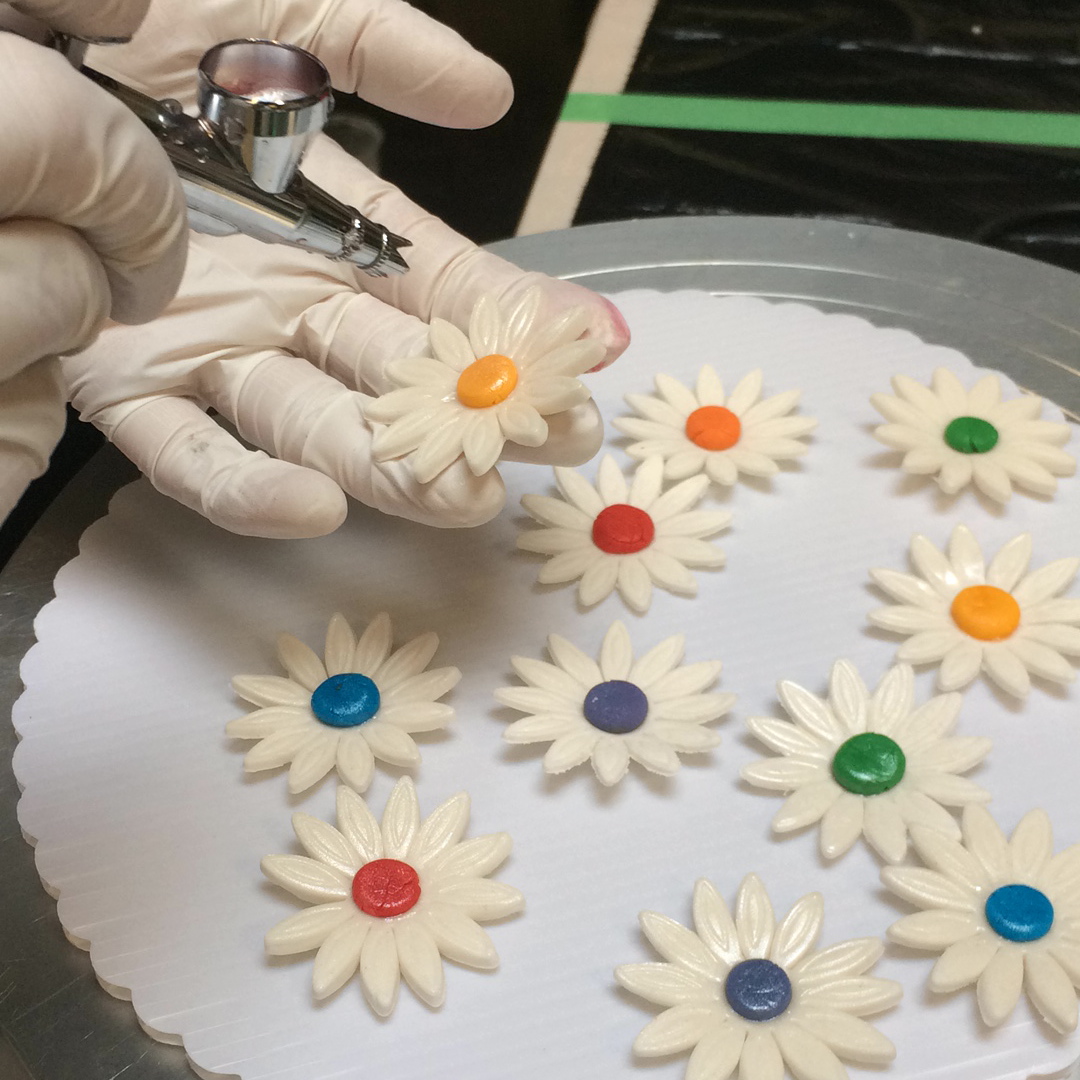
Our rainbow daisies.
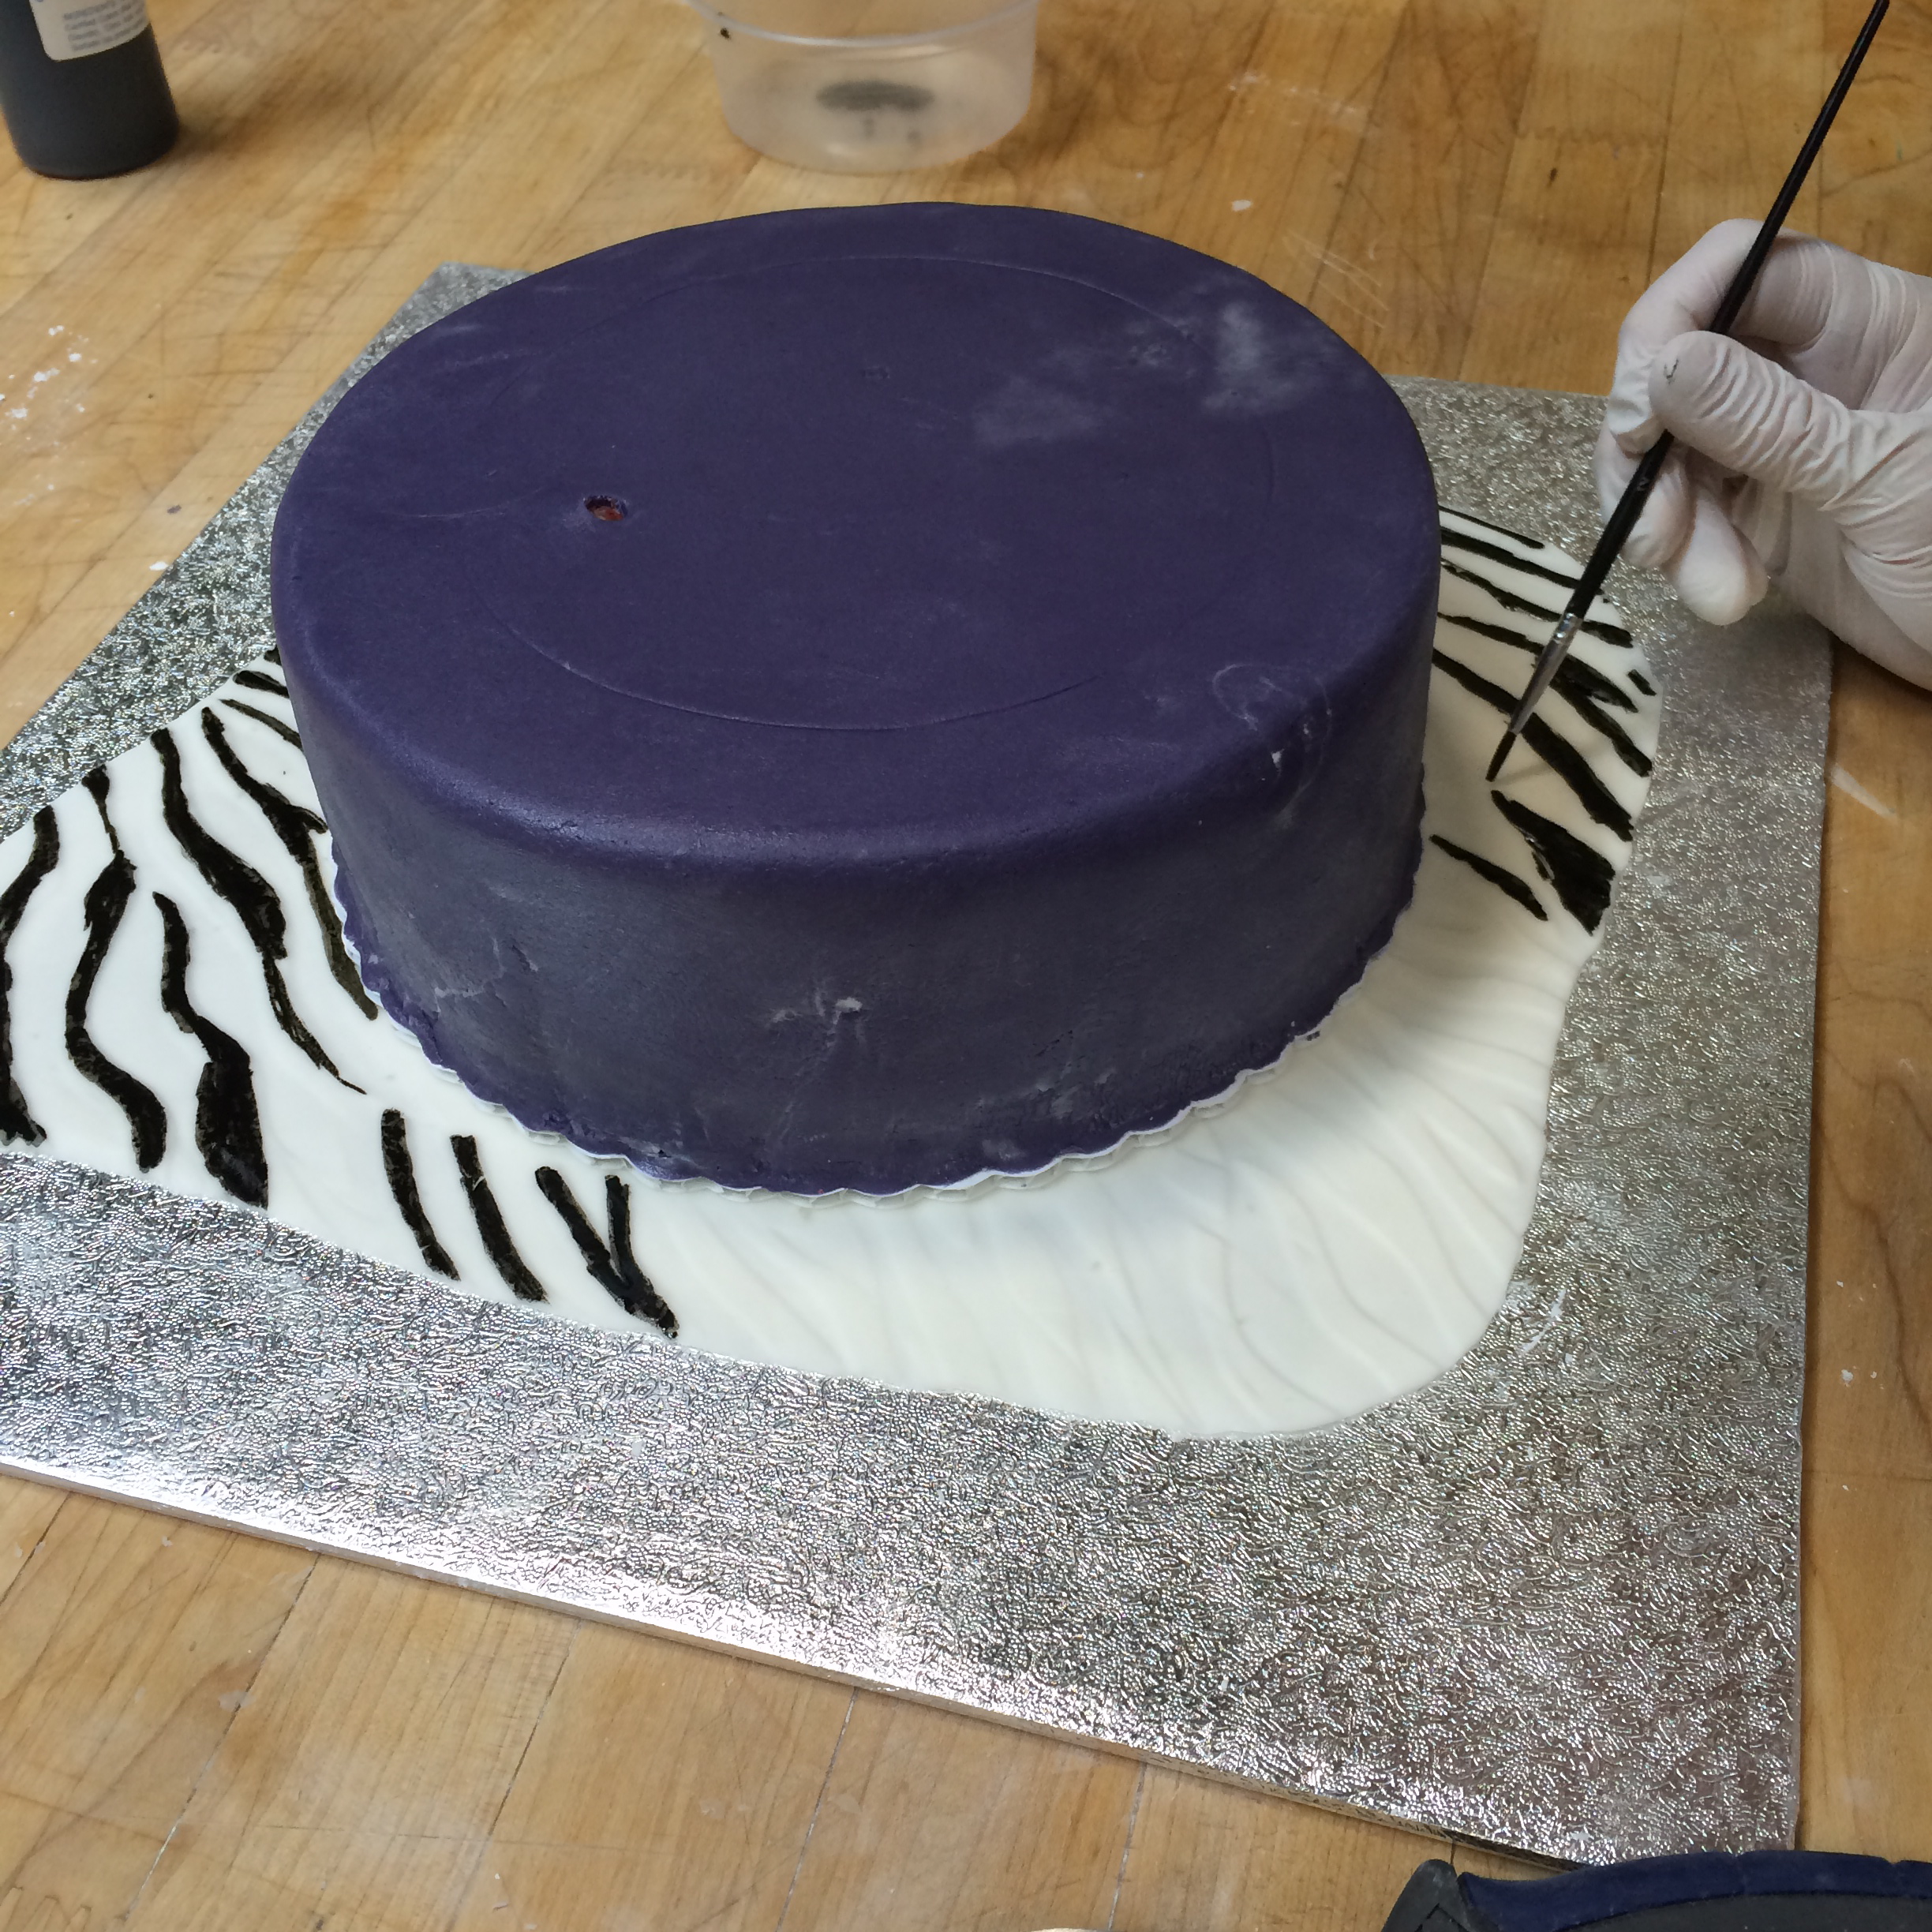
The zebra base.
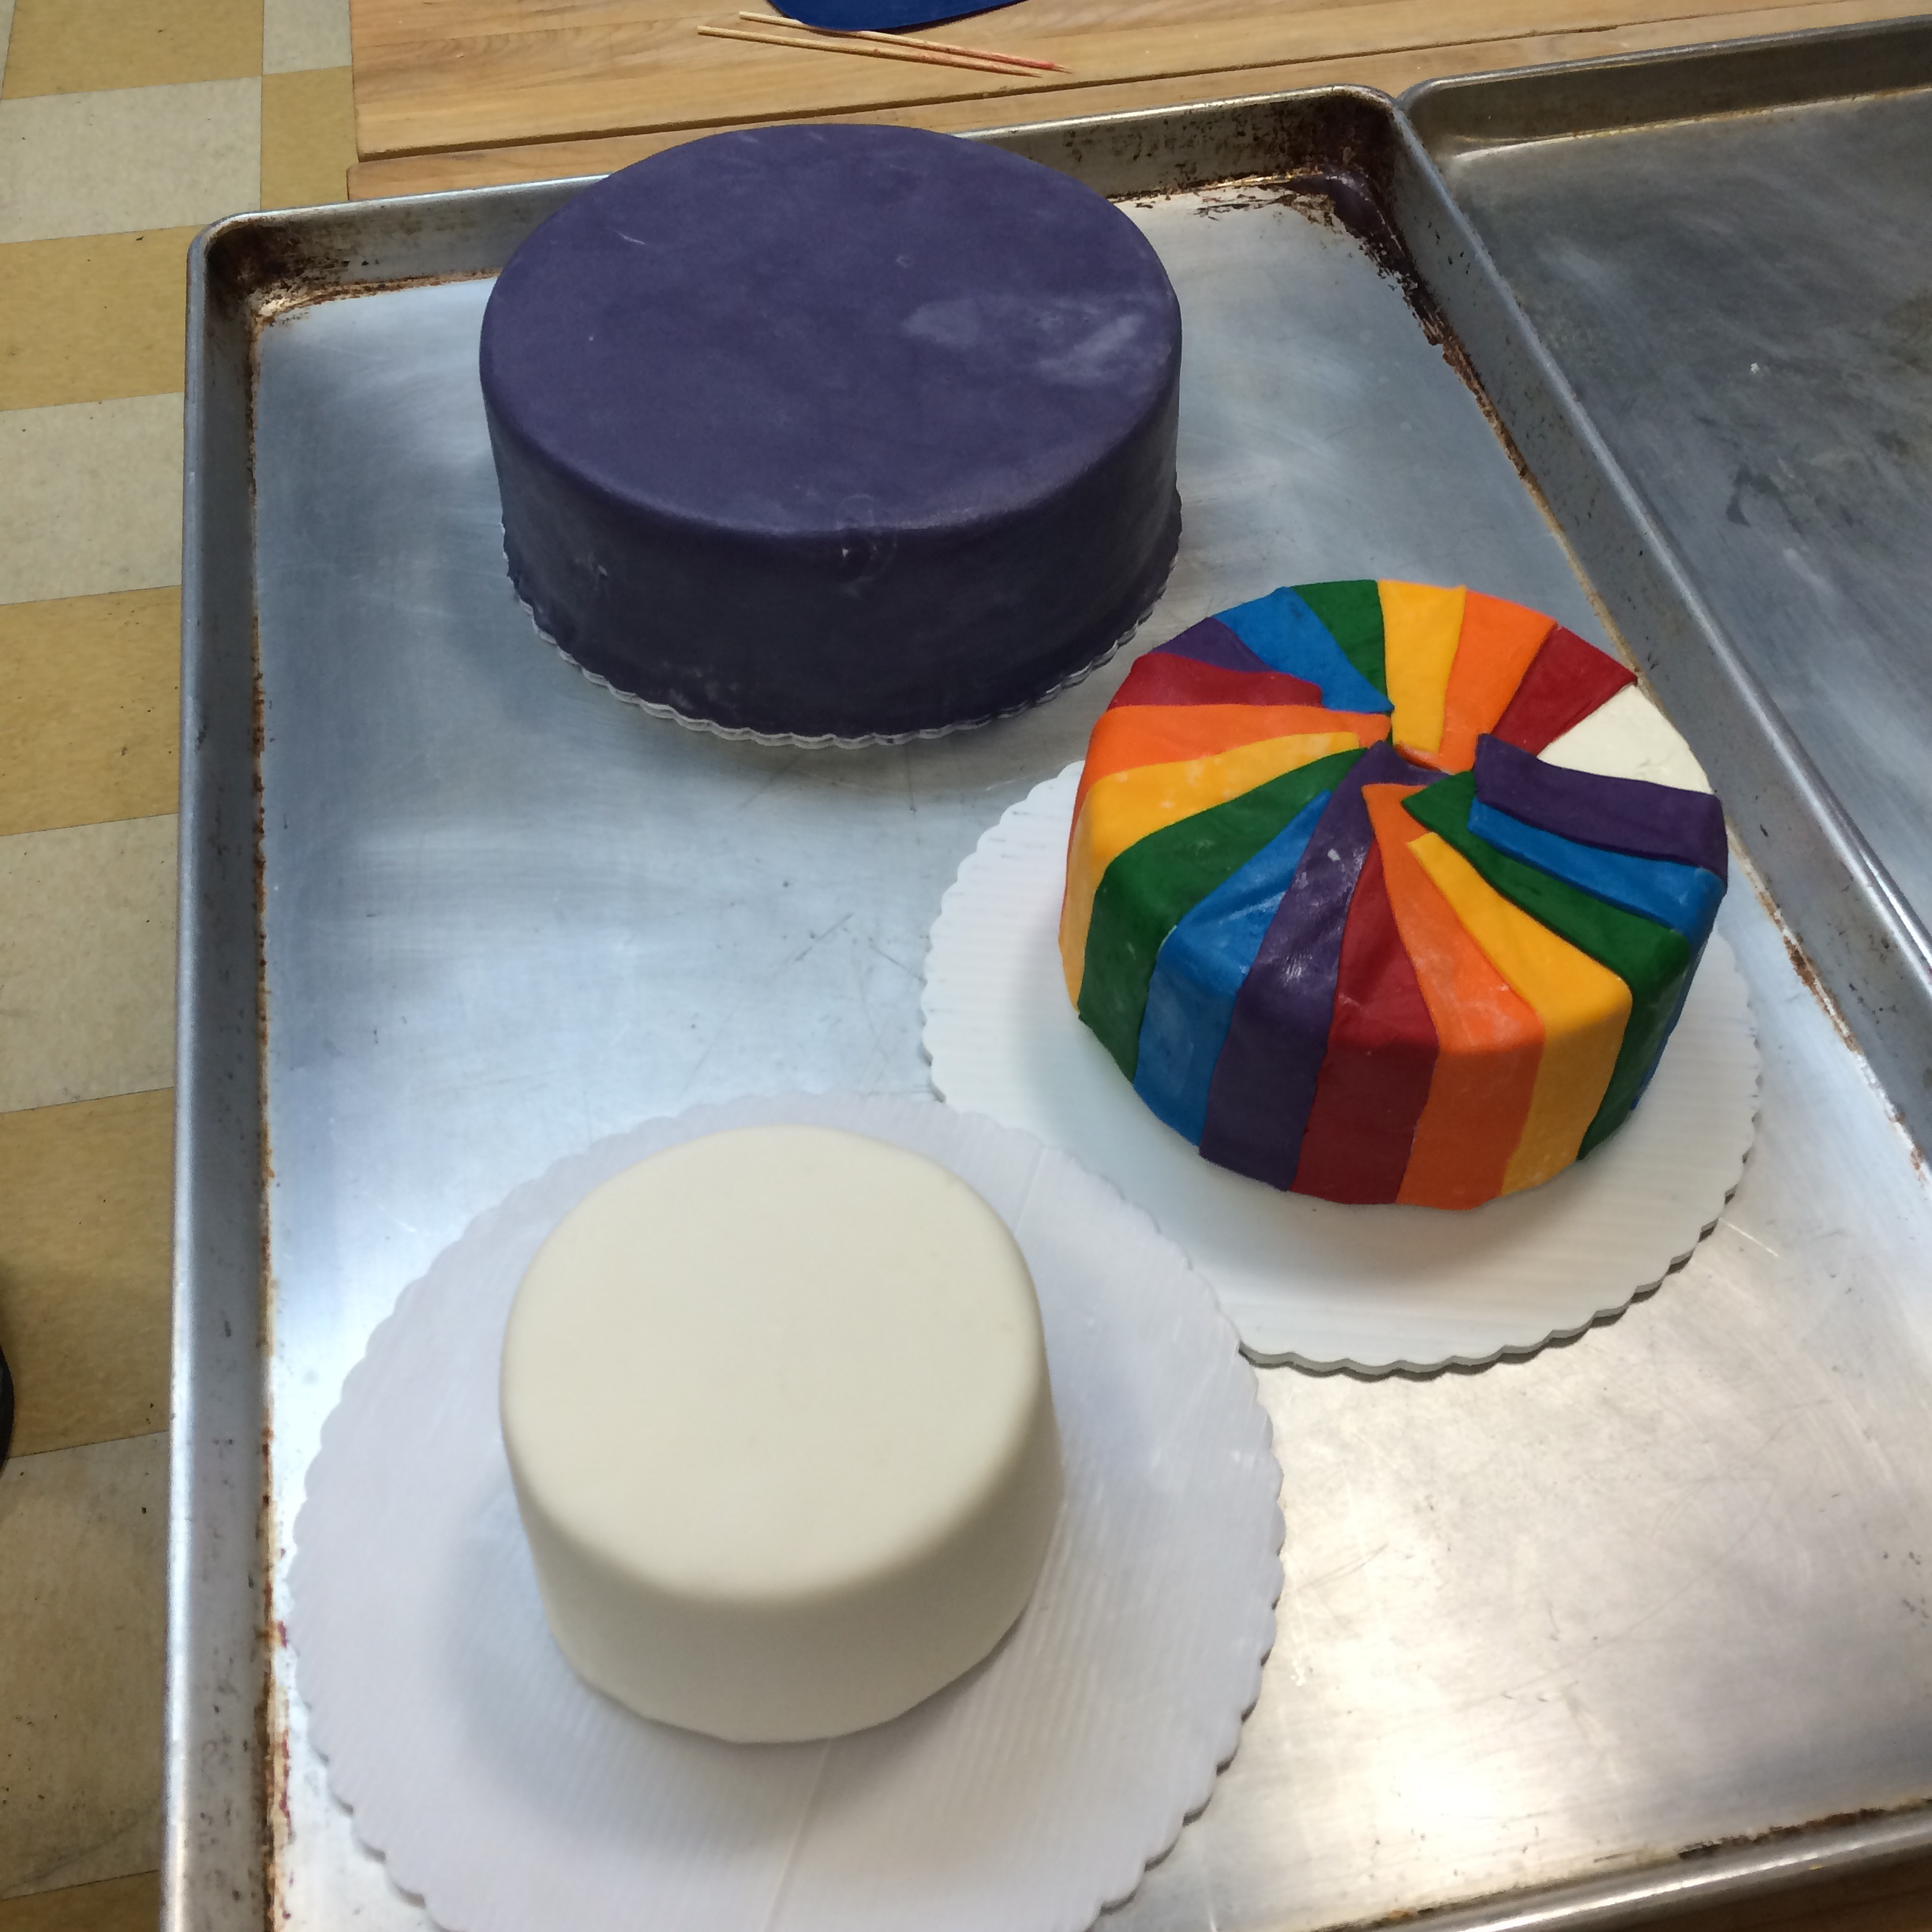
Three tiers made on day two, ready to stack on the third day.
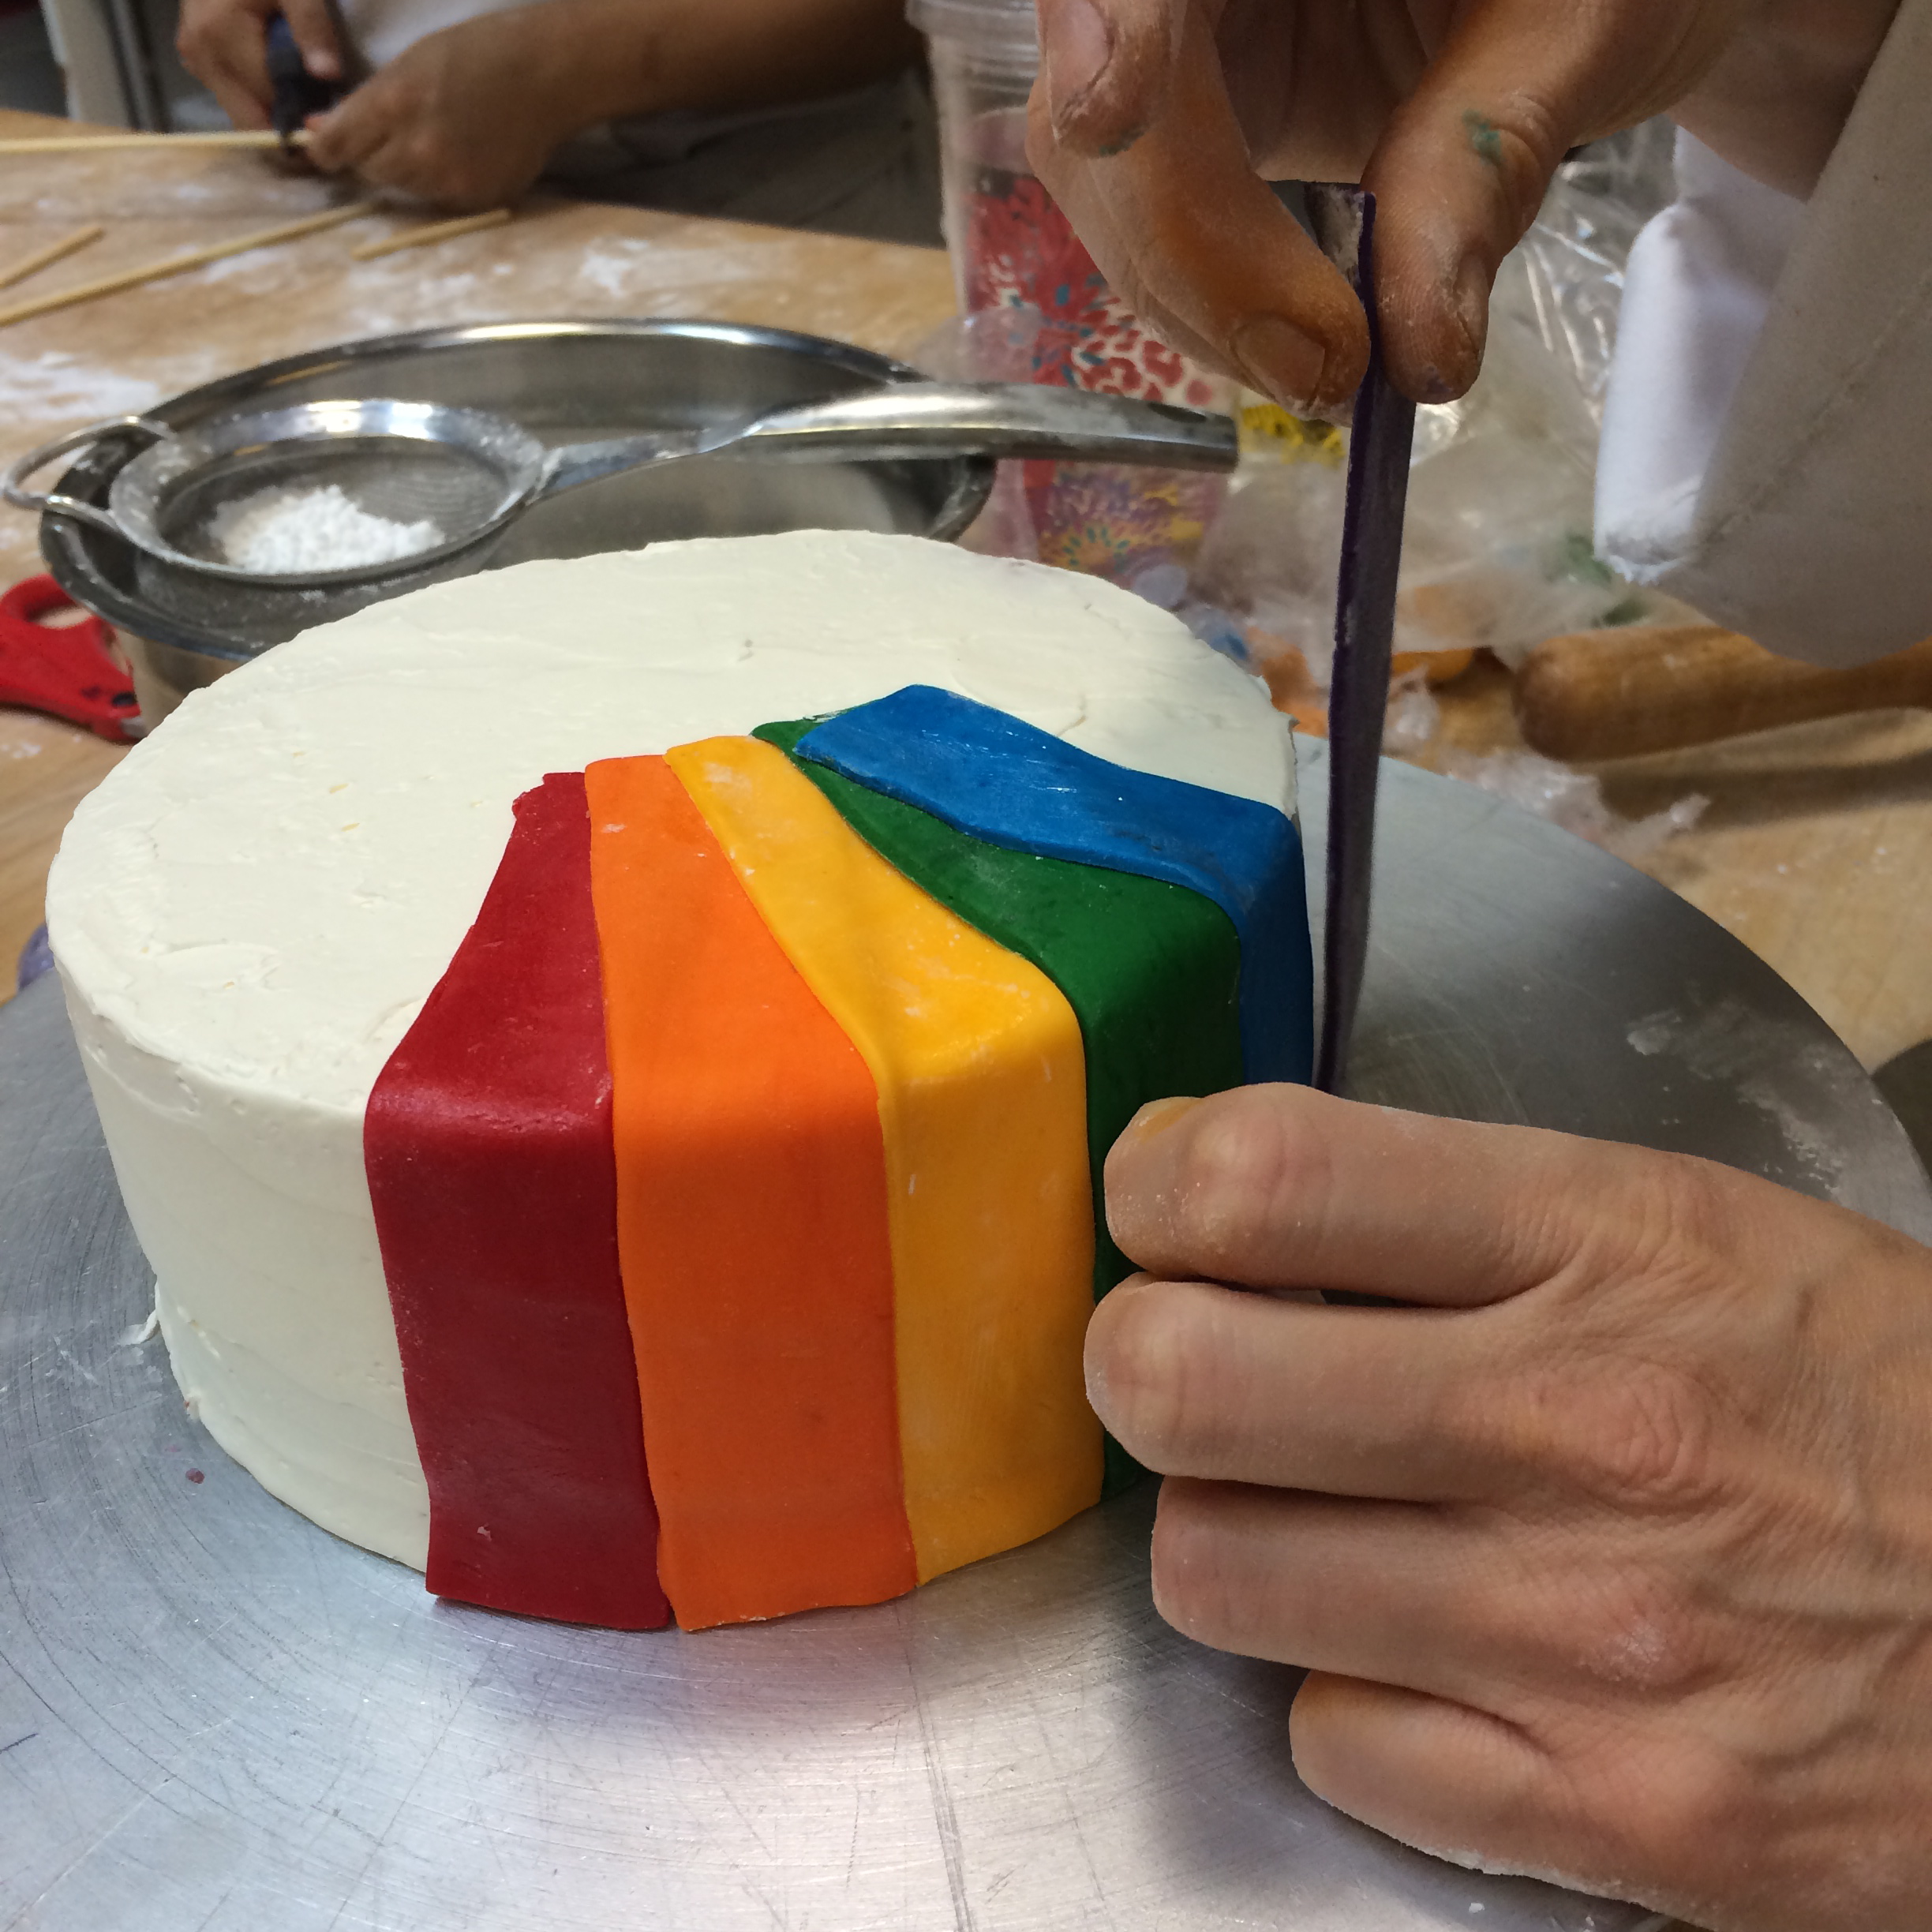
Adding the rainbow strips.

Jeanette, did you know your cake made it in the Vancouver Sun! http://www.vancouversun.com/life/news/10063164/story.html?tab=PHOT